
Components Status
Component Status
In this module, you will find the aircraft, engine and propellers components, their status and the associated maintenance tasks.

You can use the 'Show By Groups' button in the main ribbon to group the components with the associated subcomponents.

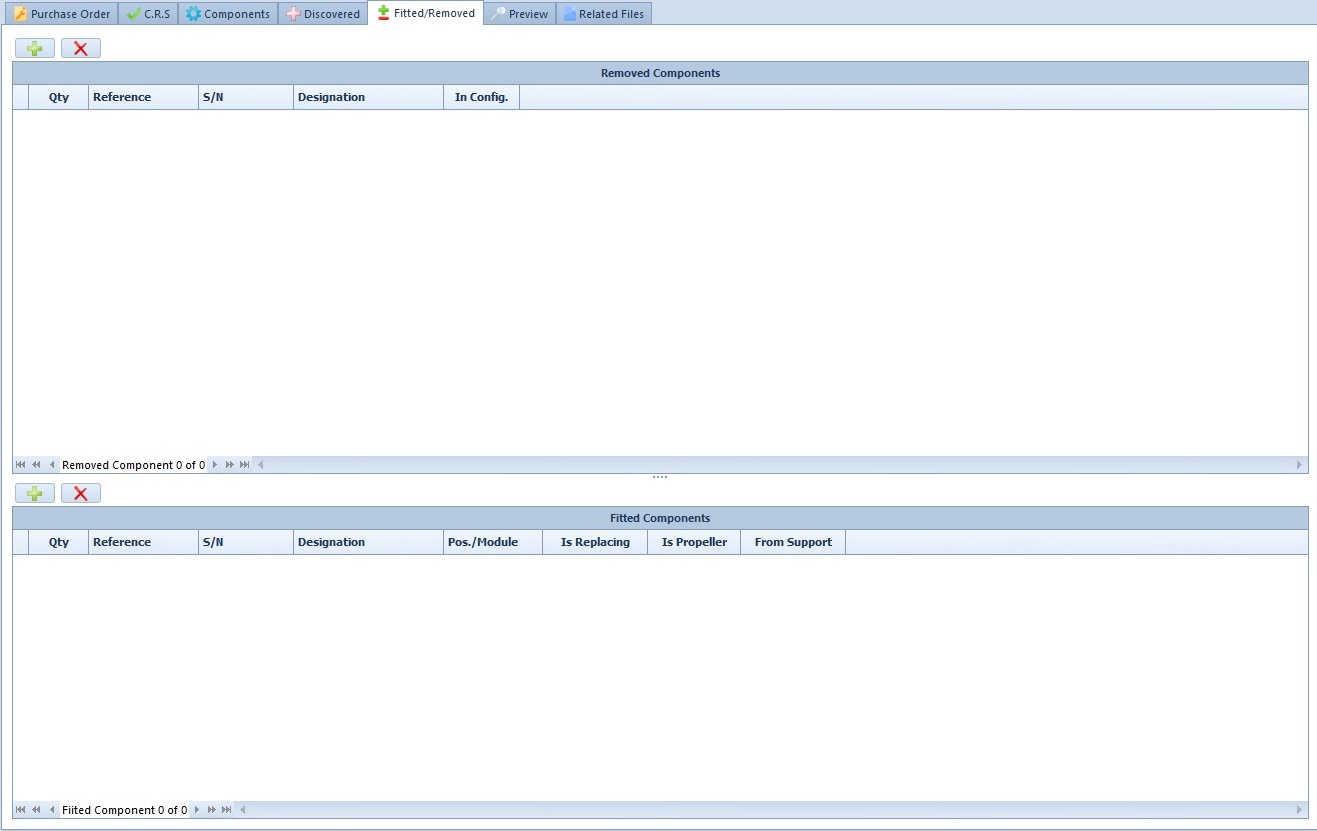
Fit / Remove Components
When receiving the work report associated with a purchase order, you are able to see which part has been removed/fitted or replaced.
Open the 'Purchase Orders' module, switch
to edit
mode  and click on the ‘Fitted/Removed’
tab.
and click on the ‘Fitted/Removed’
tab.
Then,
click on the plus button  of the Fitted
Components panel or the Removed
Components panel.
of the Fitted
Components panel or the Removed
Components panel.
They will both open the same window.
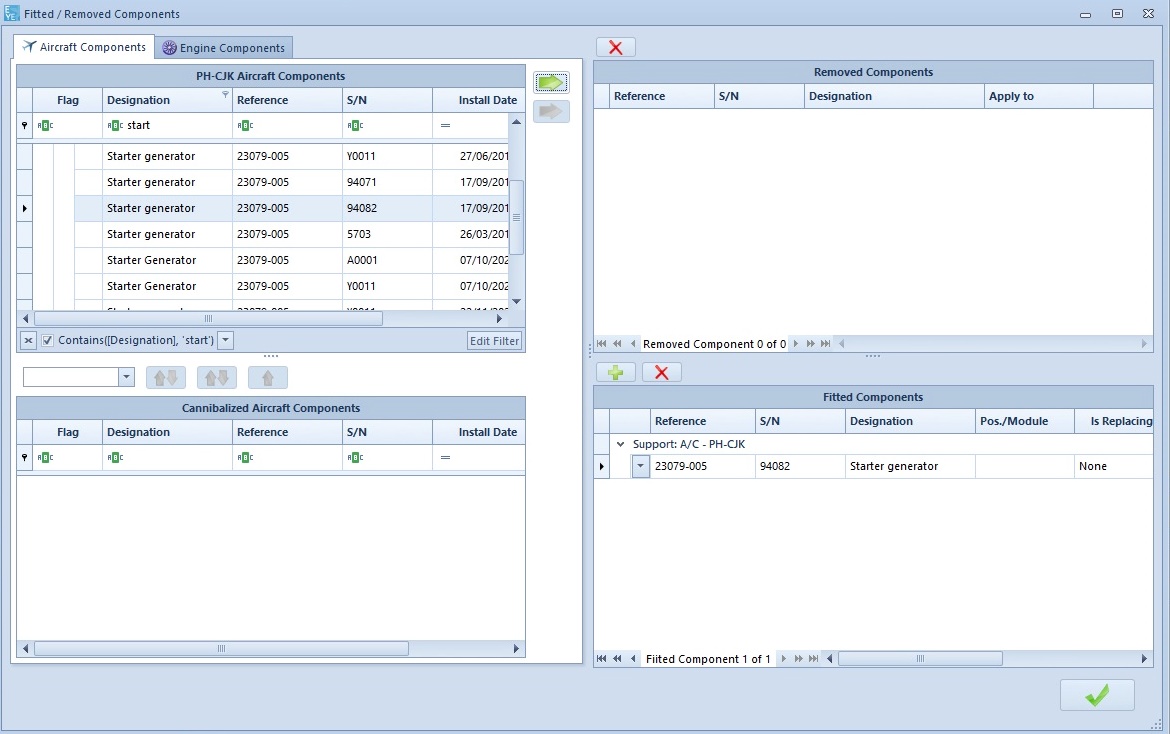
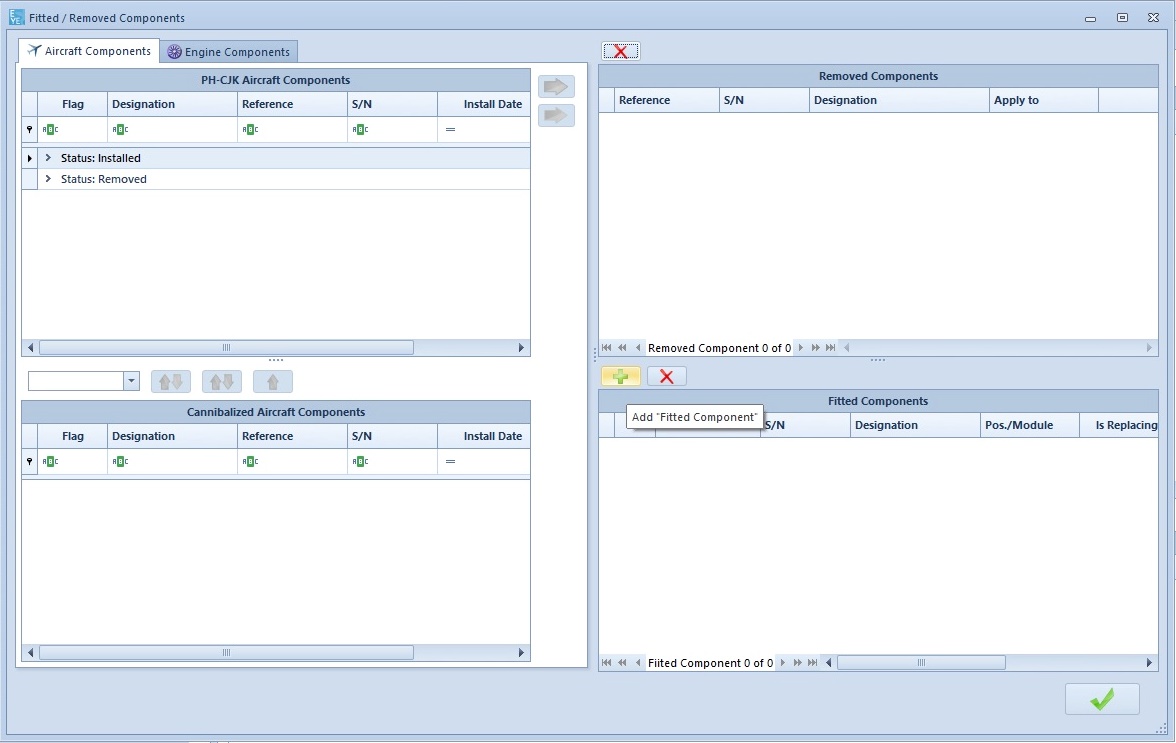
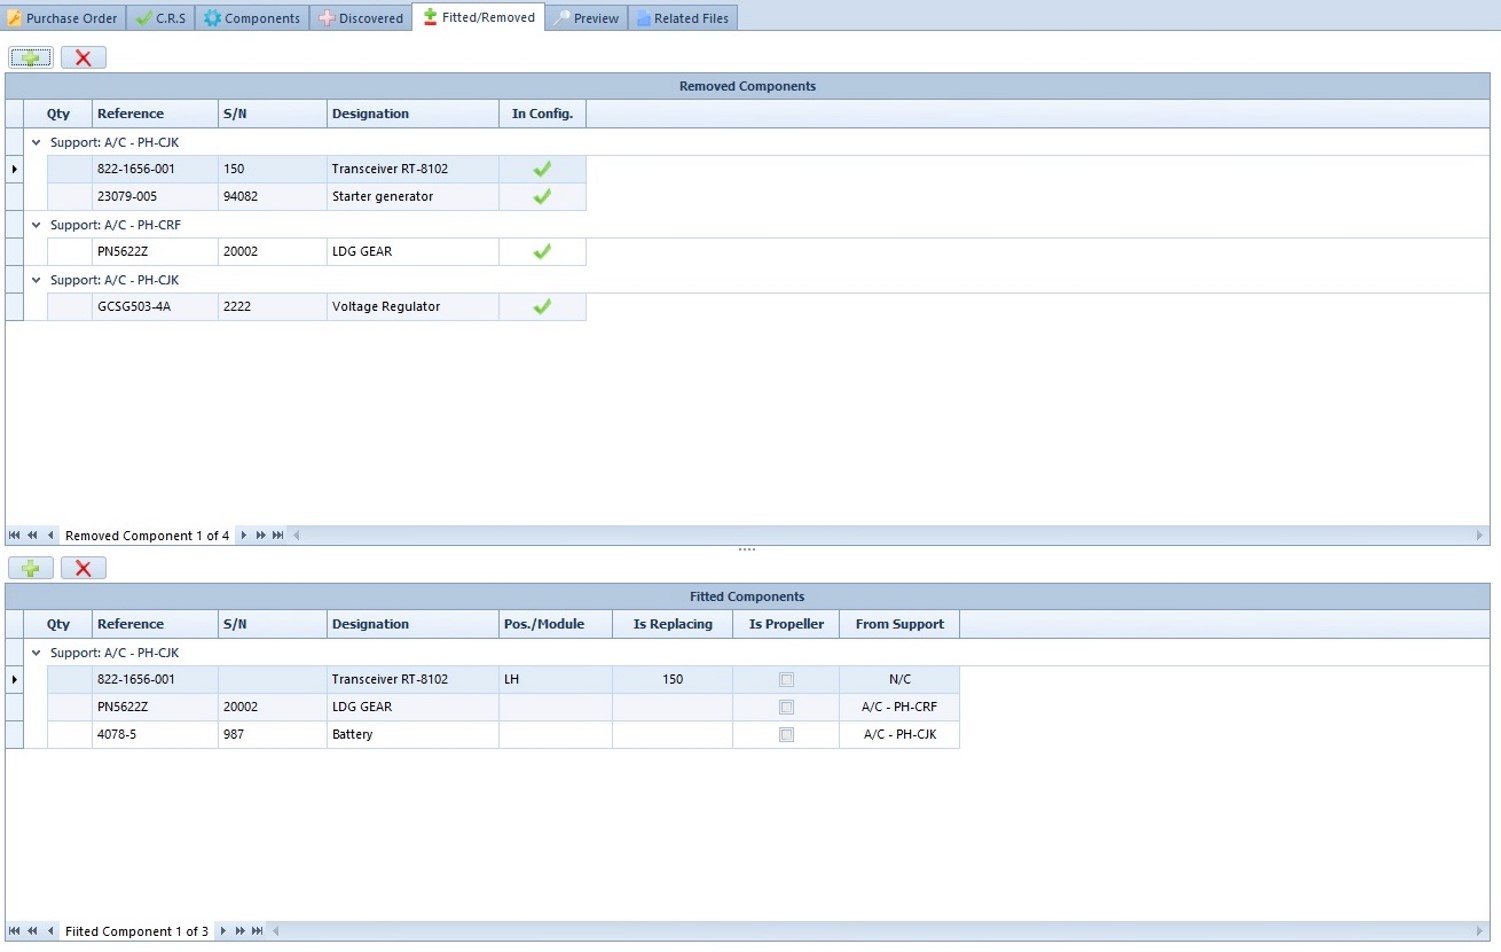
A ‘Fitted/Removed Components’ window opens. There are 2 tabs: ‘Aircraft Component’ and ‘Engine Components’.
Fit a Component
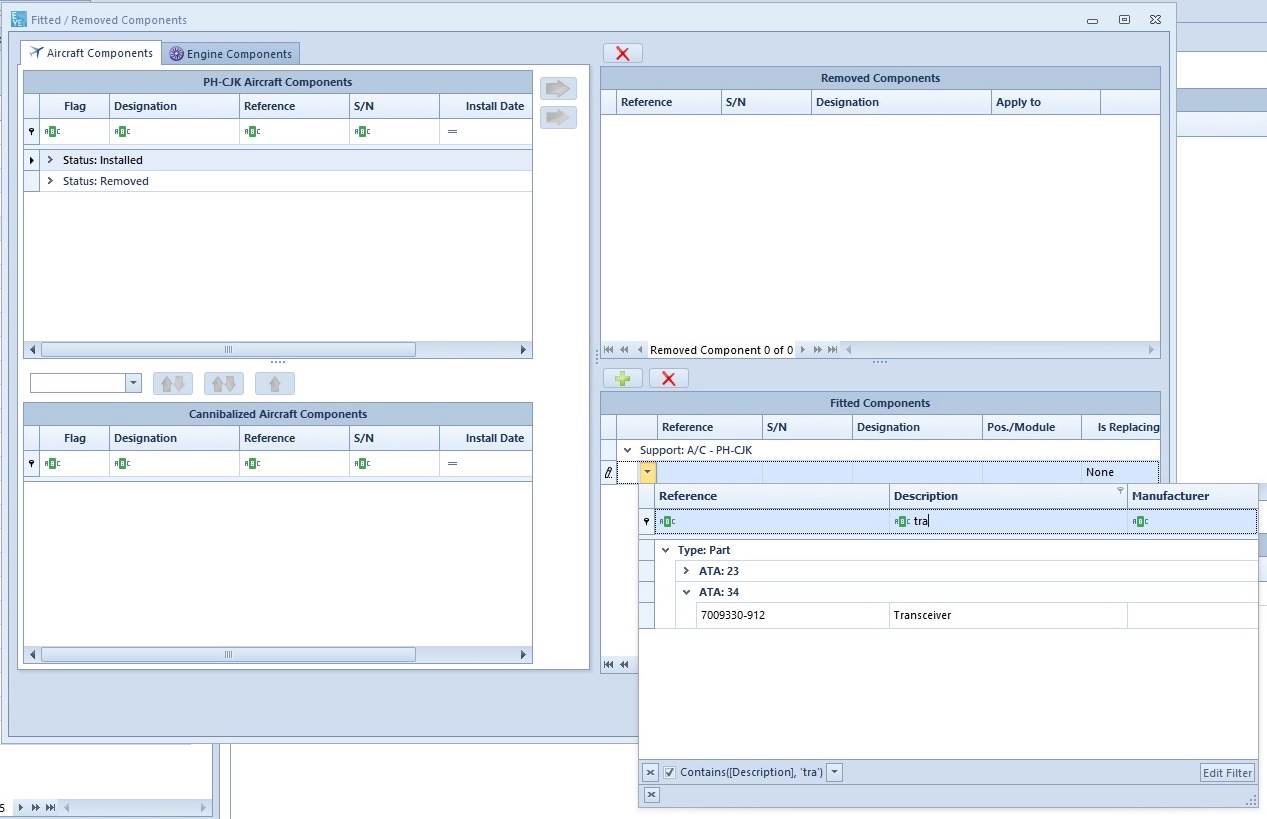
Click on the plus button above the ‘Fitted Components’ section.
You can either type in the information or click on the arrow and look for the component.
Once the fitted component is displayed in the ‘Fitted Component’ panel, you can state which component it replaces by clicking on the ‘Is Replacing’ field. Expand the ‘Status: Installed’ list.
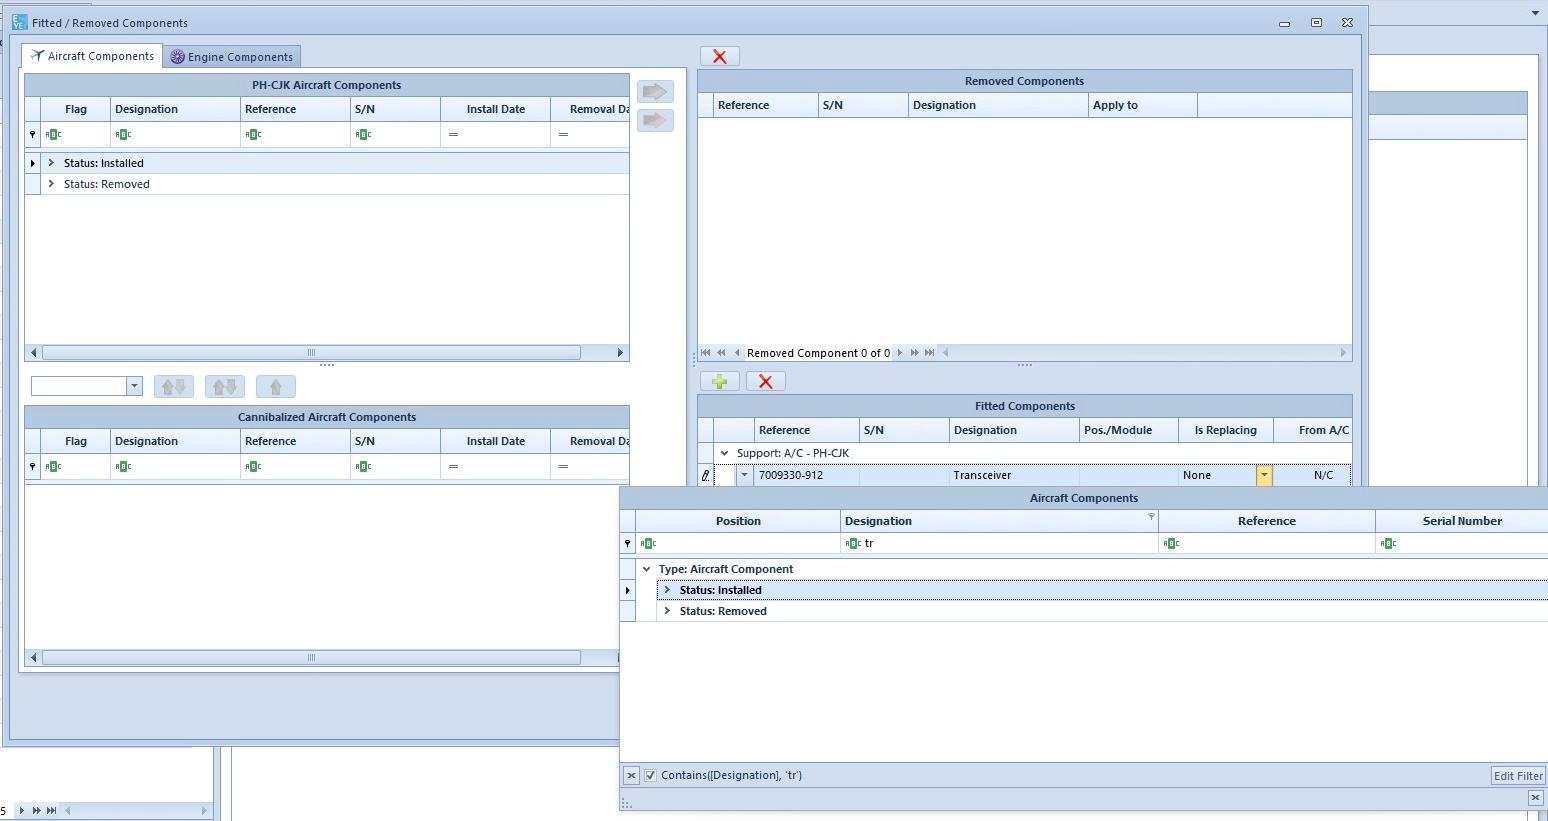
Look for the appropriate component and select it.
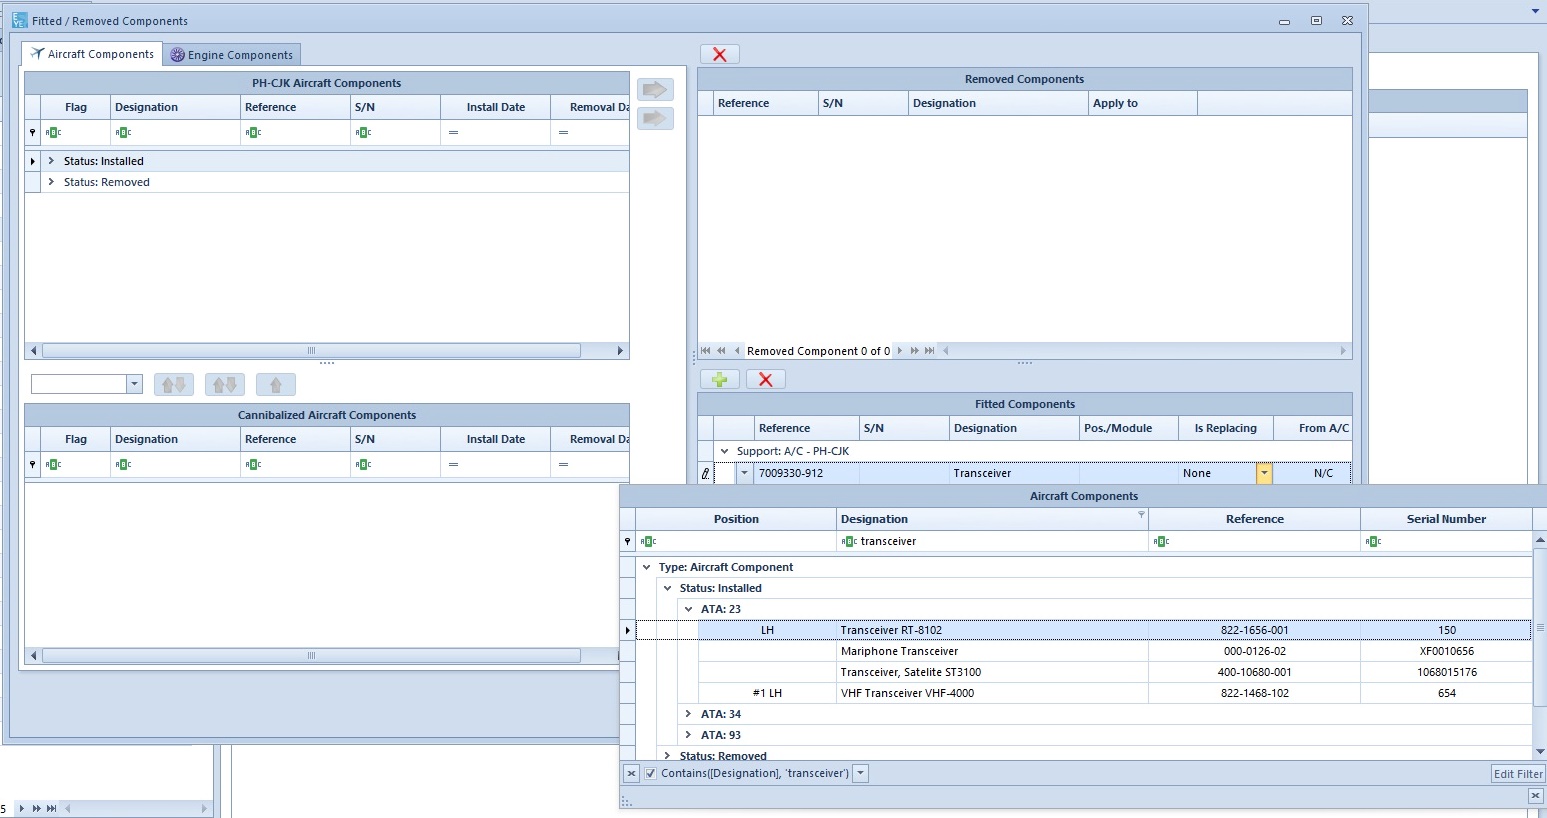
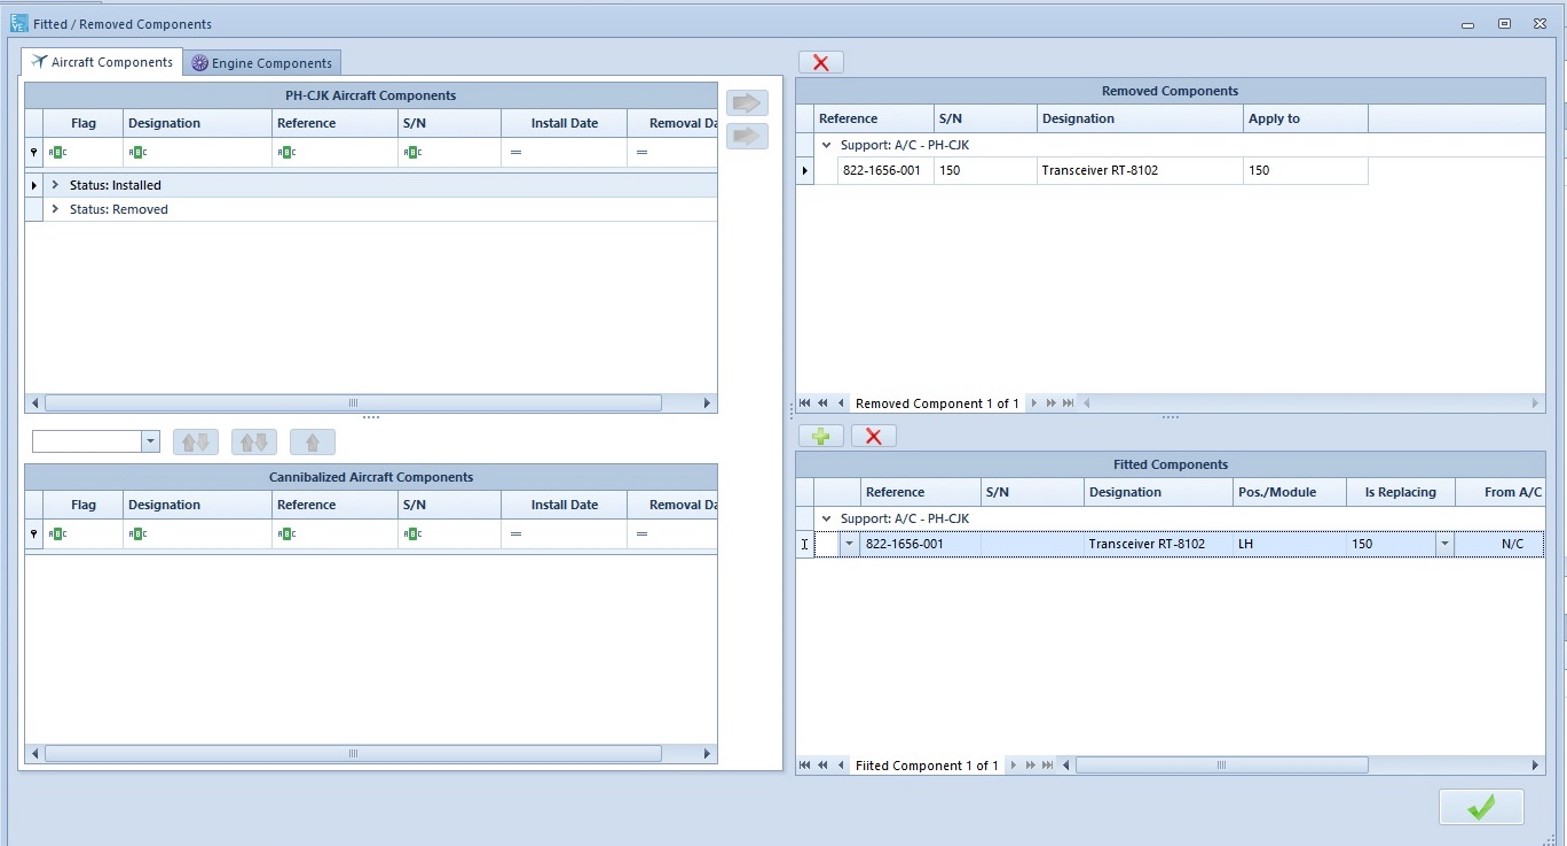
The component that is being replaced will appear in the ‘Removed Components’ section.
The component that is replacing another will appear in the ‘Fitted Components’ section.
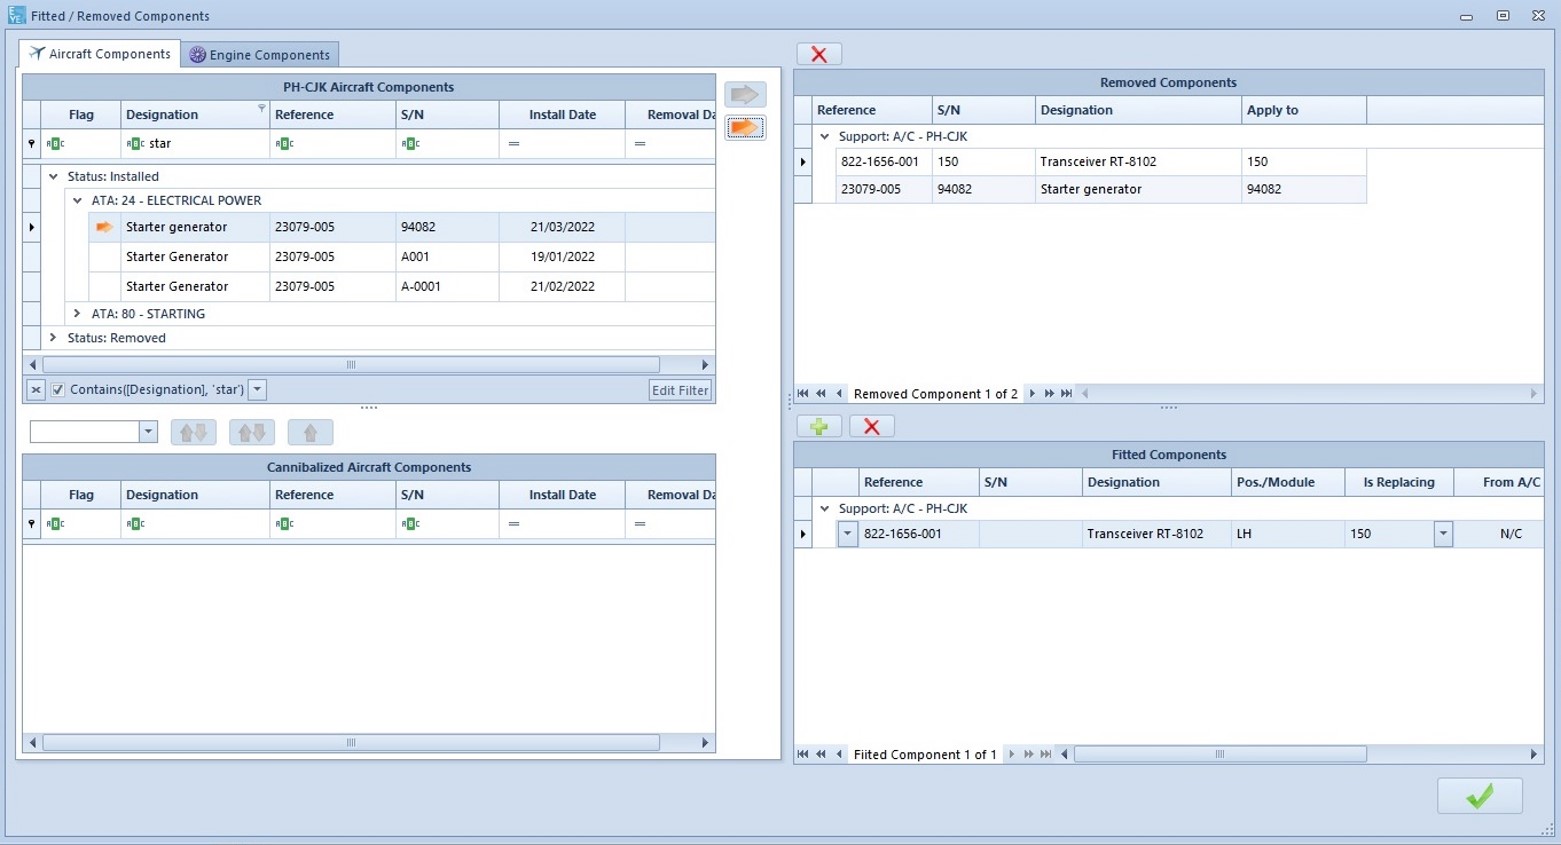
Remove a Component
Expand the ‘Status: Installed’ list.
Look for the relevant component, and select it. Click on the orange arrow to add the component to the ‘Removed Components’ section.
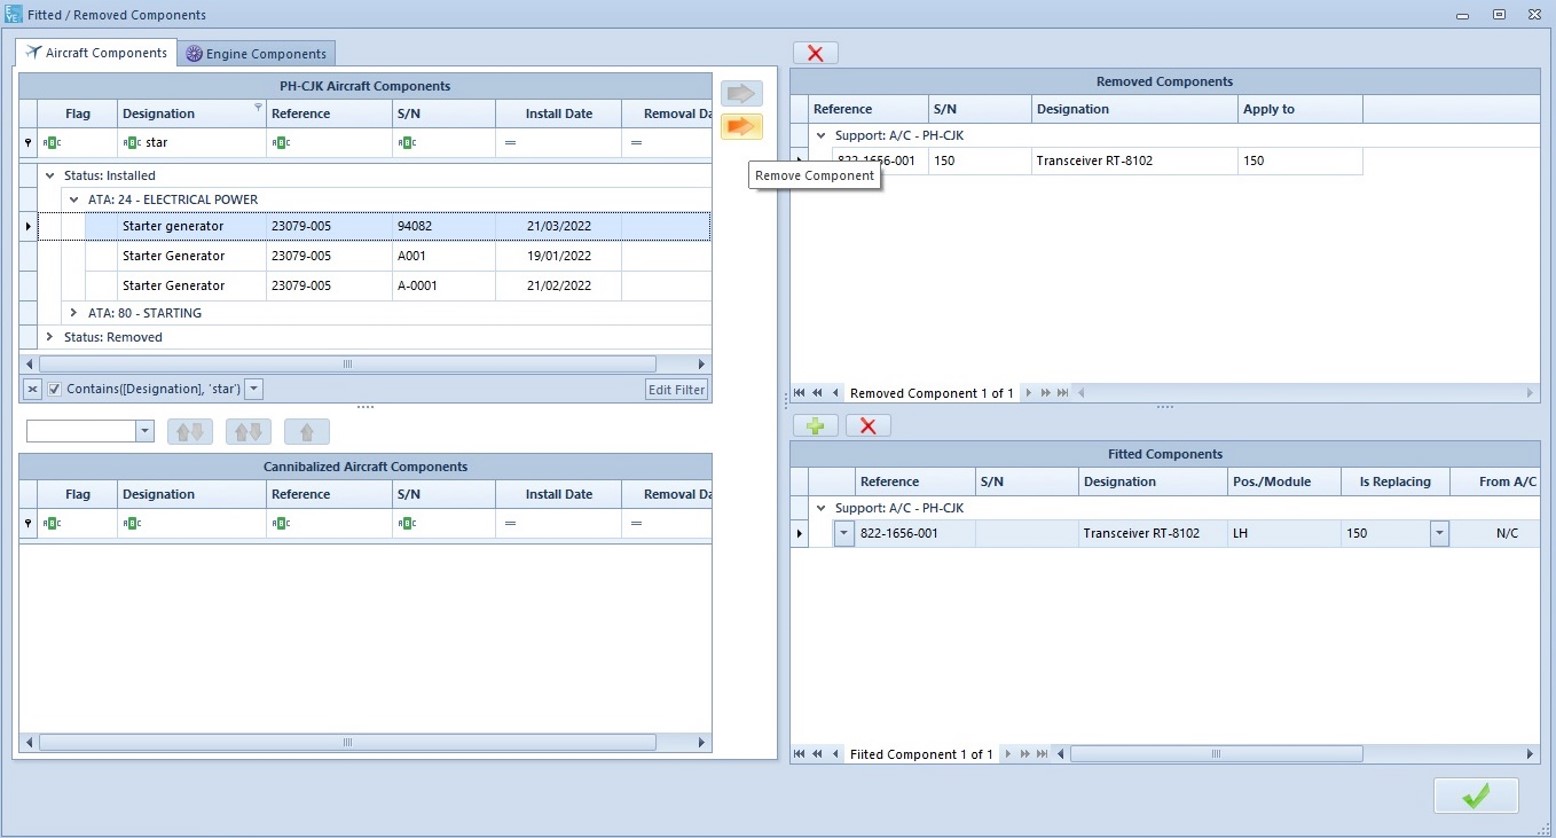
The component is now displayed in the ‘Removed Components’ section.
Select an aircraft and look for a component in both panels (Here the ‘PH-CJK Aircraft Components’ panel and the ‘PH-CRF Aircraft Components’ panel).
Then, three options are available: Swap components (1), Cannibalize component (do not refit replaced component) (2), Cannibalize components without counterparty (3).
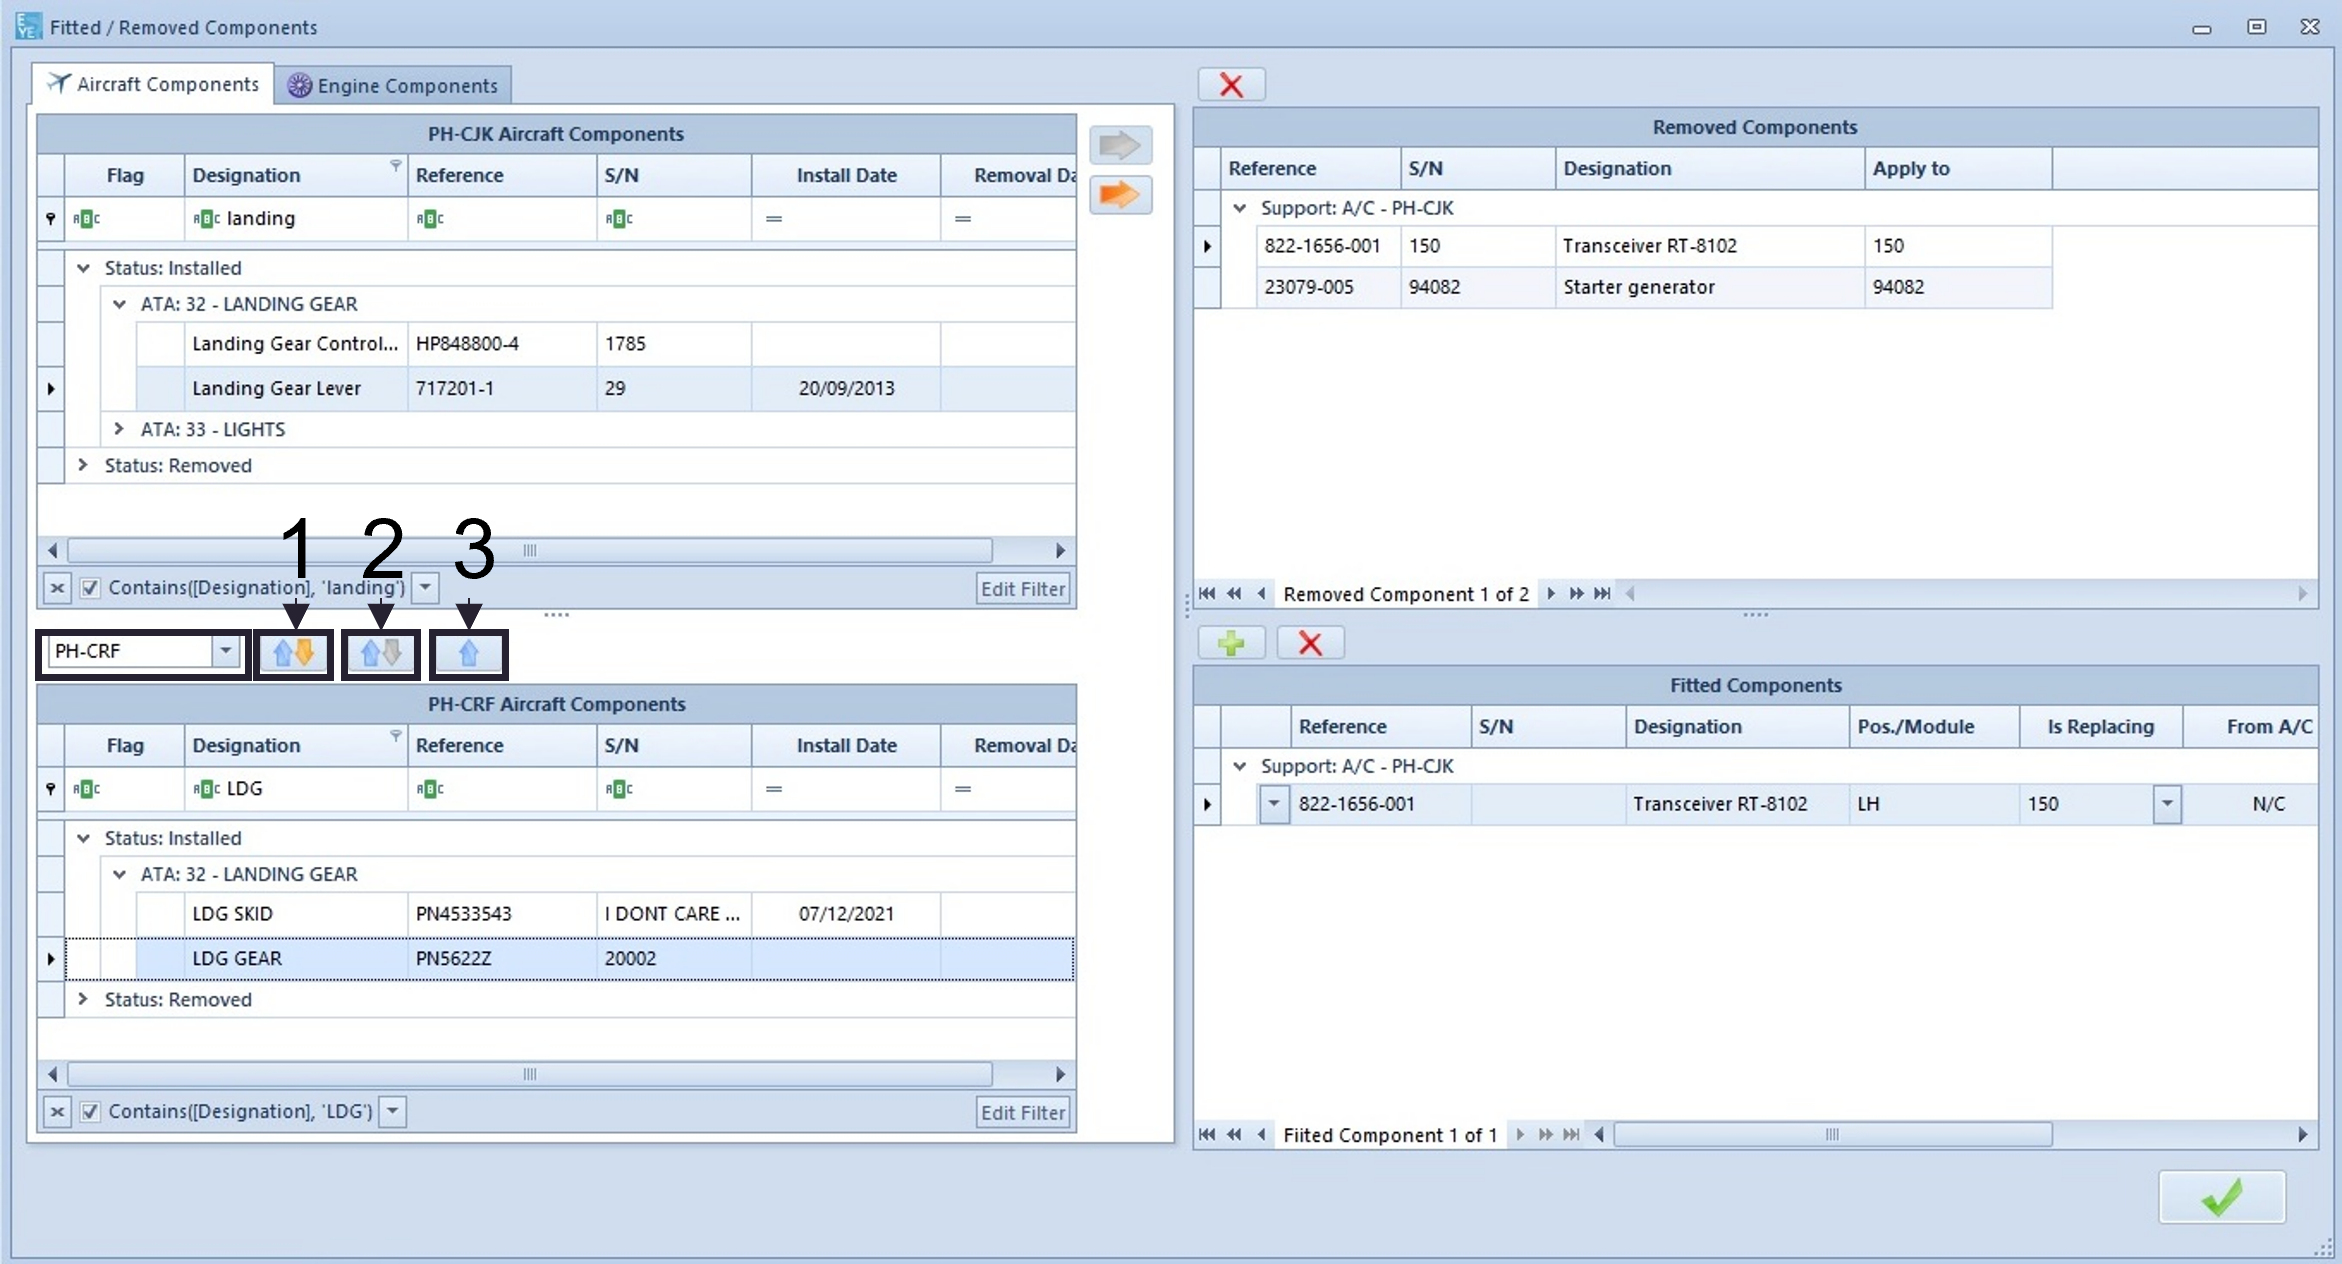
1- Swap components: You remove interchangeable components from 2 different aircraft and you exchange them when refitting components.
2- Cannibalize component (do not refit replaced component): Cannibalization of parts, in the maintenance of aircraft with interchangeable parts, refers to the practice of removing parts for repair from another similar aircraft, rather than from inventory, usually when resources become limited. You remove a part from an aircraft and you replace it by a part coming from another aircraft.
3- Cannibalize components without counterparty: Refers to the practice of cannibalizing an aircraft to fit a component on an aircraft that had no such component fitted at that moment.
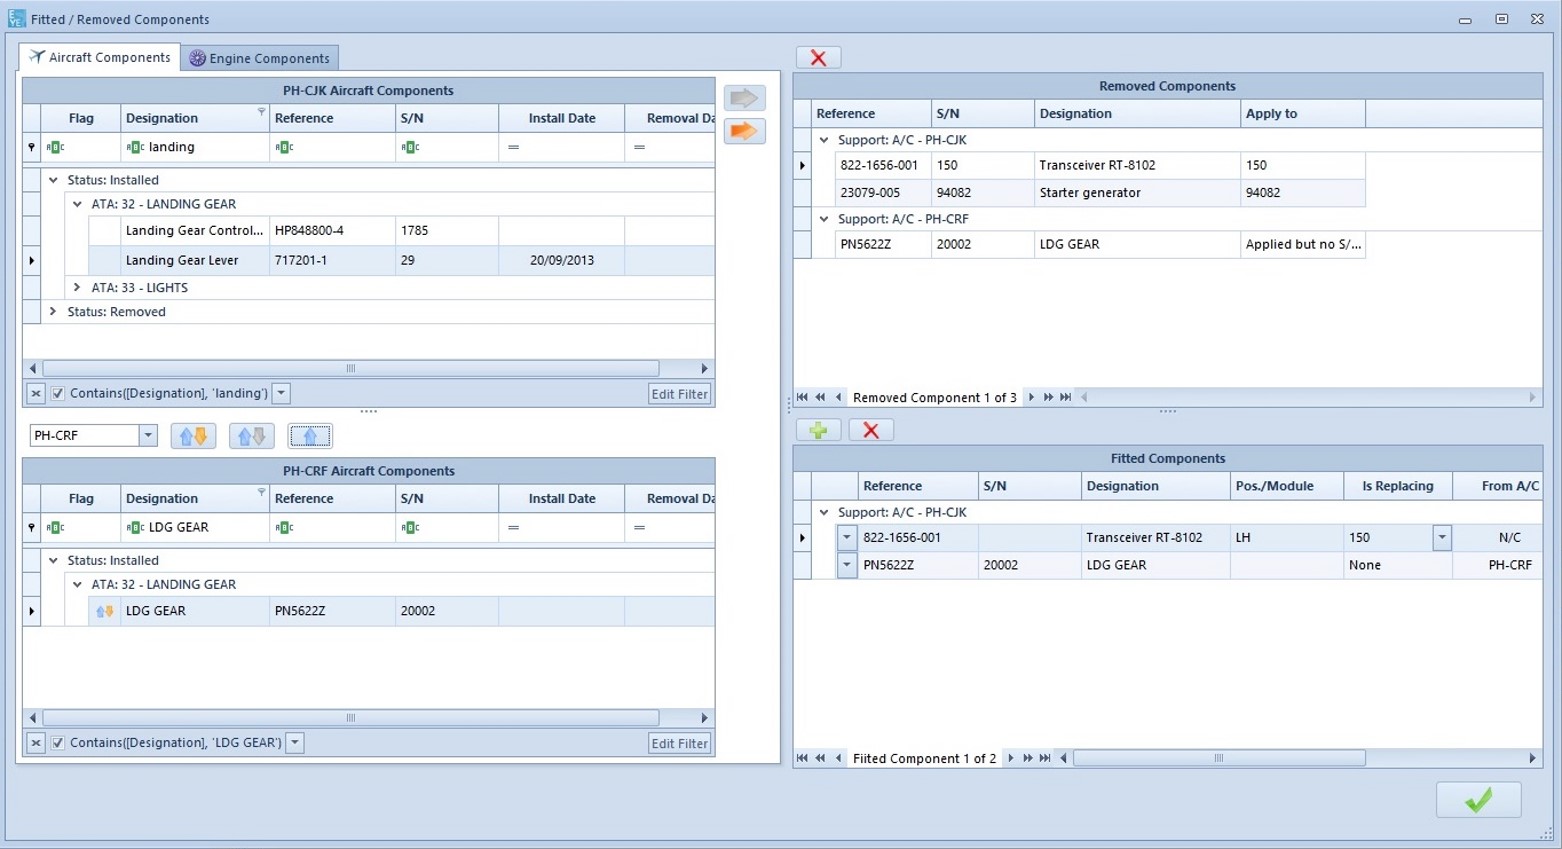
Here, we will swap components. The ‘Removed Components’ section will show the component removed from the aircraft PH-CRF and the ‘Fitted Components’ section will show the component that has been fitted on the aircraft PH-CJK.
Refit a Component
You can type what you need to find the relevant component in the ‘Status: Removed’ list.
Once you have found it, select it and click on the green arrow to add it to the ‘Fitted Components’ list.
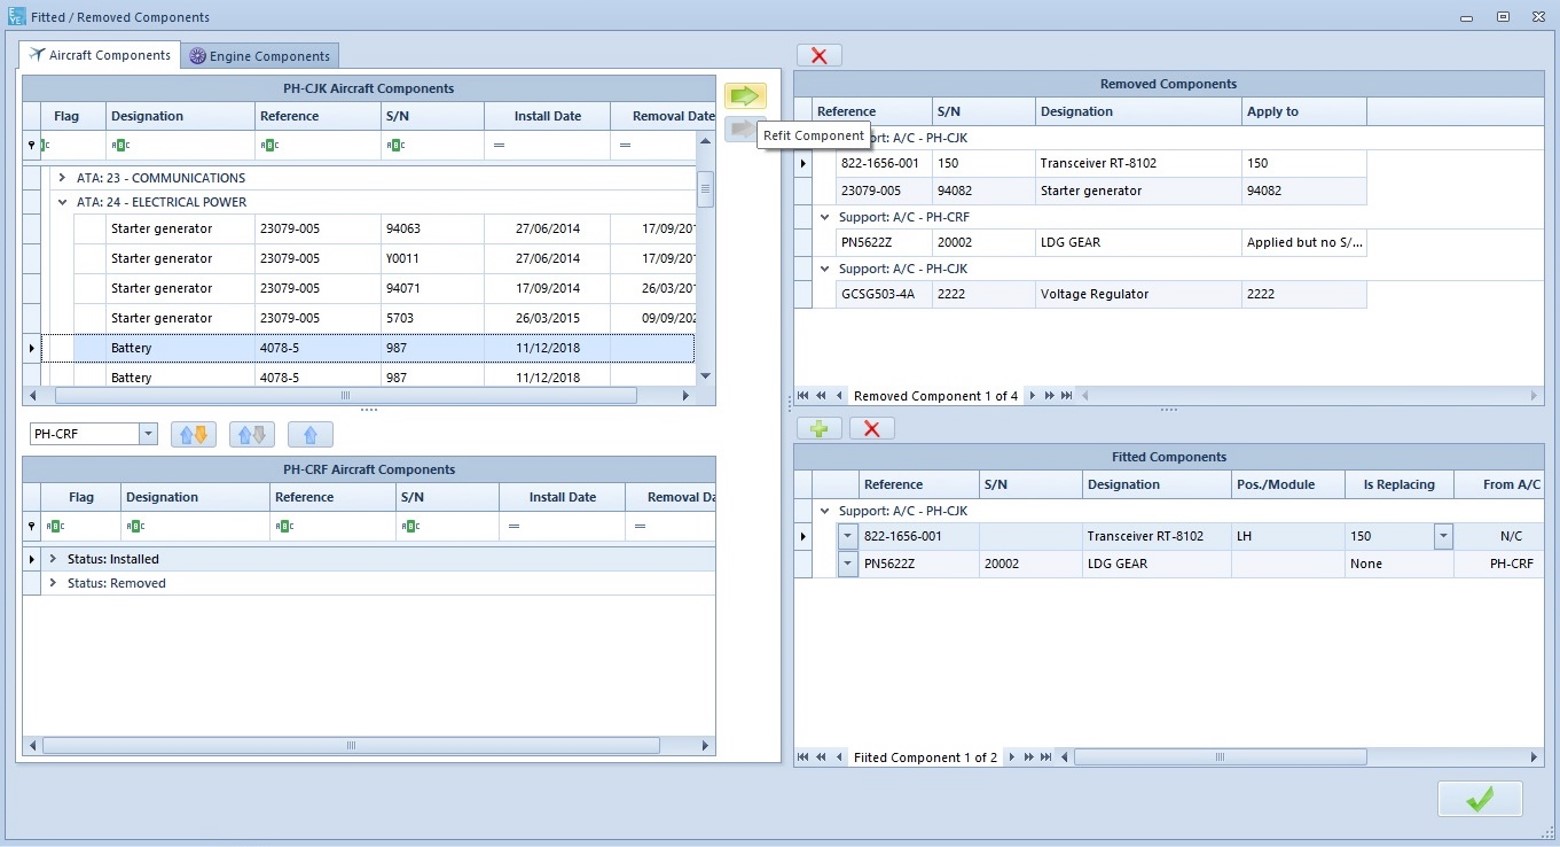
The component will appear in the ‘Fitted Components’ section. In the field ‘From A/C’ you will see the appropriate aircraft. Then, click on the validation button.

As you can see, the components have been added to the ‘Fitted Components’ panel and the ‘Removed Components’ panel.
Open the ‘Components’ tab, select the task and set it done by clicking on the validate button.

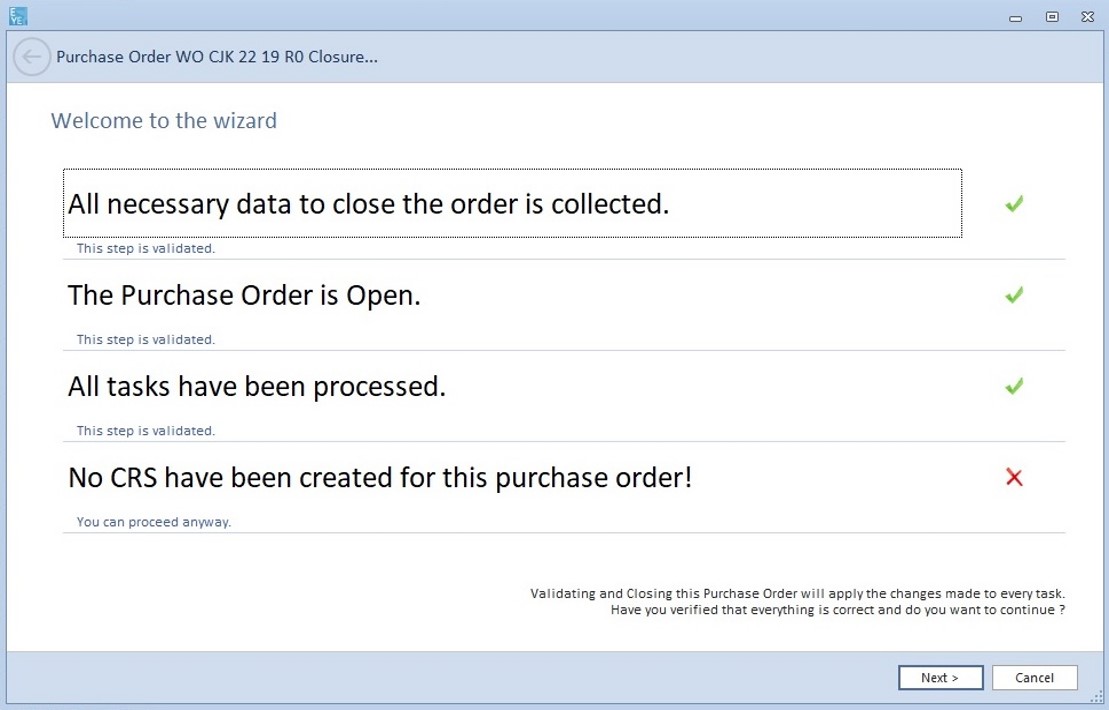
Click on ’Close PO’ in the main ribbon.

The ‘Purchase Order Closure’ window pops up. Click on ‘Next’.
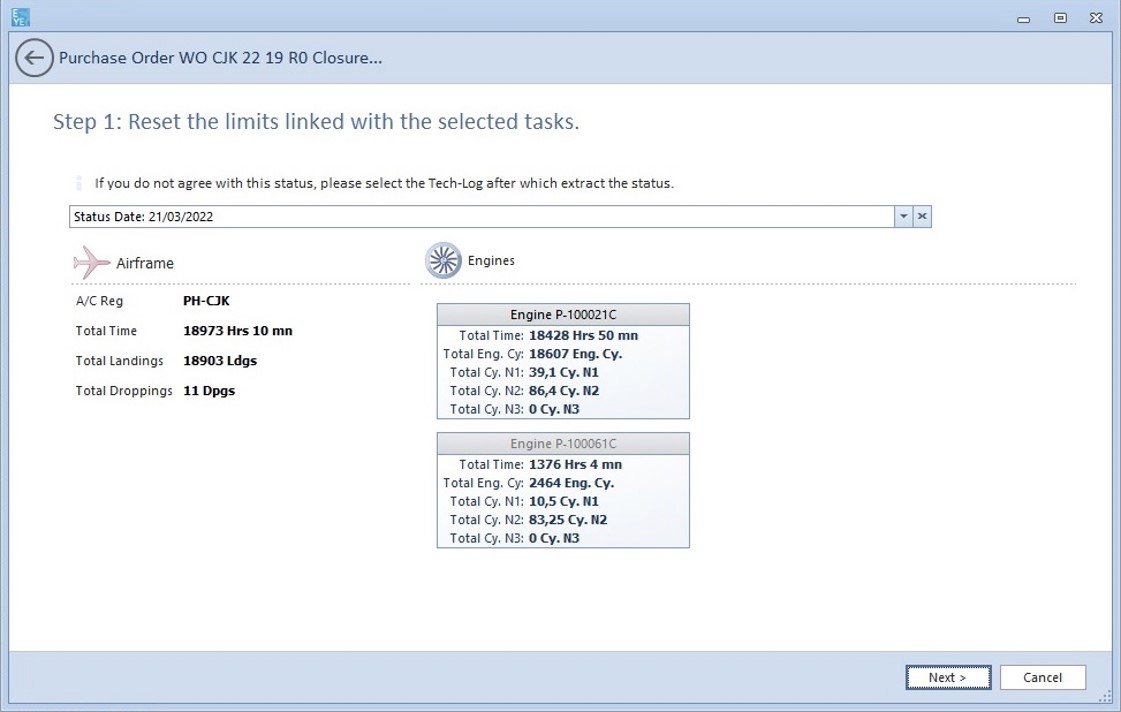
The new engine and aircraft status appears. Click on ‘Next’.
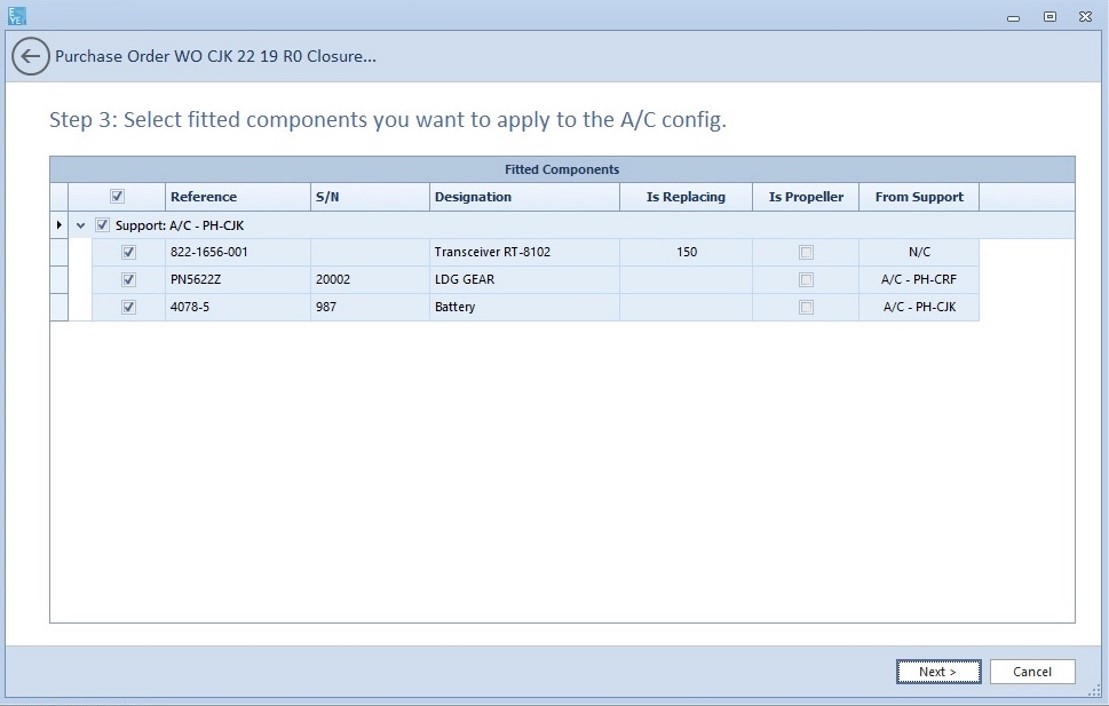
The fitted components are listed. You can untick the ones you do not want to apply to the aircraft configuration.
Click on ‘Next’.
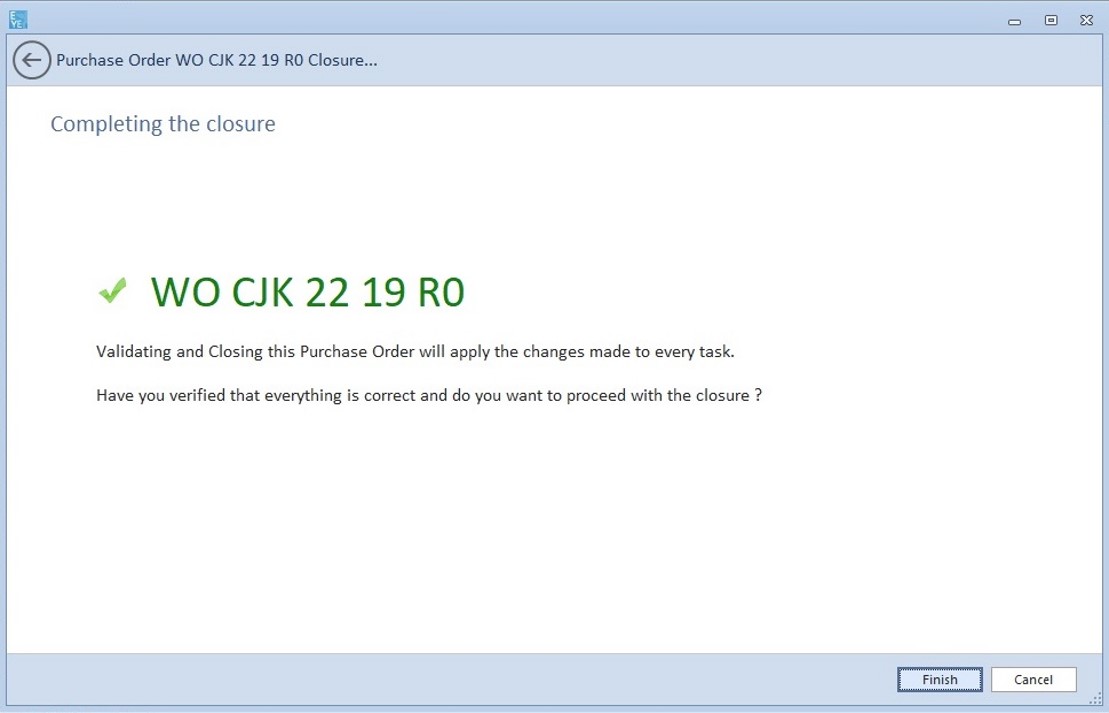
The Purchase Order is now closed. Click on ‘Finish’.
The system sets the components as removed. Click on ‘OK’.

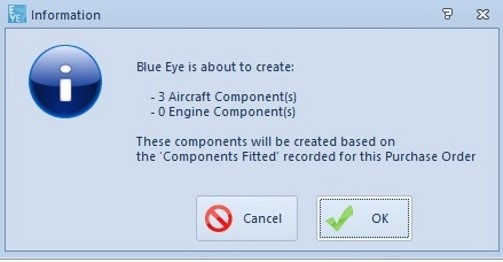
The system states how many aircraft components and engine components are about to be created. Click on ‘OK’.
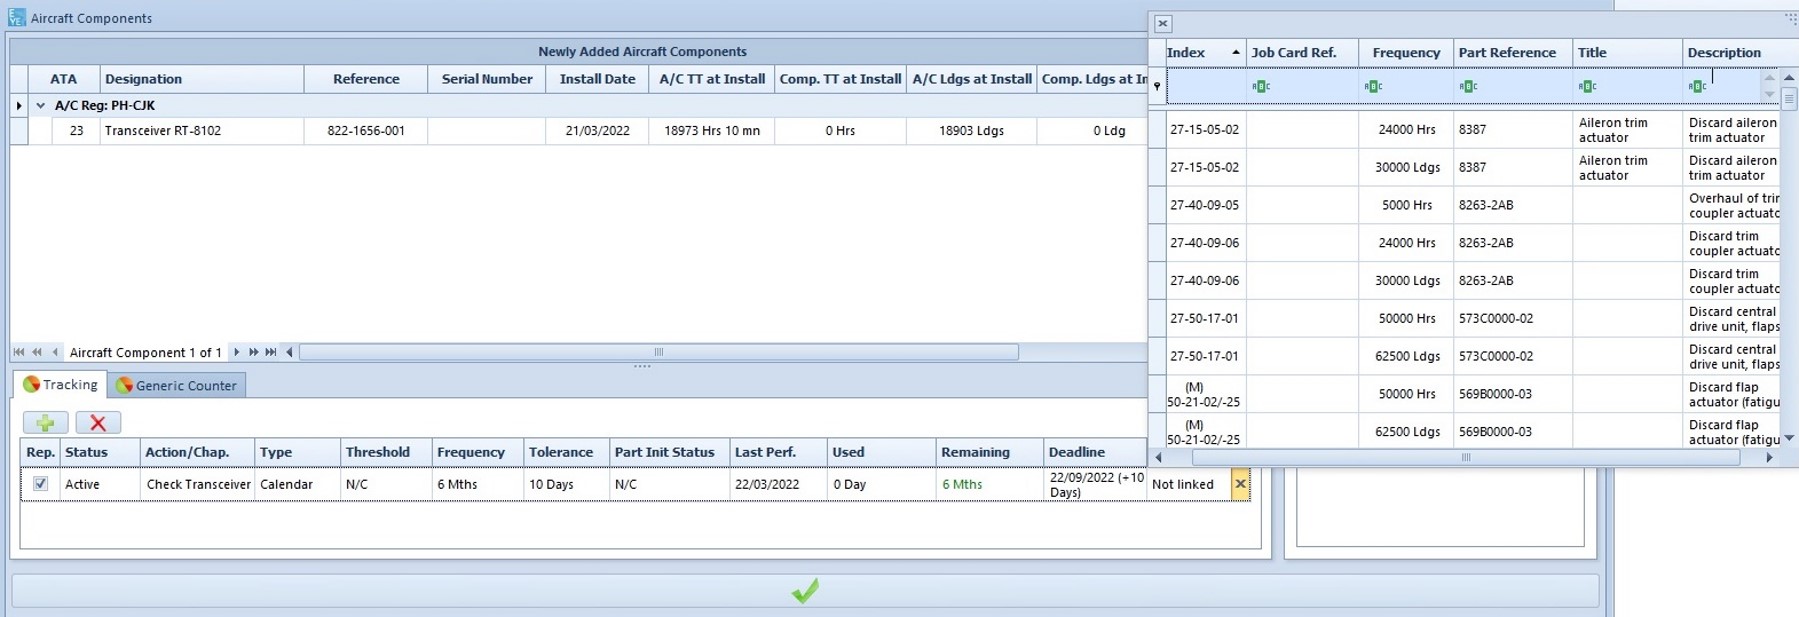
A window pops up to allow you to add tracking event(s) and/or related file(s) to the newly added aircraft component.
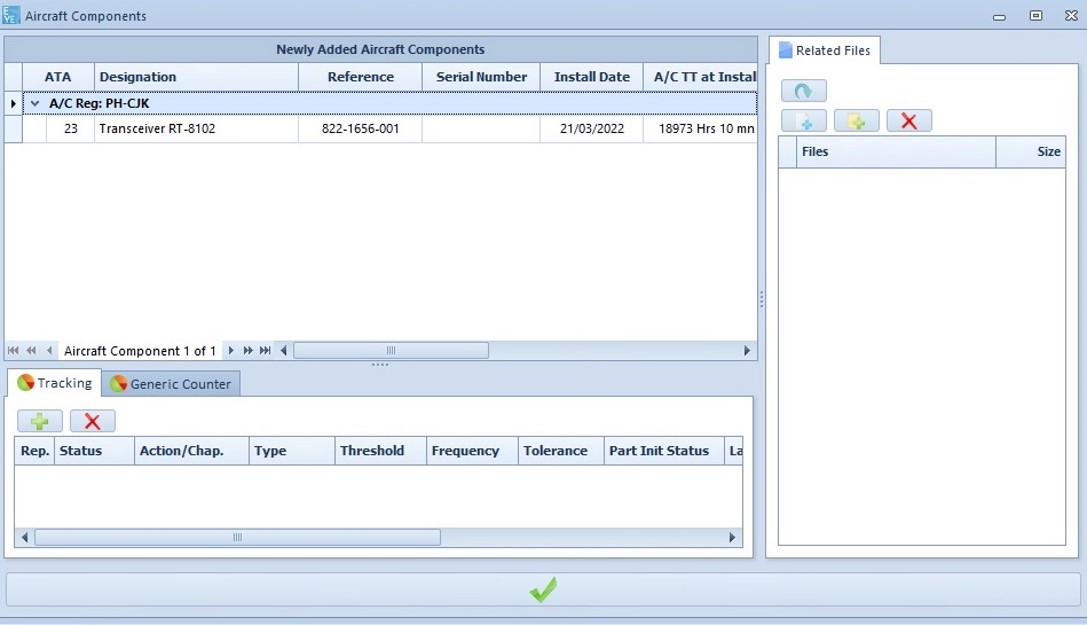
Click on the plus button in the 'Tracking' section and fill in the required fields.
Then, click on the validation button.
Click
on ‘Save’  in the main ribbon.
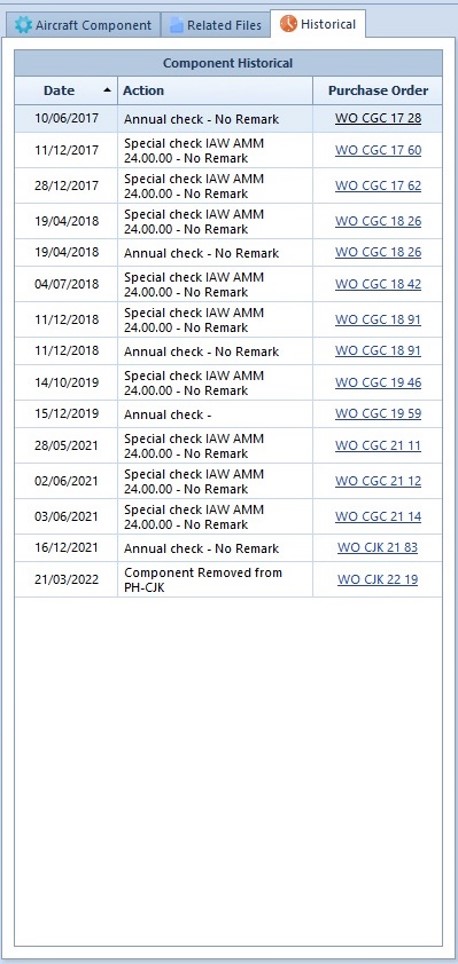
If you open the ‘Component Status’ section, and you look for a component that has been removed, you will see that its current status has been updated.

The history of the removed component has been updated according to the actions that have been completed.
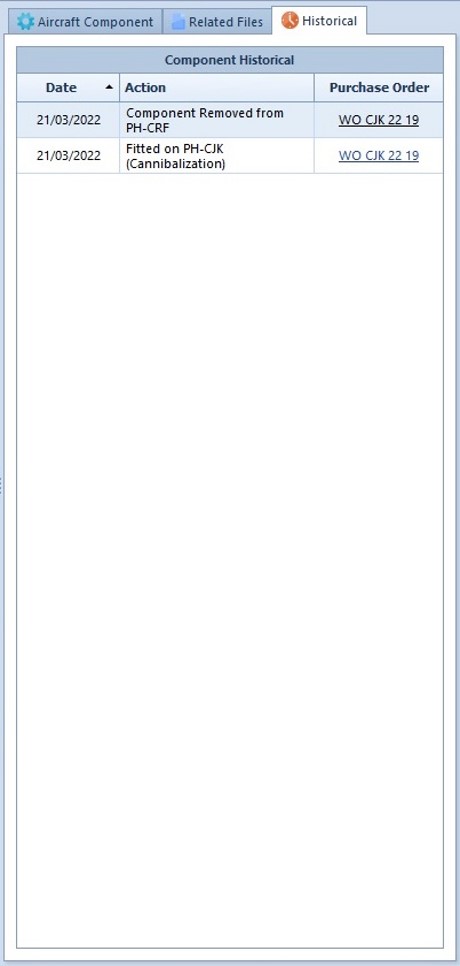
If you look for a component that has been installed, you will see that its current status has been updated and the tracking events are now active.

The history of the installed component has been updated according to the actions that have been completed.
If you made some mistakes and need to correct the data, you can directly modify the information in the PO and close it again.
The system will undo all the changes triggered by the first closure and close the Purchase Order like it's the first time.