
eTechlog
Data Synchronization
This article explains how to use the eTechlog Blue EYE iPad app allowing you to generate techlogs, CRS, declare discrepancies etc.
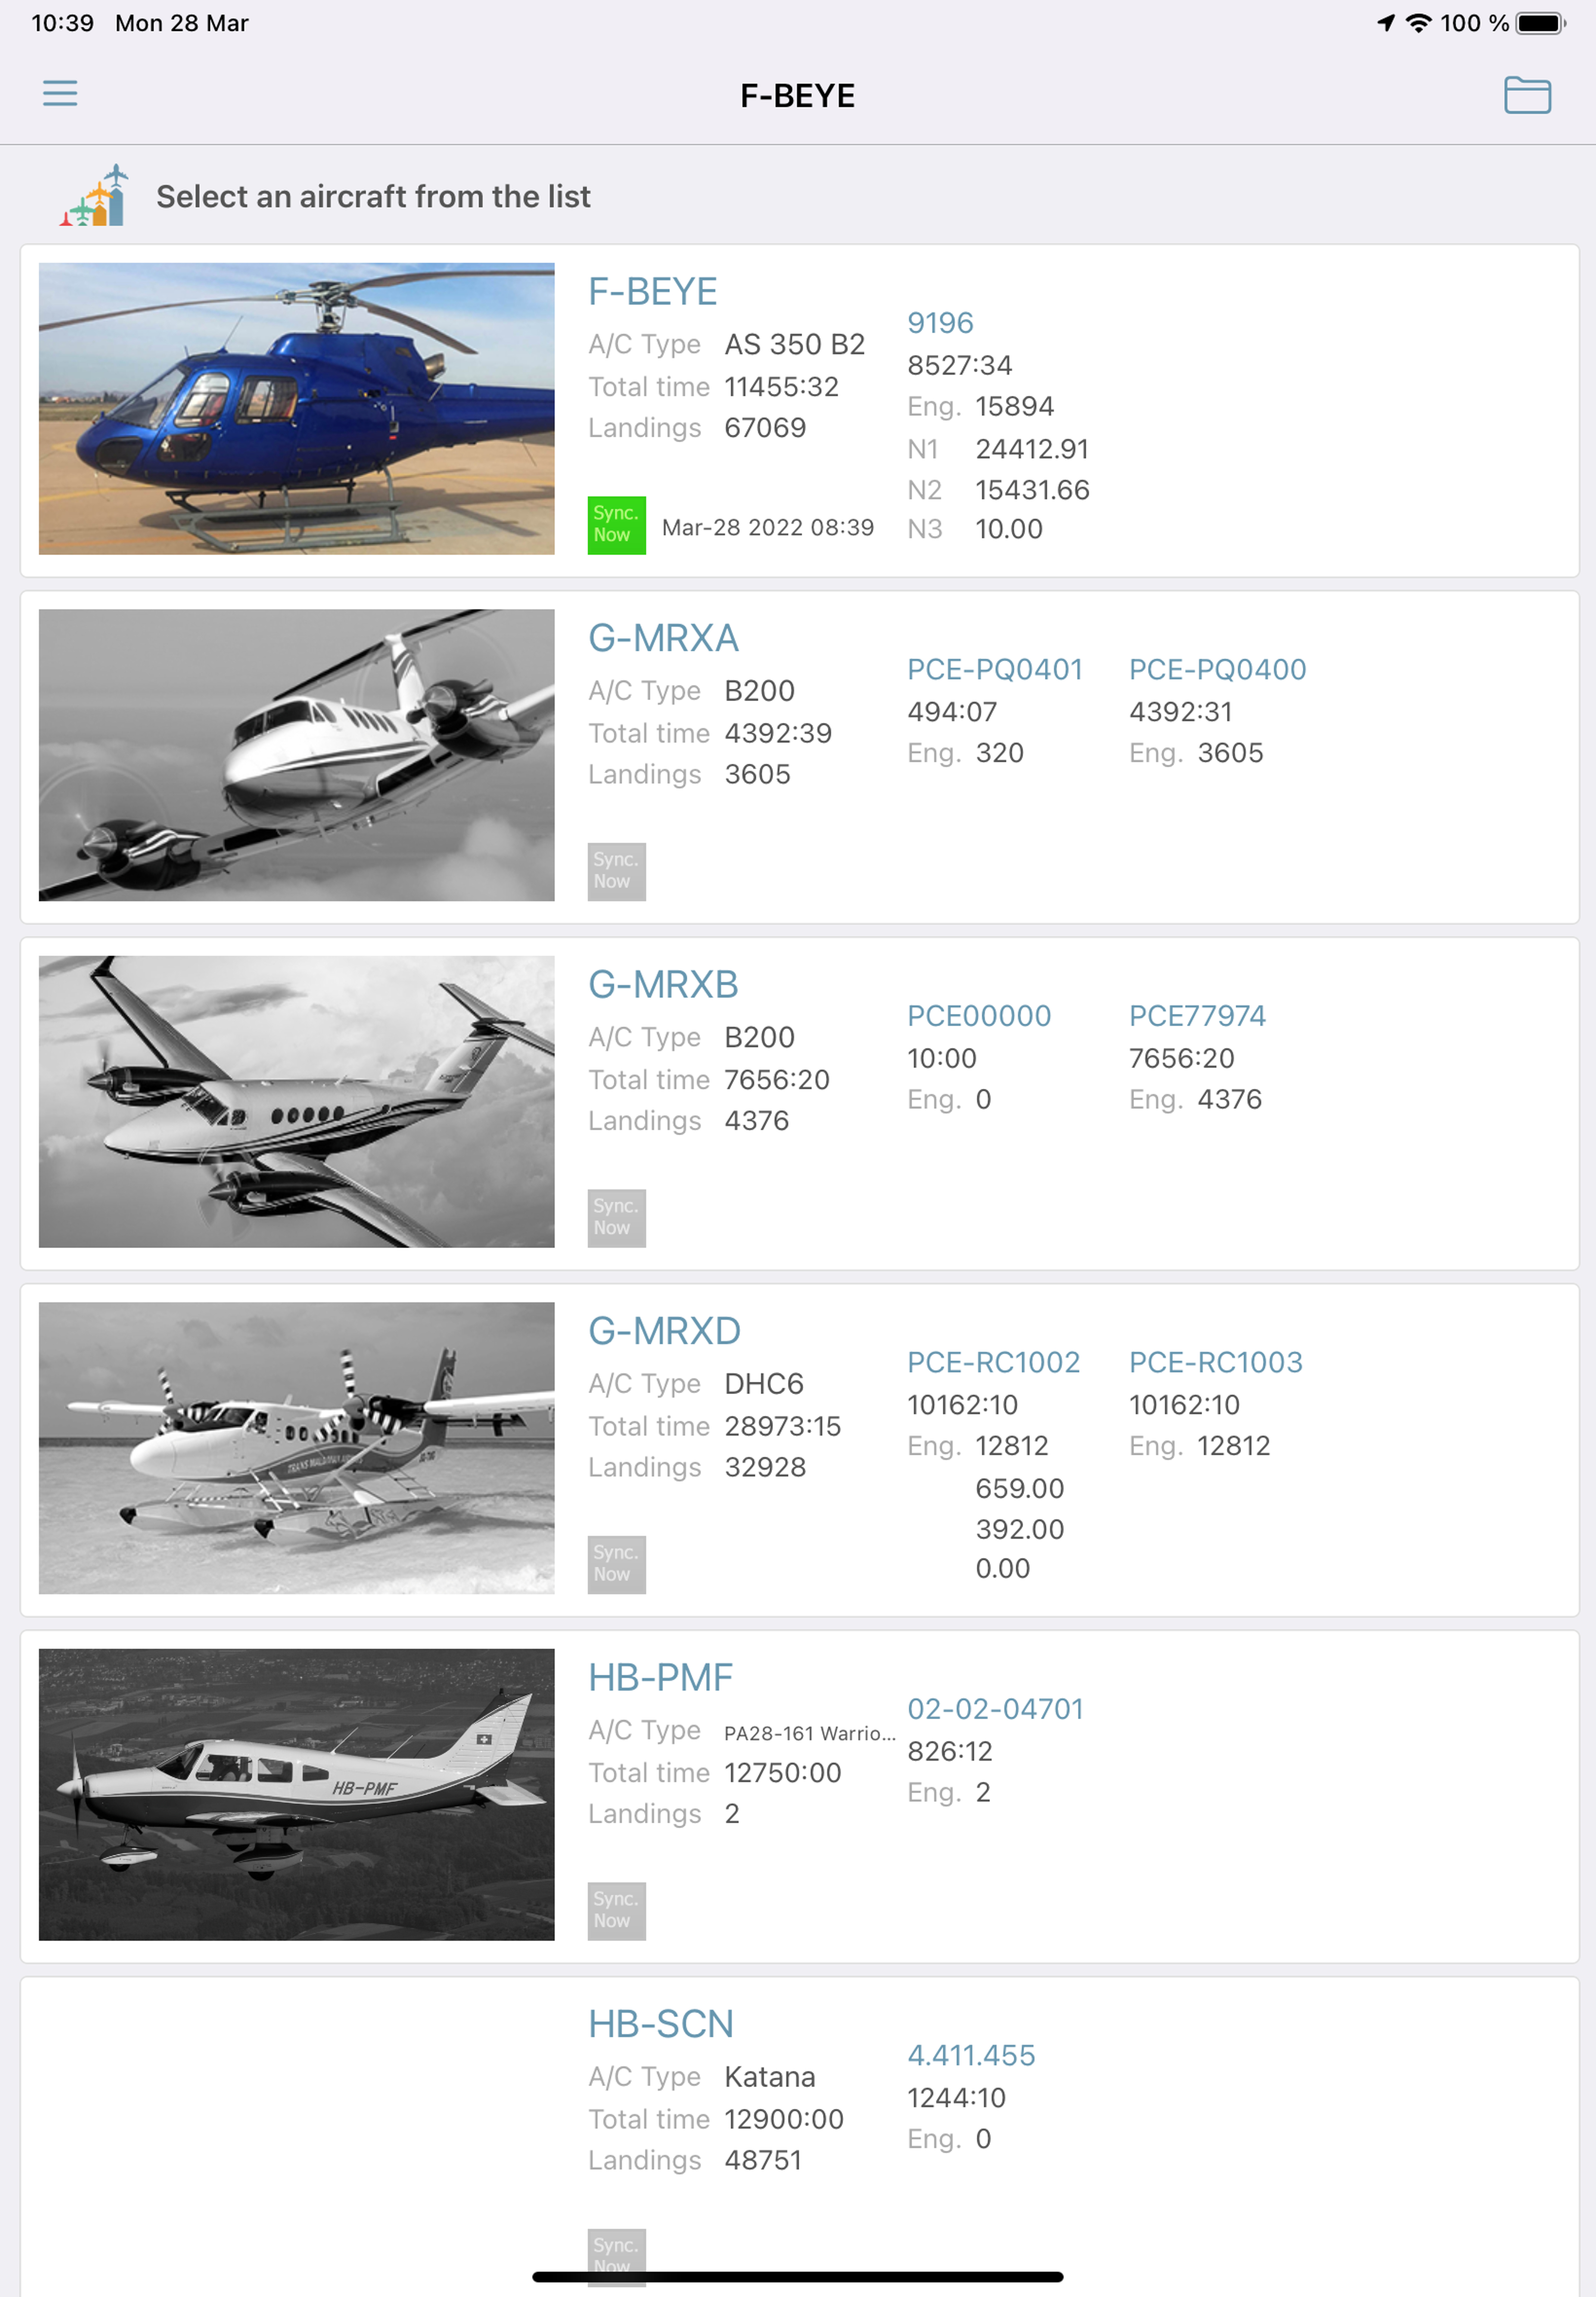
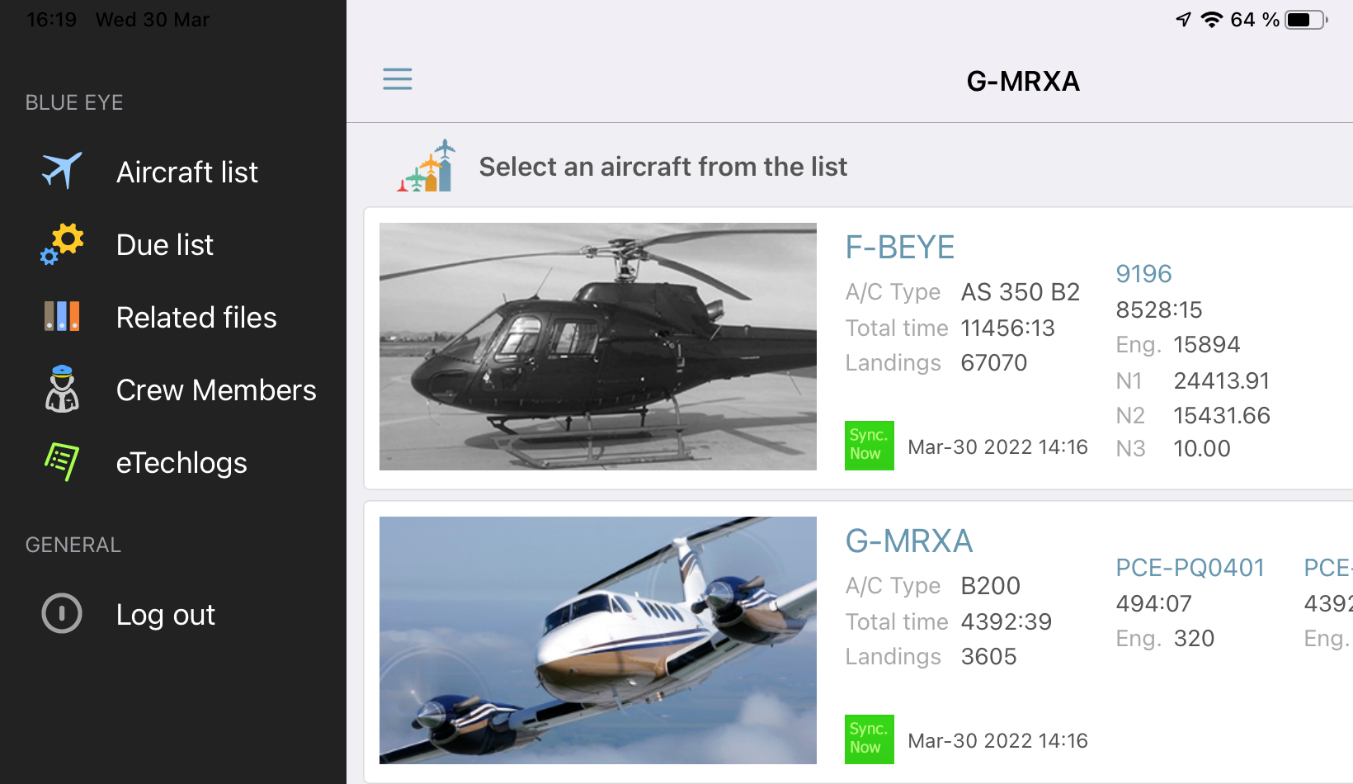
The Blue EYE app opens on the Aircraft List. The first thing to do is to synchronize data. This will enable you to work off-line.
There are two different methods.
You can click on the ‘Sync Now’ button on the right of the aircraft picture.
You can also click on the folder-shaped button in the top right corner. This will allow you to synchronize the data of the selected aircraft or all the aircraft.
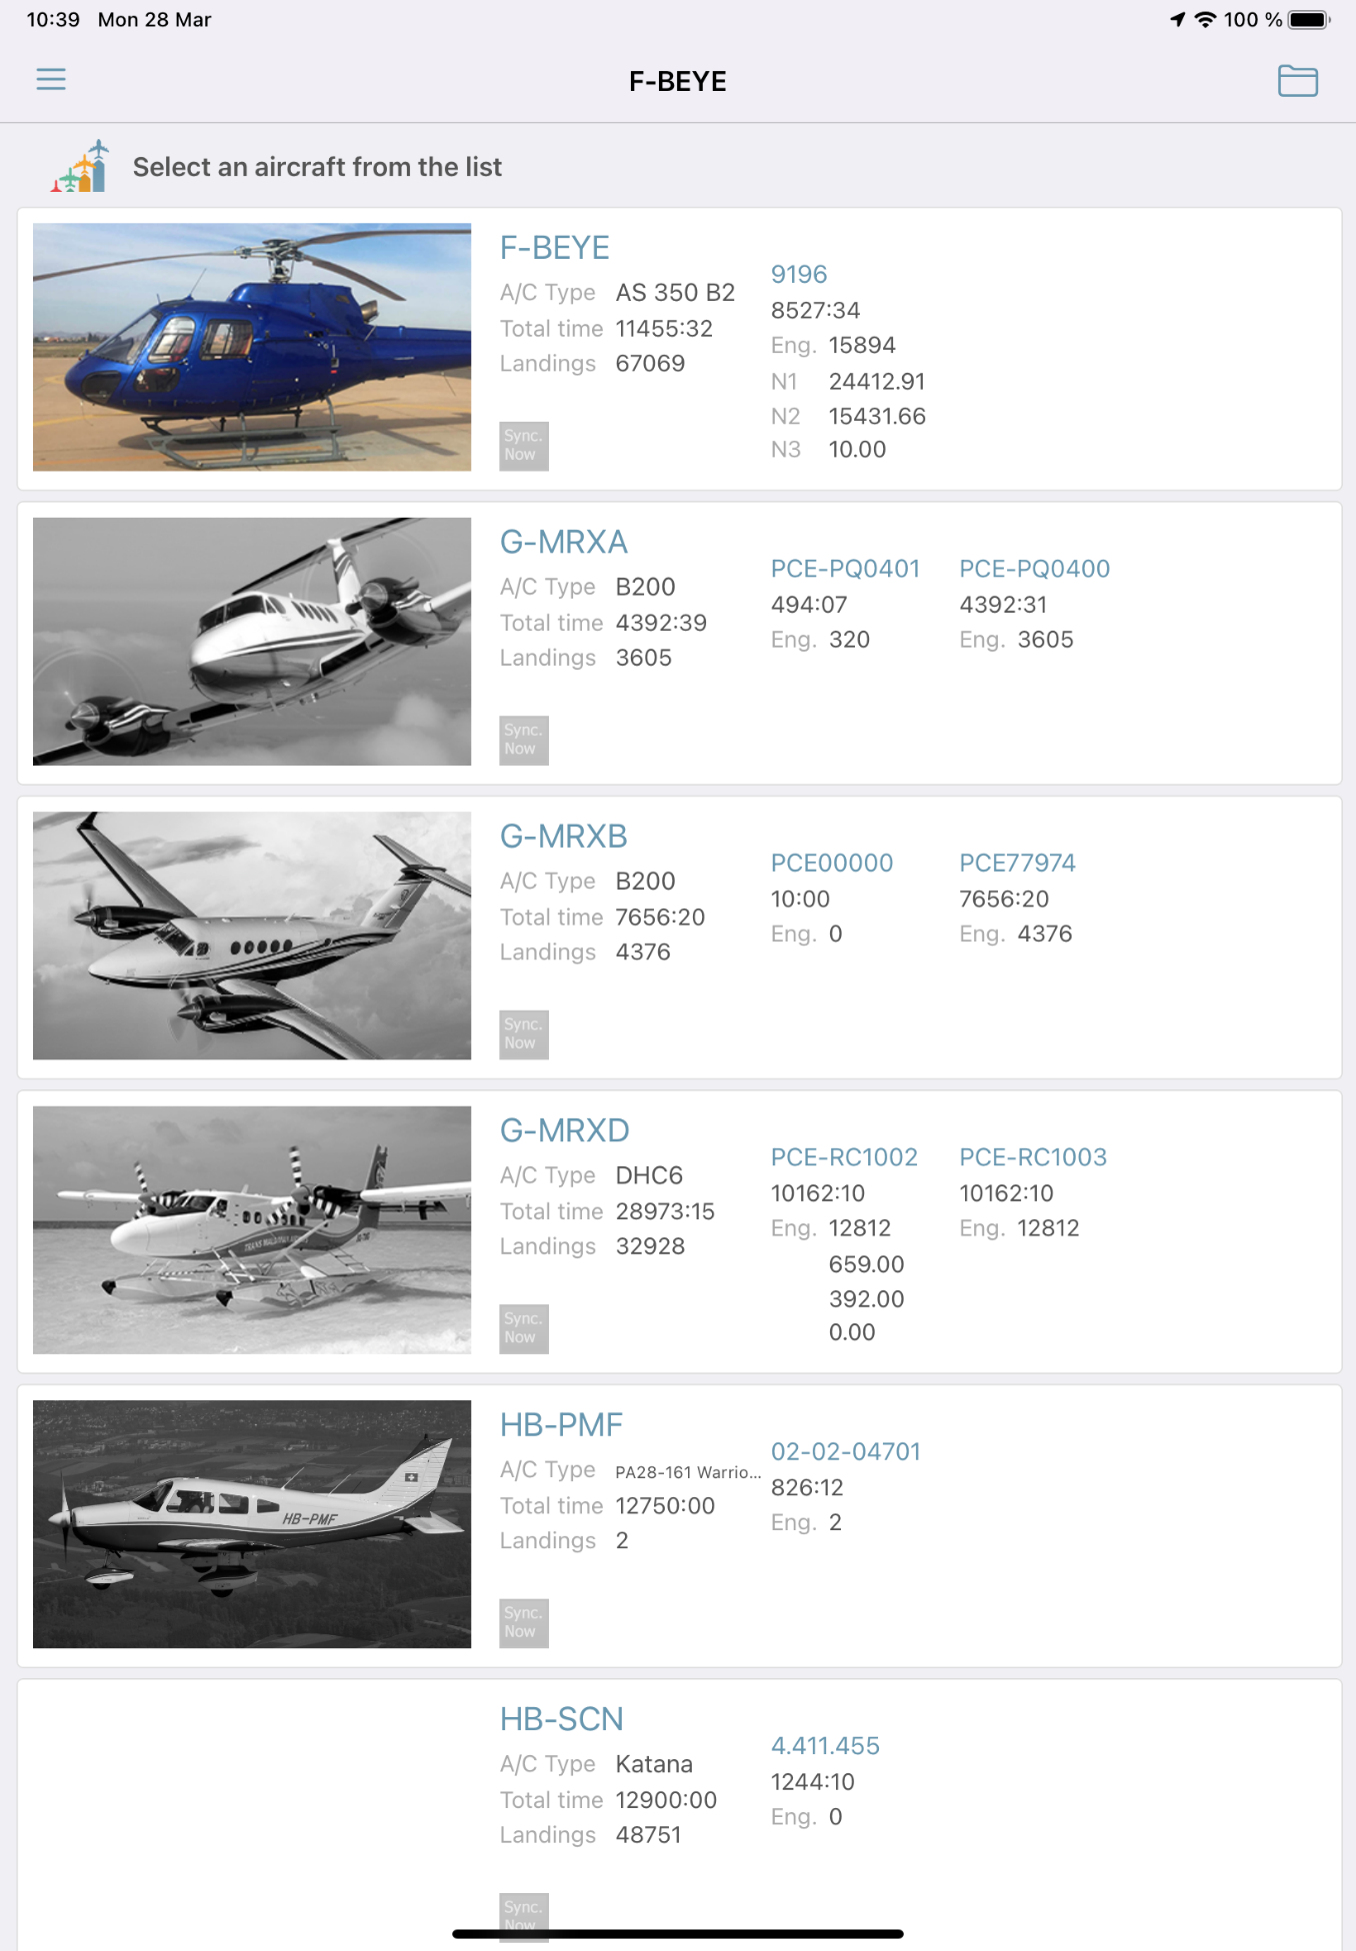
The system loads the list of pilots, the technicians working on the aircraft, the MRO workshops that are registered in the address book, the due list of the aircraft, the last 5 sent techlogs of the aircraft, and some other information.
The green flag and the date of the synchronization are the guarantee that you can work off-line with all the information required. If you do not update the information for more than 24H, the flag will turn orange to indicate that you need to synchronize the data again.
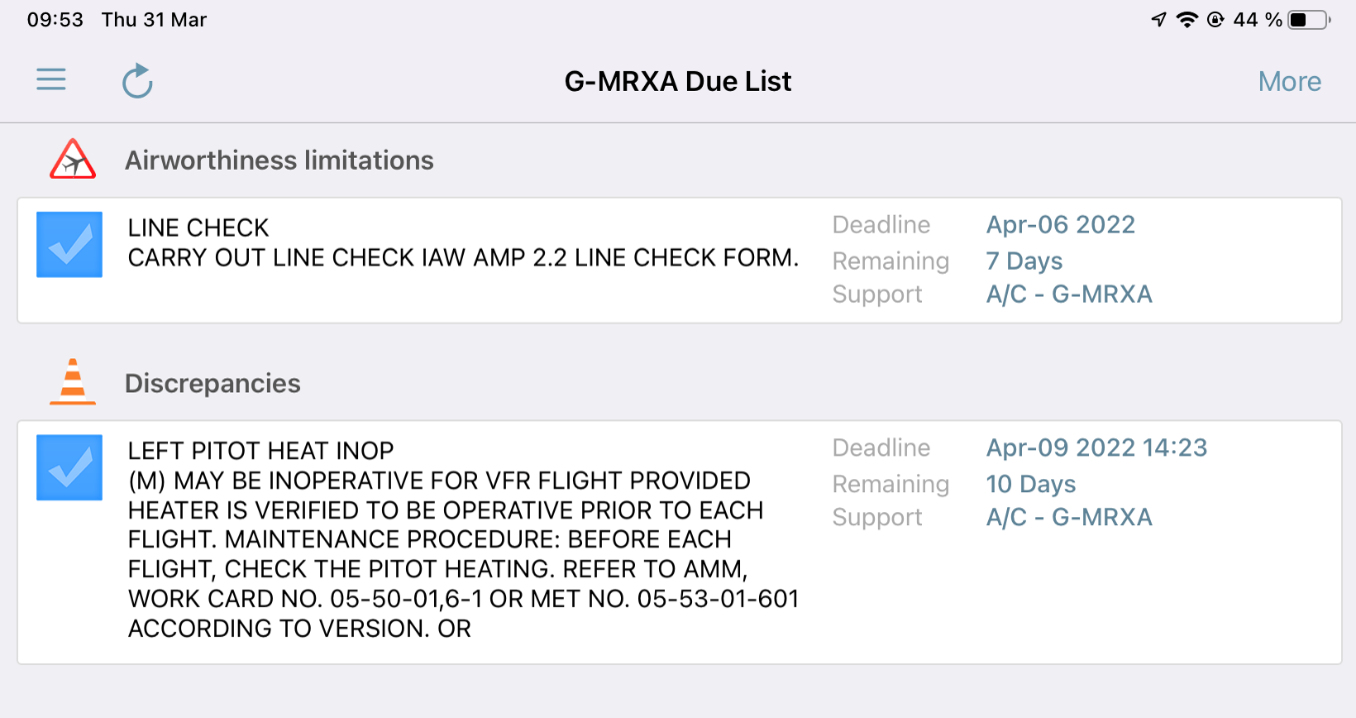
Due List
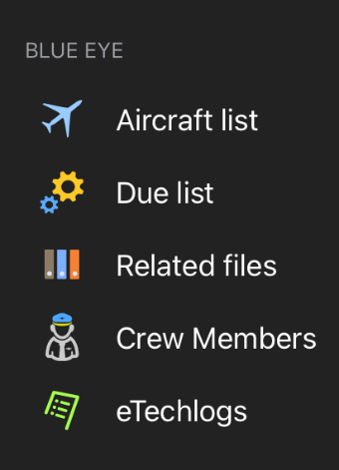
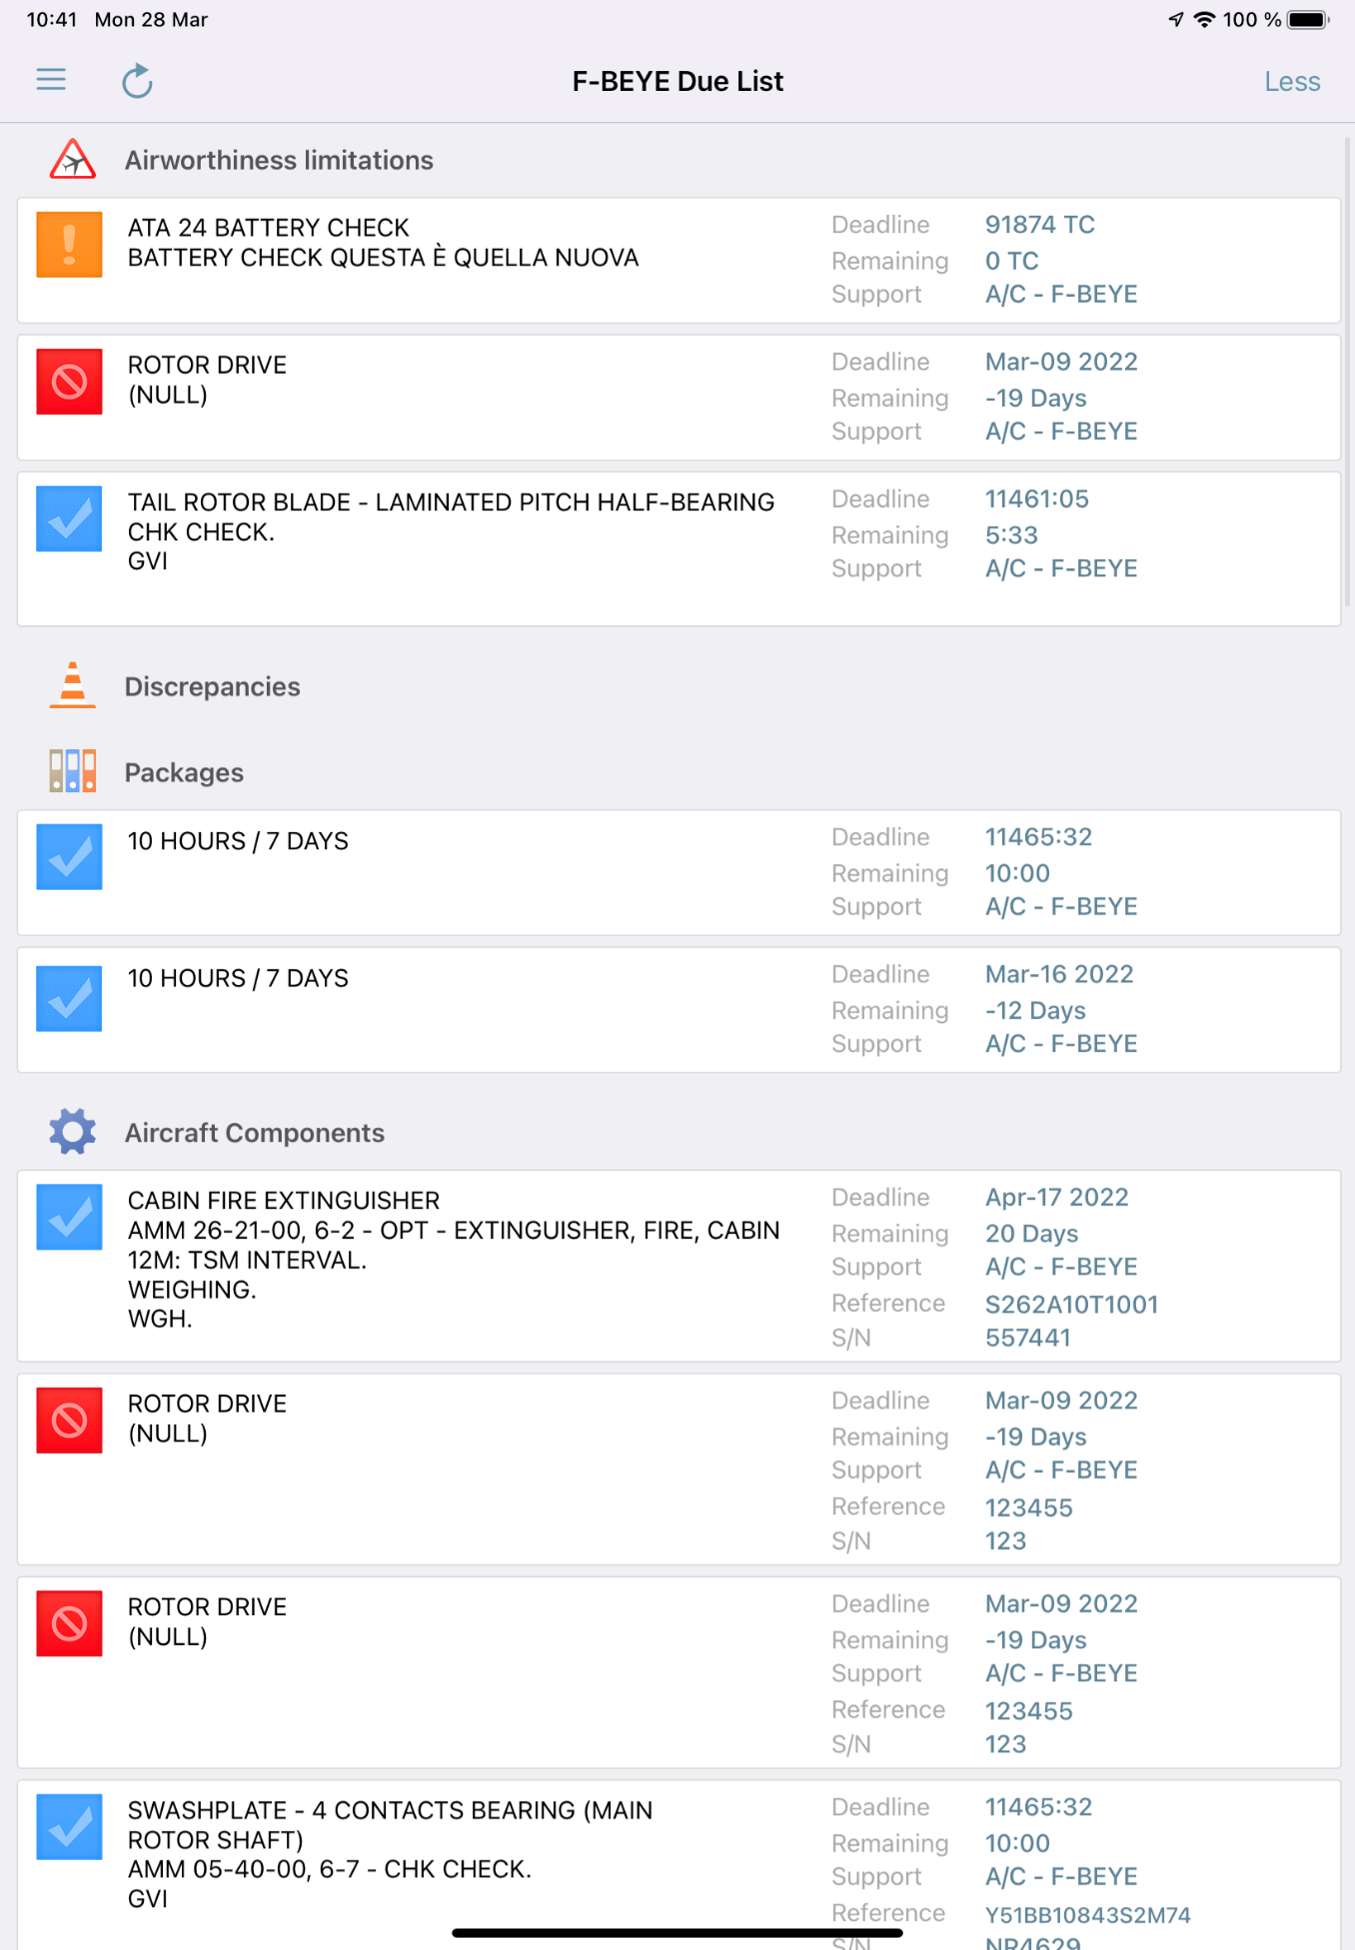
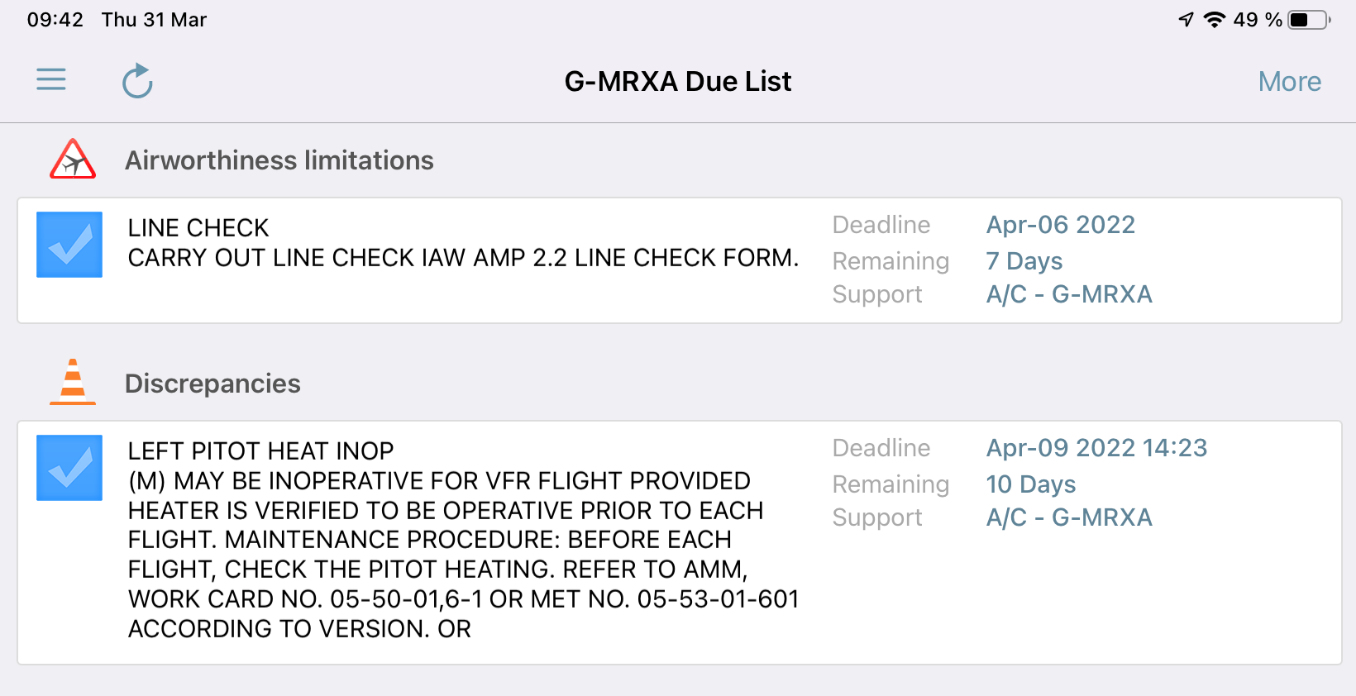
You need to check the due list that will inform you about the airworthiness status of the aircraft. Click on the ‘Menu’ button and tap on ‘Due List’.
If you only have blue flags, you can fly. Otherwise, your aircraft is grounded and you need to call your technical staff for more information.
When you tap on ‘More’, you access the aircraft limitations that will be due within the next 30 days, the next 30 flight hours, the next 30 engine cycles, the next 30 landing cycles.
The ‘Airworthiness Limitations’ list gathers the very next limitations for each unit (calendar, hours, engine cycles…).
The discrepancy section is where you will see the open discrepancies whether they are differed under an MEL or not.
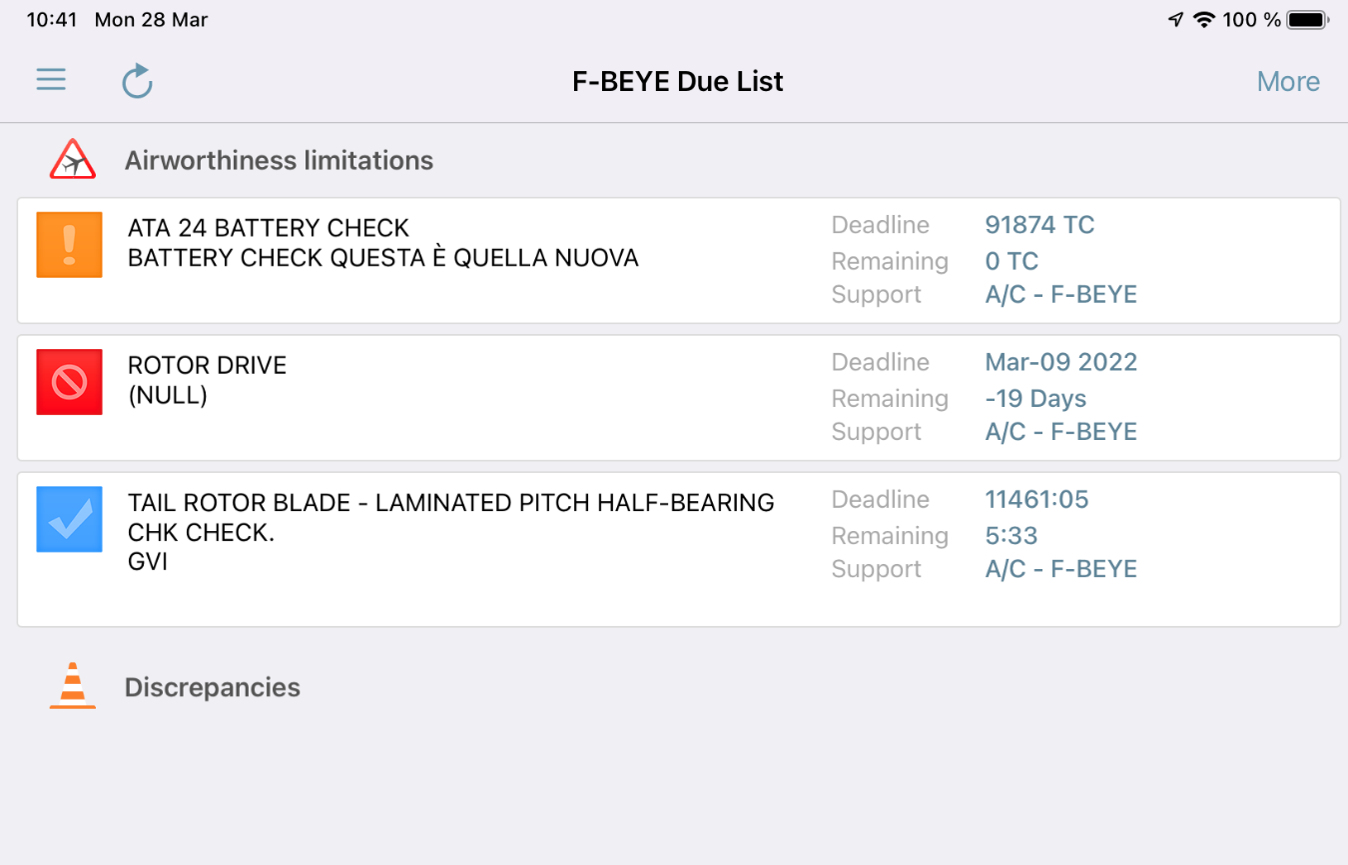
Here is an example of what you could see after taping on ‘More’.
Techlog Creation
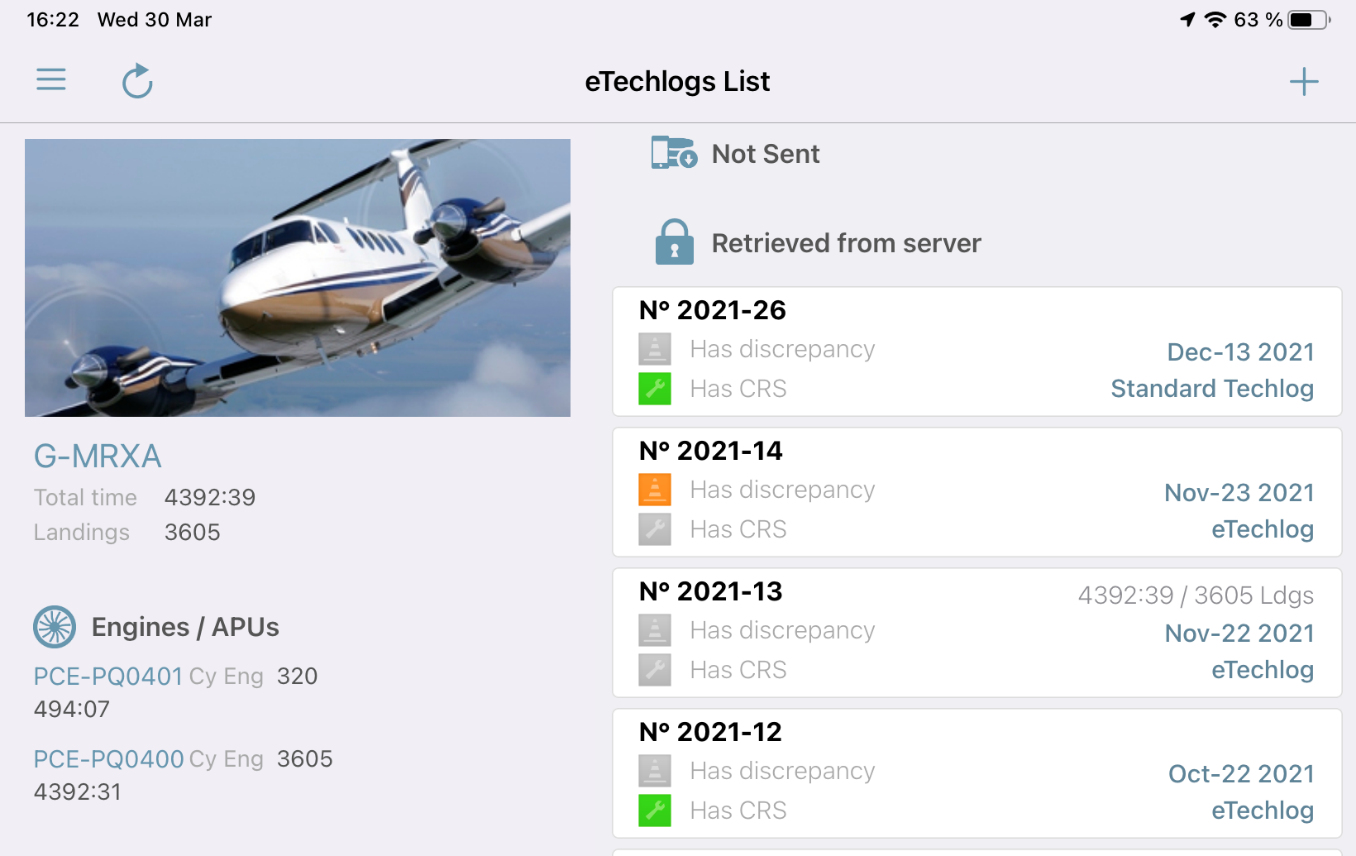
Open the Menu and select the ‘eTechlogs’ page.
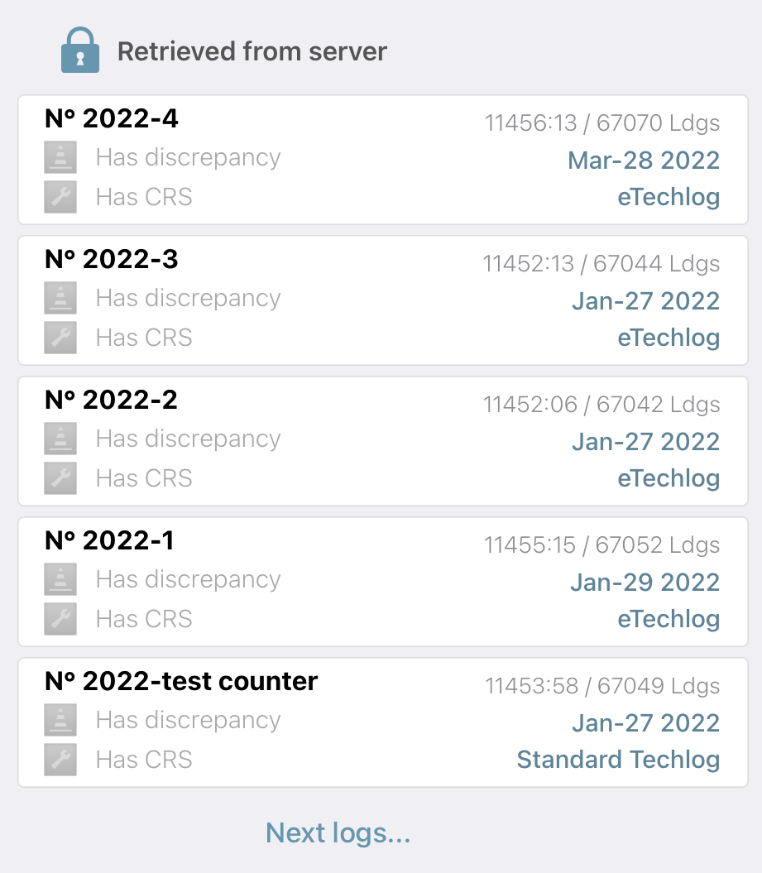
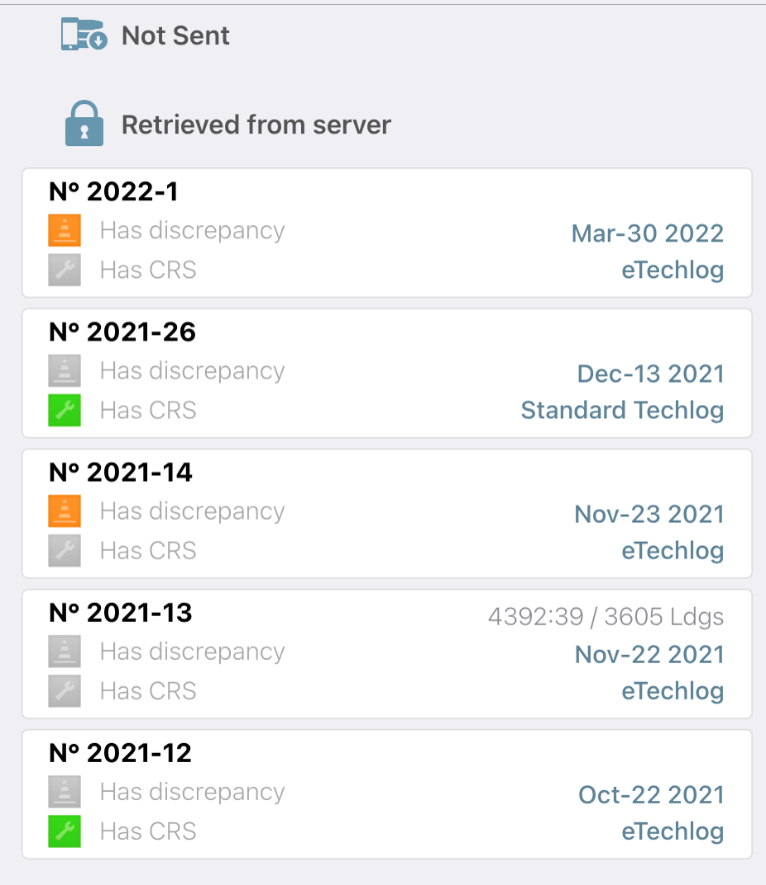
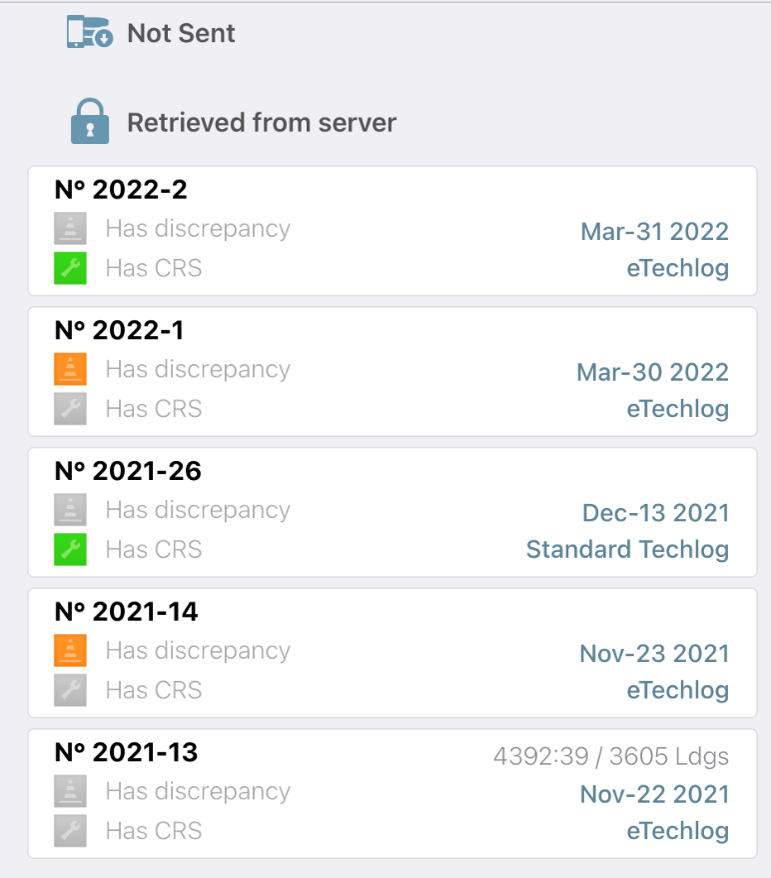
In the ‘Retrieved from server’ section, you will see the 5 last sent techlogs.
If you click on ‘Next Logs…’ under the last 5 sent techlogs, more logs will be displayed.
On the left side of the screen, there is a summary of the selected aircraft. Picture, registration, current total time, landing status and associated engines and APUs if applicable.
Below, there is a summary of the airworthiness limitations. You will know at one glance if your aircraft is in airworthy condition or not.
Tap on the plus button to start creating a new log.
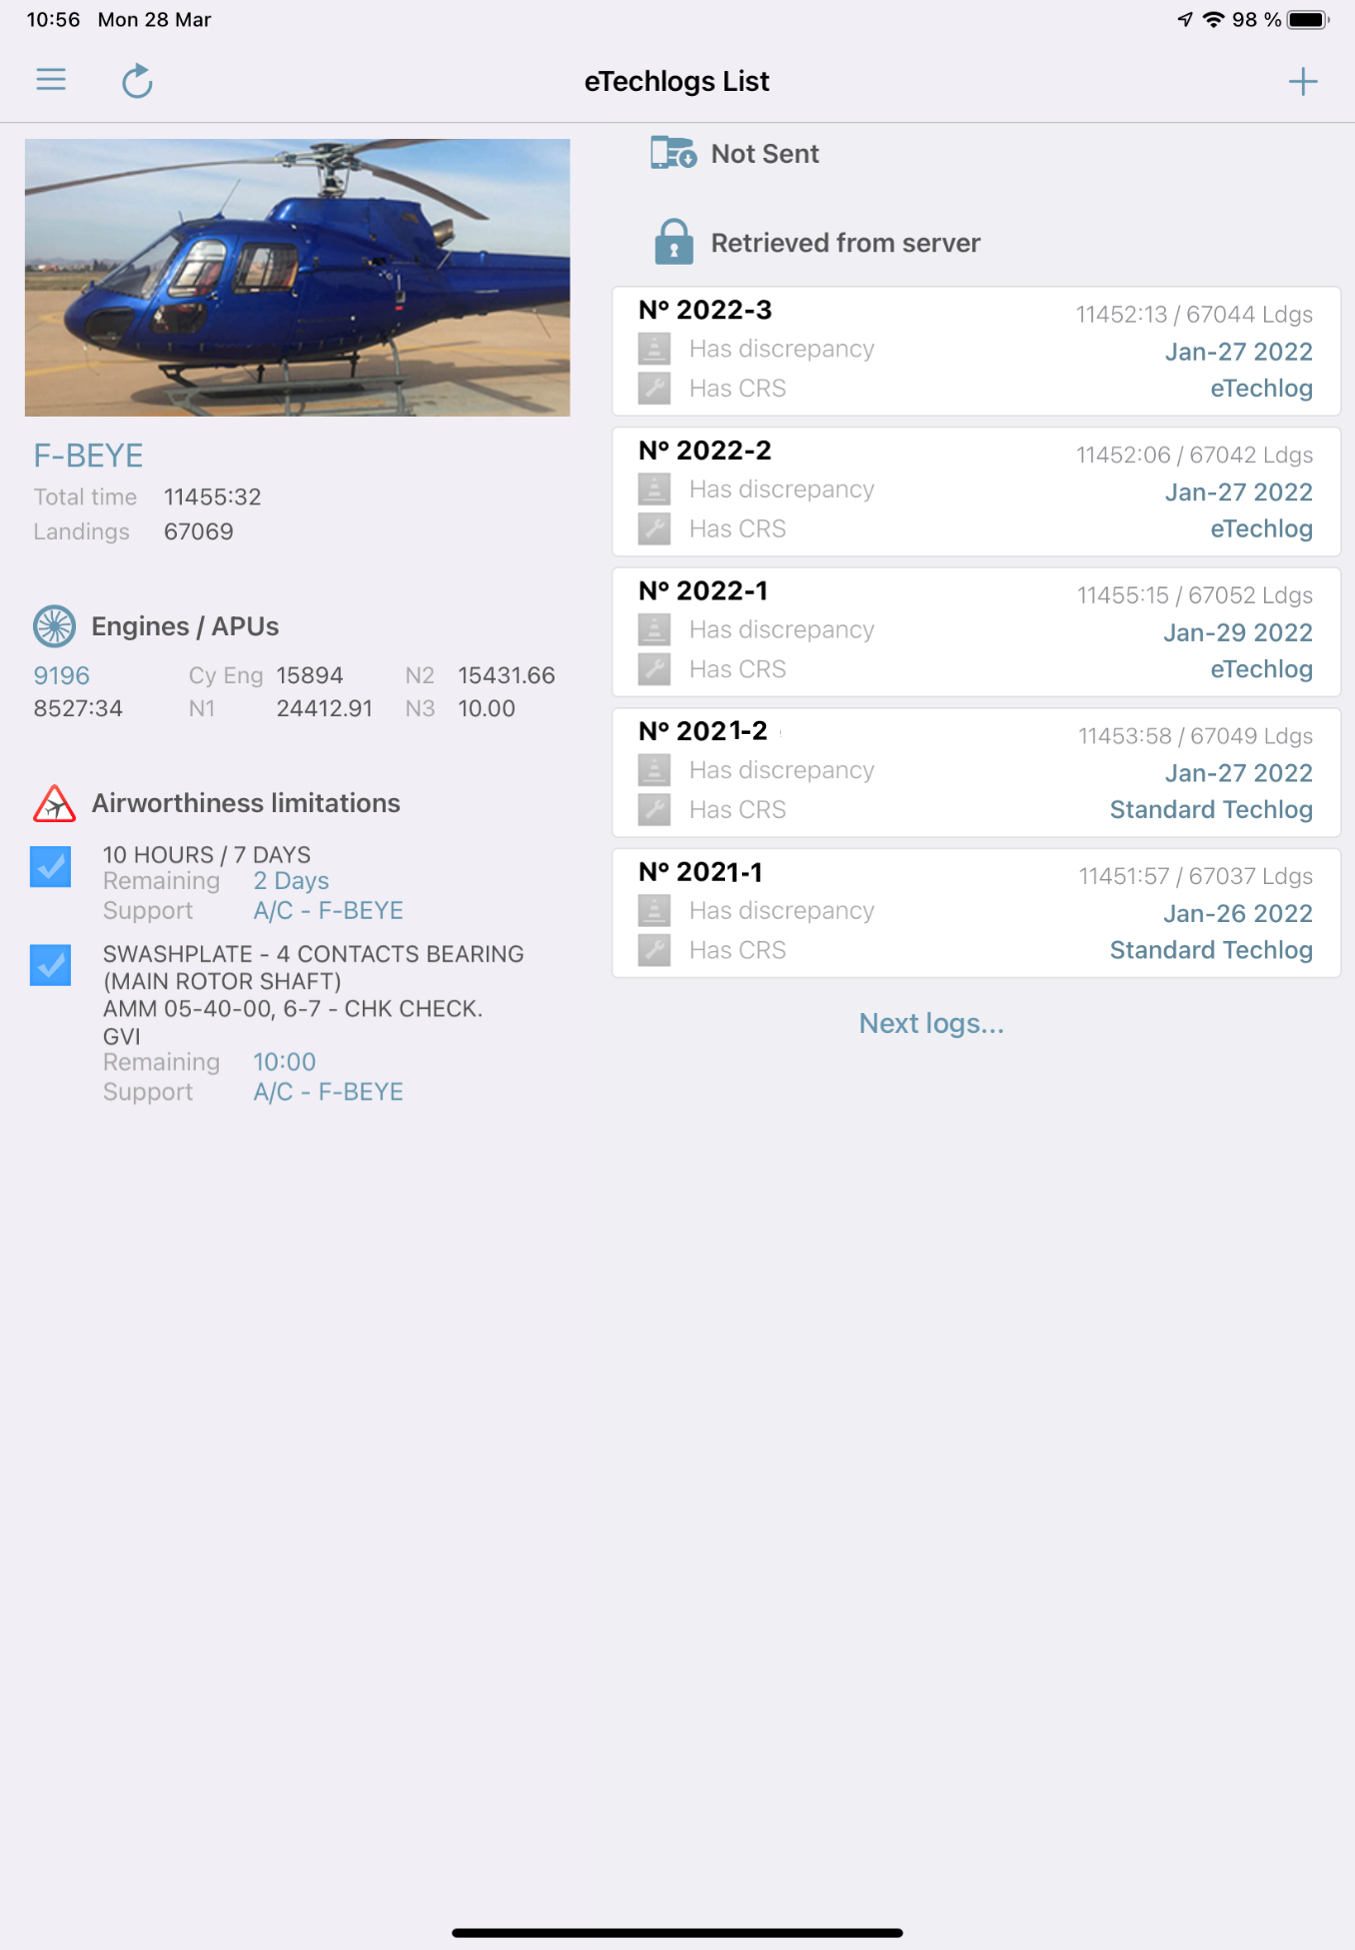
On top of the screen, on the left-hand corner, you will see the techlog number. It is the 4th techlog of the year 2022.
This cannot be changed but you can modify the date by tapping on this box.

On the right side of the screen, there is the Quick Flight Mode. We will see later how to use it.
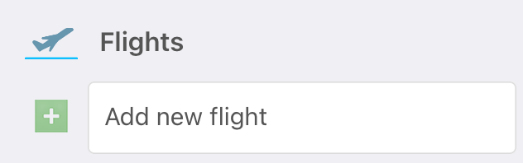
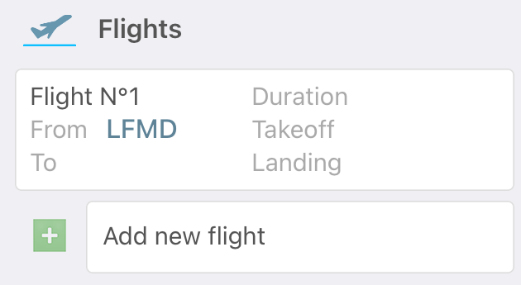
Tap on ’Add new flight’ in the column on the left.
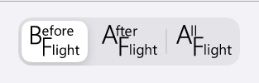
Before Flight
A new form appears.
On top of the screen, in the middle, the filter is now on ‘Before flight’.
A new flight box appears in the ‘Flights’ section in the column on the left.
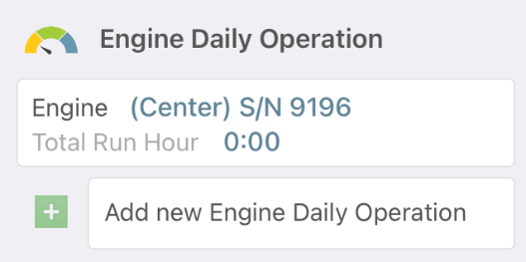
One engine daily operation has been created for the engine installed on the aircraft in the ‘Engine Daily Operation’ in the column on the left.
The crew and total fuel departure fields information is retrieved from the last sent techlog.
The ‘from’ field information is retrieved from the last sent techlog.
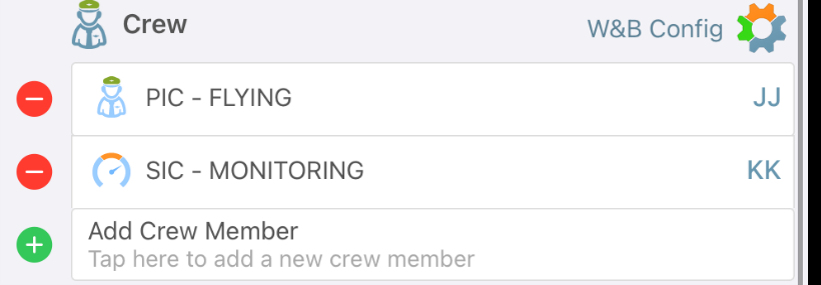
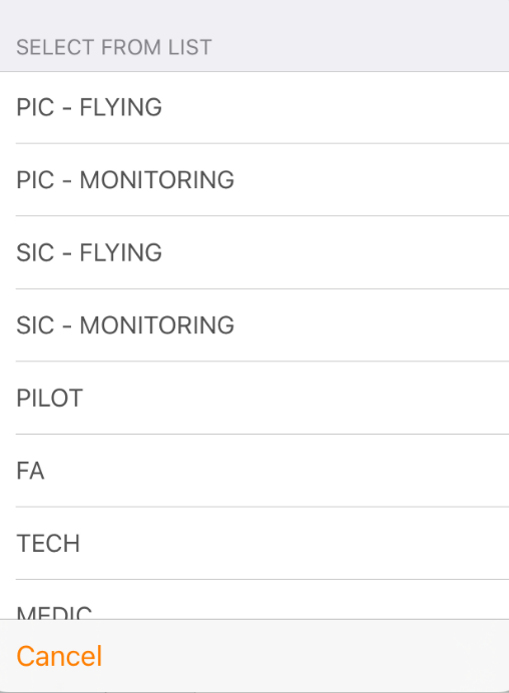
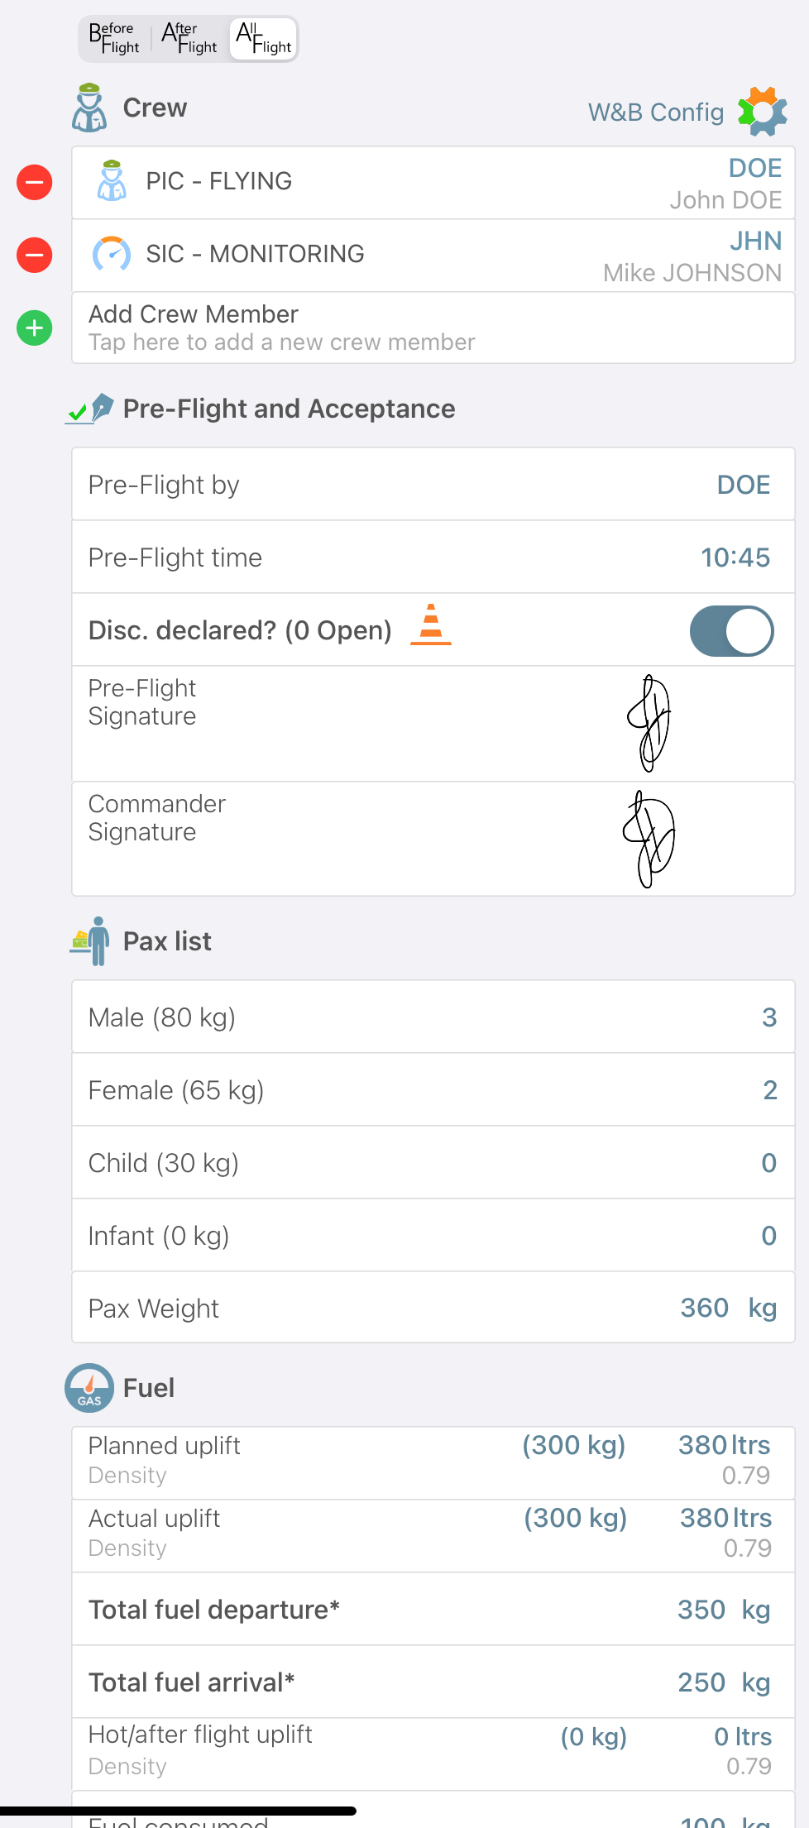
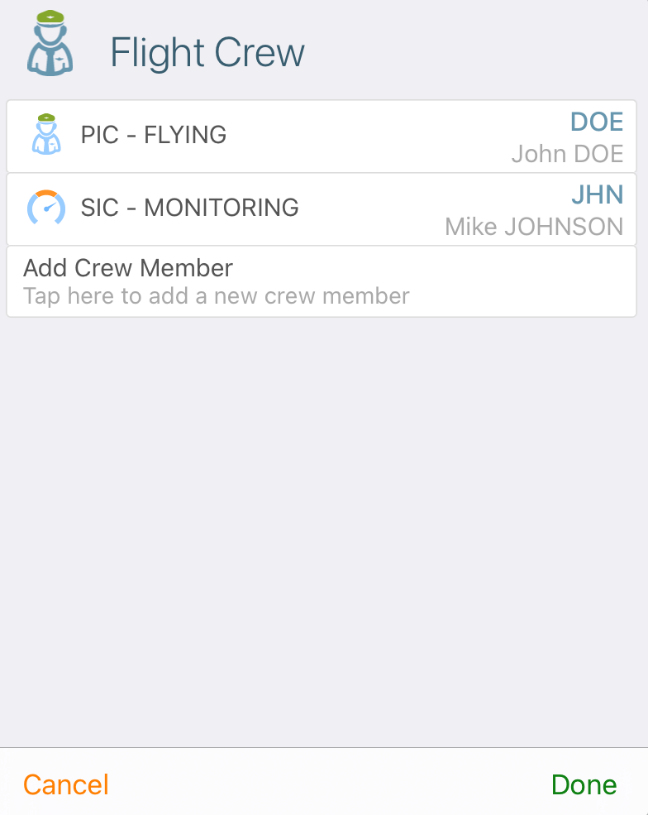
a. Crew
You can modify the crew by tapping on the trigram and selecting a crew member from the list displayed in the pop-up window.
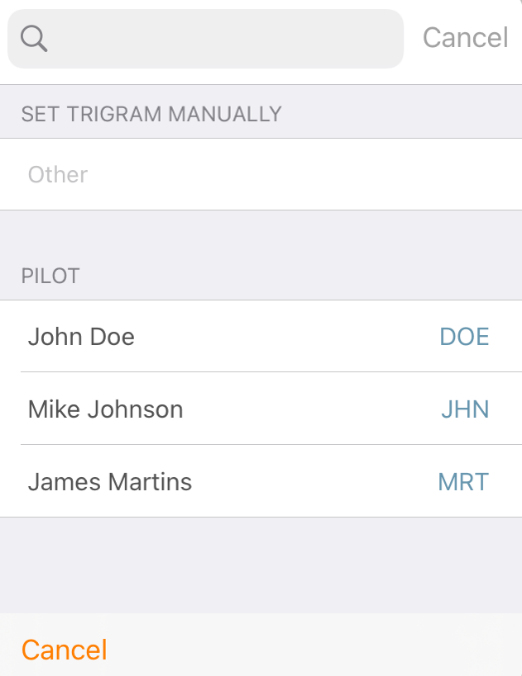
You can modify the role of the crew member by tapping on the role and selecting one from the list displayed in the pop-up window.
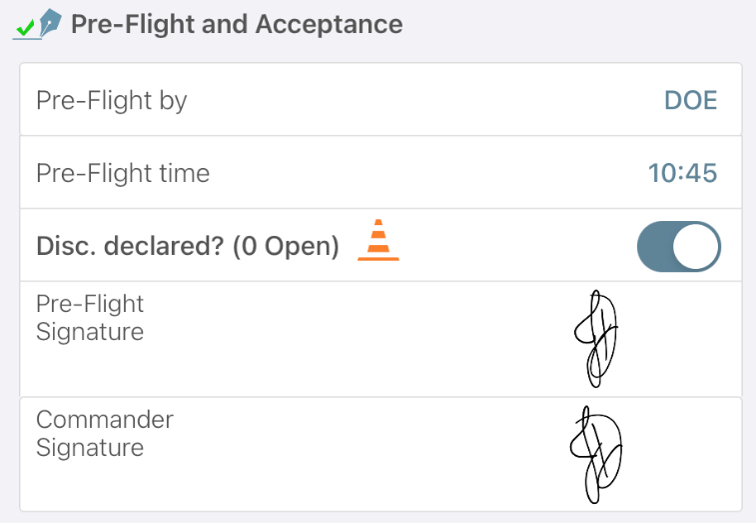
b. Preflight & Acceptance
Tap on the toggle of the ‘Disc. Declared?’ field to state that there is no open discrepancy.
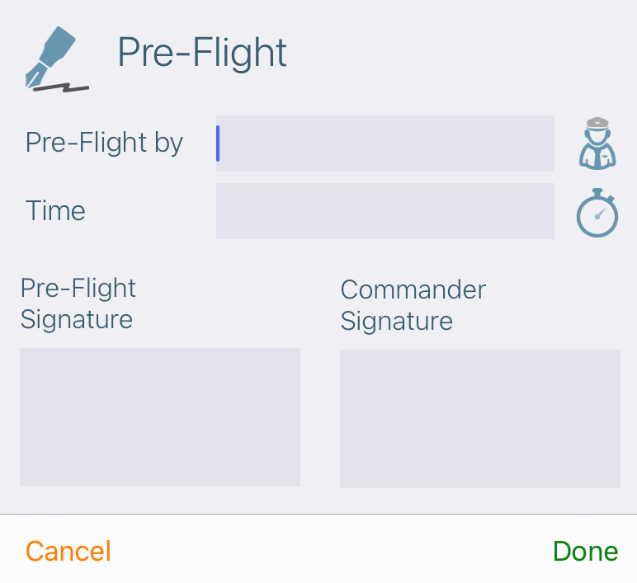
Sign the Pre-flight.
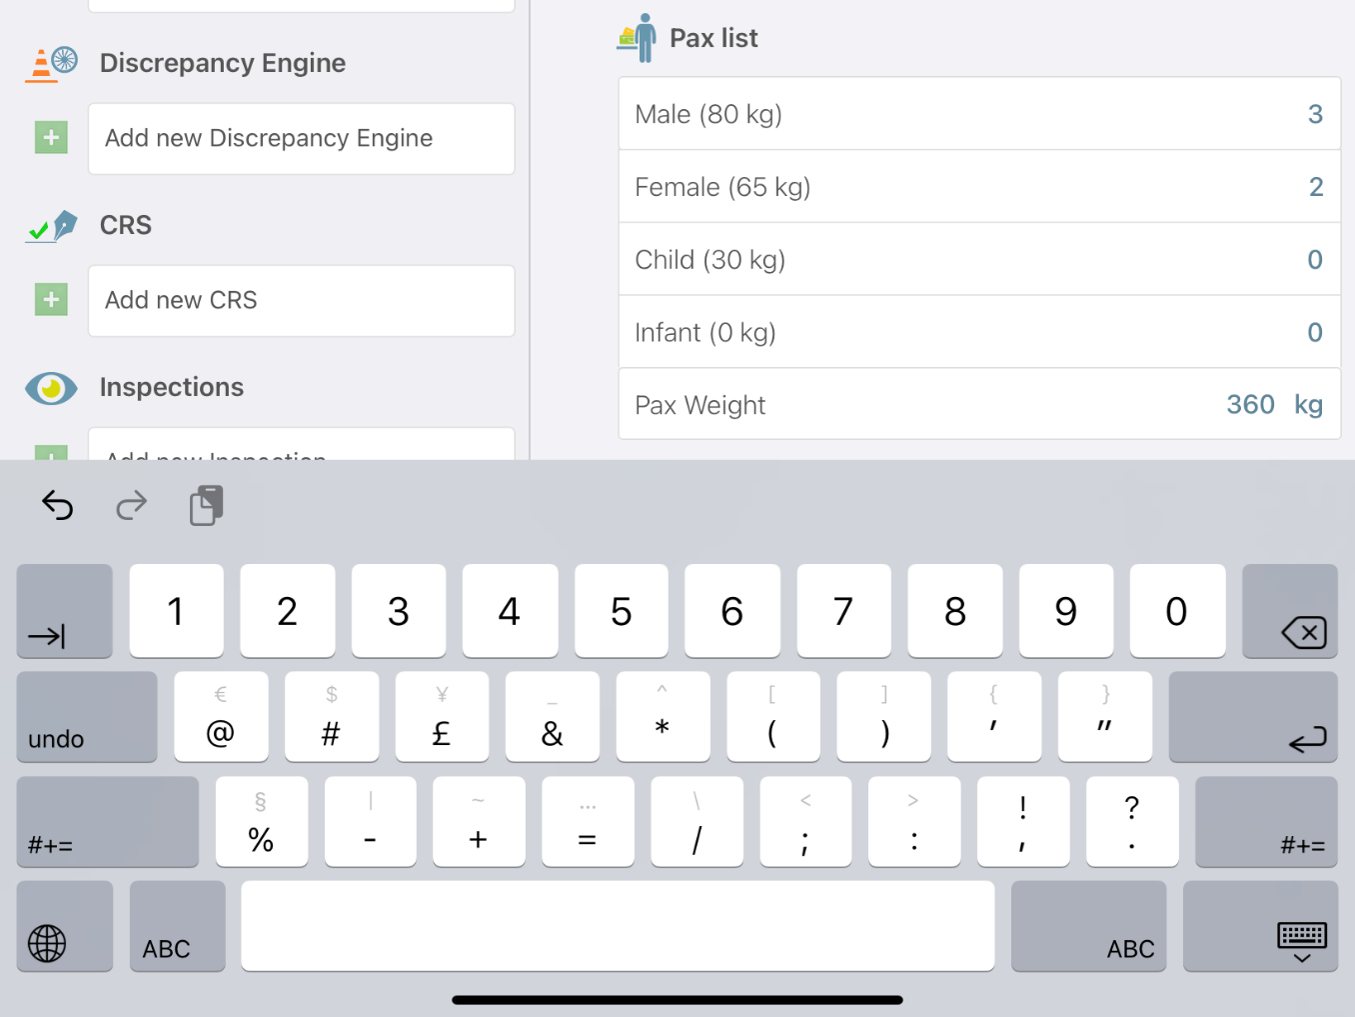
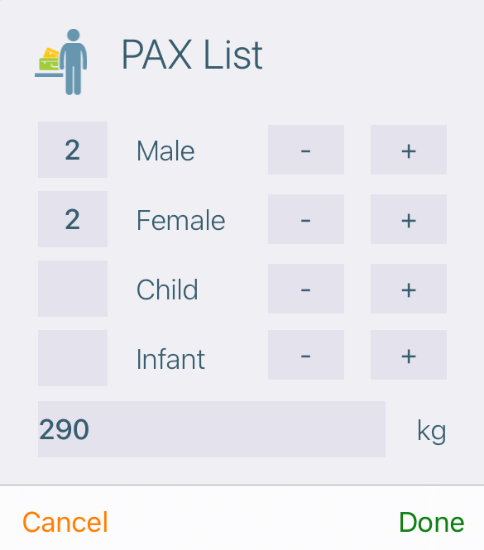
c. Pax List
The weight of the pax is set in the aircraft information in the ‘Aircraft and Engines’ module of the desktop version.
Tap on the right side of the pax box to override the pax number.
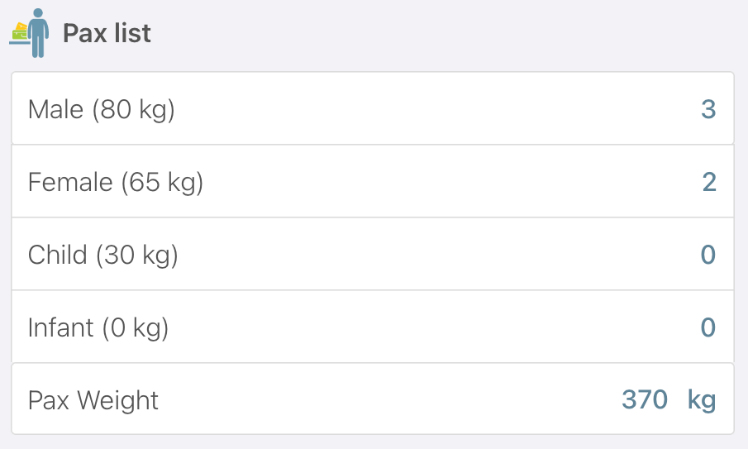
When you tap on the pax number, a keyboard appears to allow you to override the value.
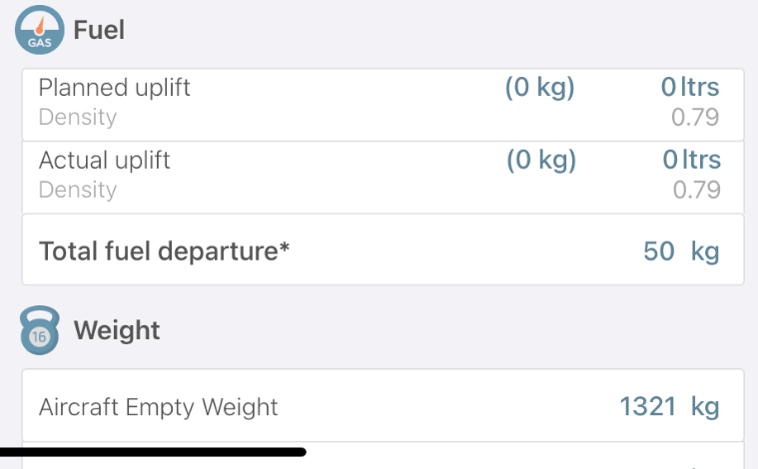
d. Fuel
You can specify the planned uplift as stated on your flight plan and the actual uplift that you performed before the flight.
Tap on the value of the planned uplift field or actual uplift field to override the information.
The system will display the total fuel at departure based on the actual uplift plus what remained in the fuel tank at the end of the last flight.

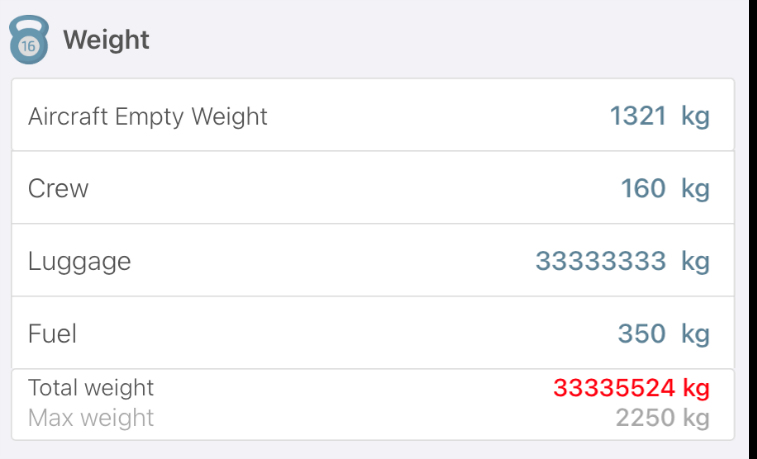
e. Weight
The weight section.
Empty weight is automatically filled based on the information you set up on the desktop version.
The crew weight is taken from the last techlog.
If you exceed the maximum take off weight set on the desktop version, you get an alert.
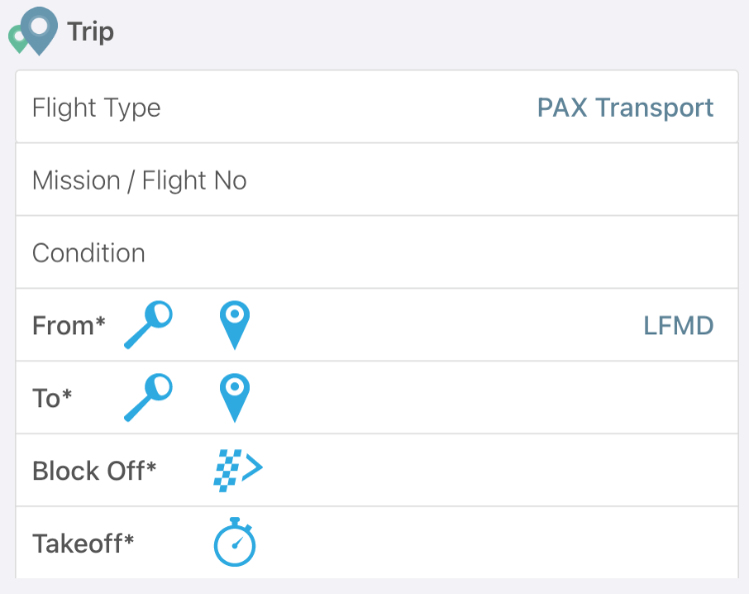
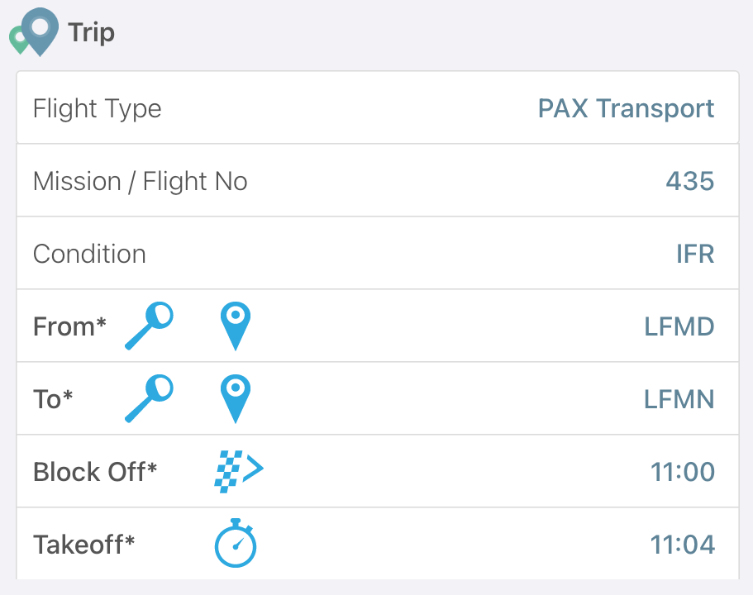
f. Trip
The trip section.
You can modify the flight type and the condition by tapping on the ‘Flight Type’ field or the ‘Condition’ field and selecting an entity from the list that will be displayed in a pop-up window.
‘Mission / Flight No’ is a free text field.
Regarding the ‘From’ and ‘To’ fields, you can either tap on the pin to look from the nearest airport in the area or you can directly type the name of the airport.
Tap on the ‘Block Off’ and ‘Takeoff’ fields to type the time manually.
In the ‘Counters’ section, you will find the specific counters that you set up on the desktop.

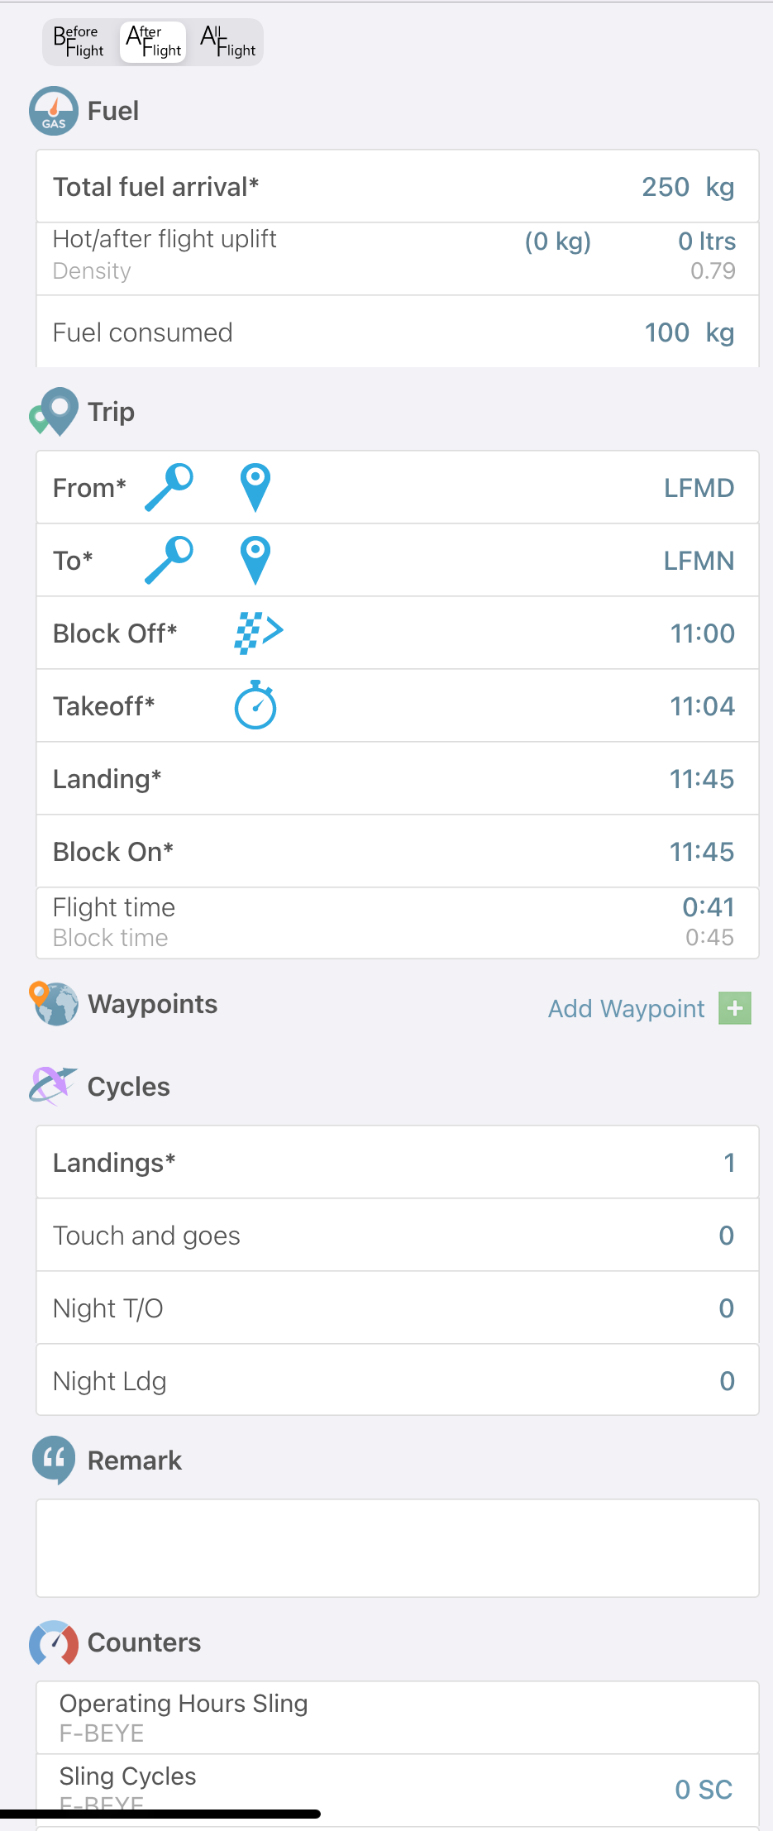
After Flight
If you filter on ‘After Flight’, the app displays more fields: total fuel arrival, landing, block on, flight time (that will be automatically calculated), landing cycles and counters.
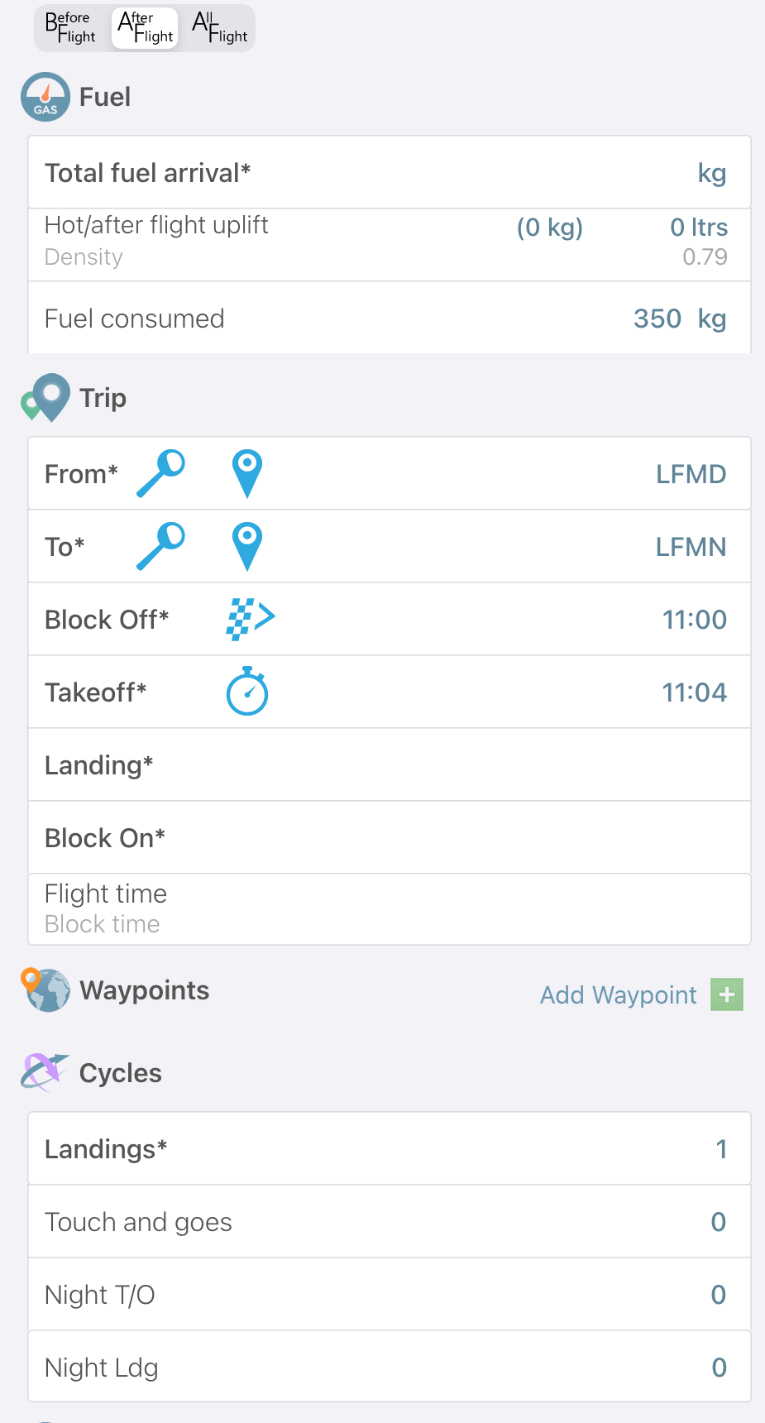
Here is the ‘After Flight’ section filled in.
All Flight
If you filter by ‘All Flight’, the app gathers the information of the ‘Before Flight’ and ‘After Flight’ sections.
You can add as many flights as needed by tapping on ‘Add new flight’ and repeating the procedure.
Once you are done, tap on ‘Validate Flight’ on the top right-hand corner.
Sending Techlogs
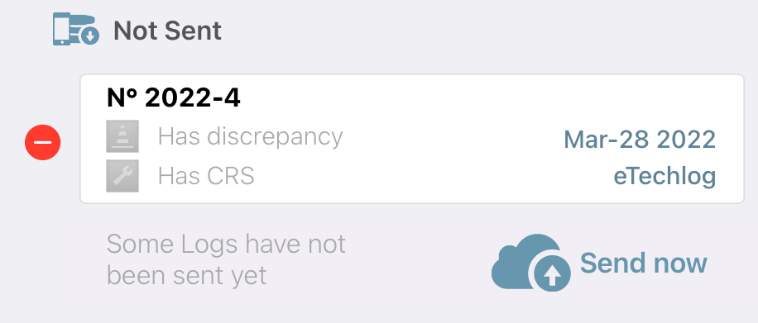
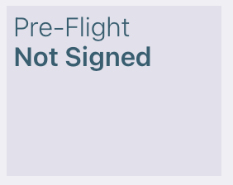
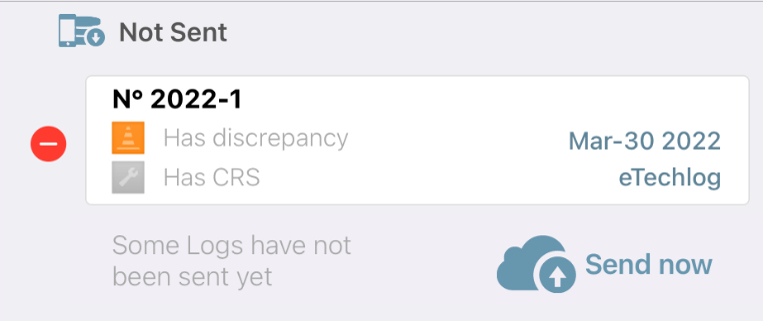
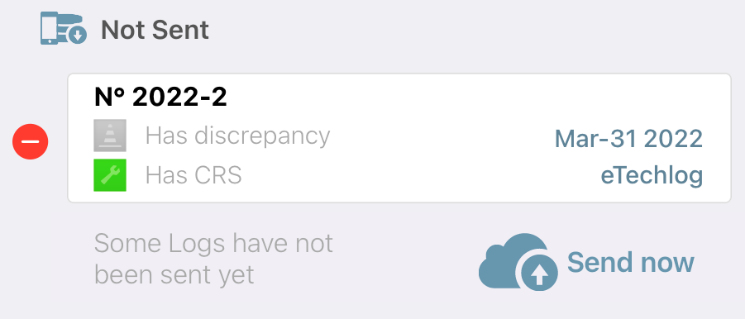
The techlog we just filled in is now in the ‘Not Sent’ section.
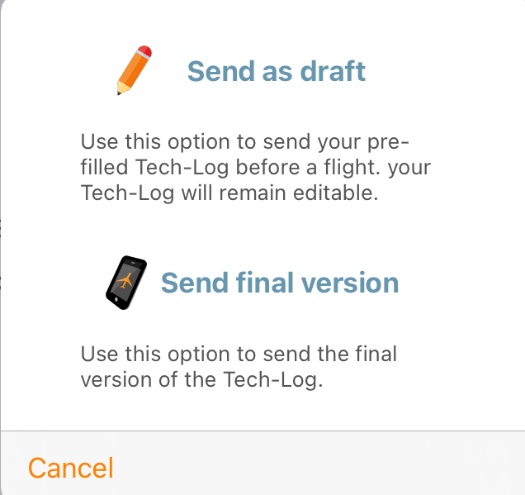
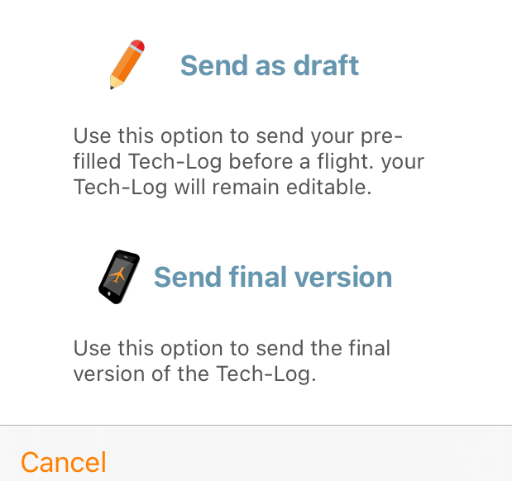
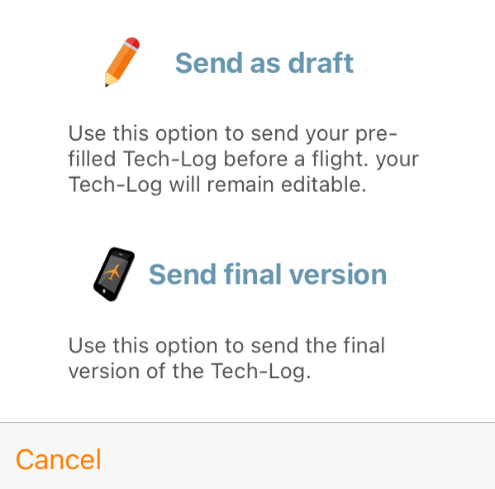
If you tap on the ’Send Now’ button, you will be able to choose between sending the techlog as draft and sending final version.
If you tap on the ’Send Now’ button, you will be able to choose between sending the techlog as draft and sending final version.
‘Send as draft’ is the equivalent of leaving a hard copy on the ground before taking off.
‘Send final version’ allows you to close the techlog.
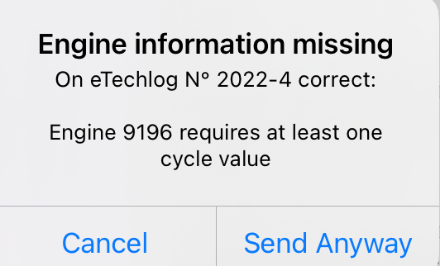
If you tap on ‘Send Final Version’ and an information is missing, you will get a message explaining what needs to be corrected. You will still be free to send the techlog anyway.
If you tap on ‘Send final version’ the log goes from the ‘Not Sent’ section to the ‘Retrieved from server’ section.
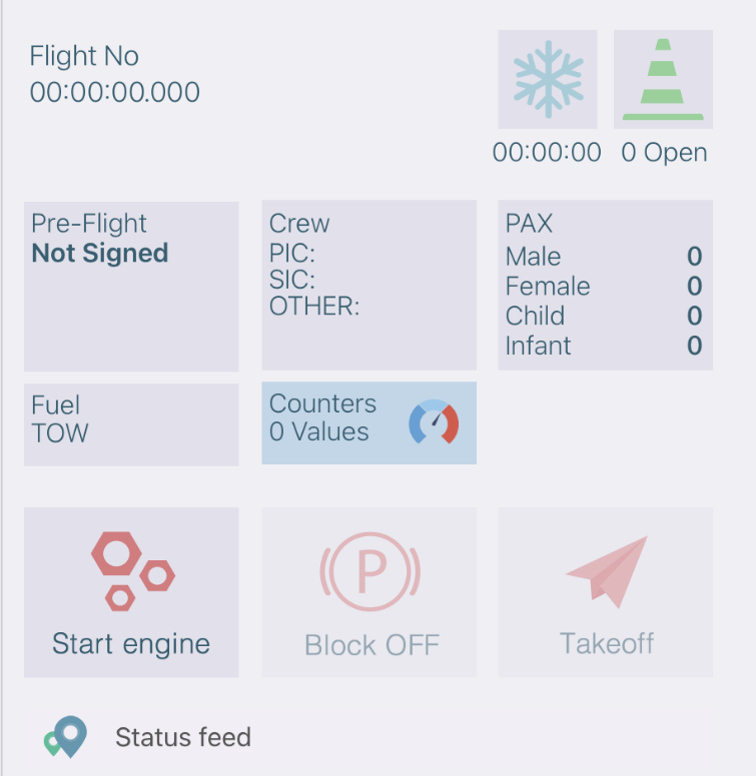
Quick Flight Mode
This option allows you to fill in eTechlogs in a quicker way to be more efficient during operation.
Tap on the ‘Pre-flight’ box to fill in the information and sign off.
a. Preflight
You can either type the trigram of the person who performed the pre-flight or you can tap on the button next to the field to select a crew member from the list. Same for the time, you can either type it (HH:MM format) or tap on the clock.
Tap on the signature boxes to sign.
b. Crew
Tap on the Crew box to fill in the required information. It is the same principle as the classic eTechlog.
c. Pax List
Tap on the PAX box to fill in the required information. You can either tap on the plus or minus button or type the number of pax.
The weight can be overridden by tapping on the field and typing the correct value.
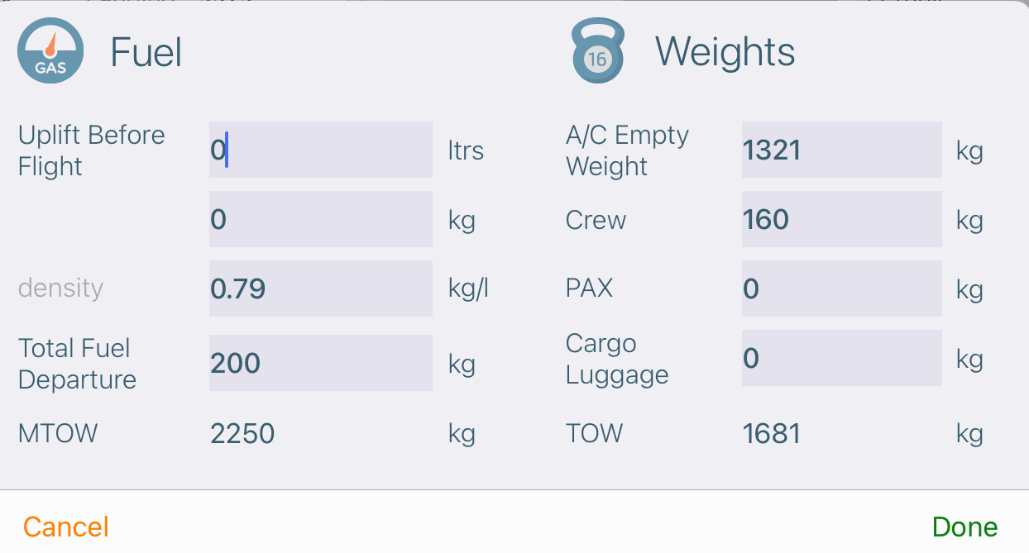
d. Fuel/TOW
If you tap on the Fuel/TOW box you will be able to fill in the information related to the fuel and the weight.
This pop-up window contains fields to fill in the information related to the fuel and the weight.
e. The Flight
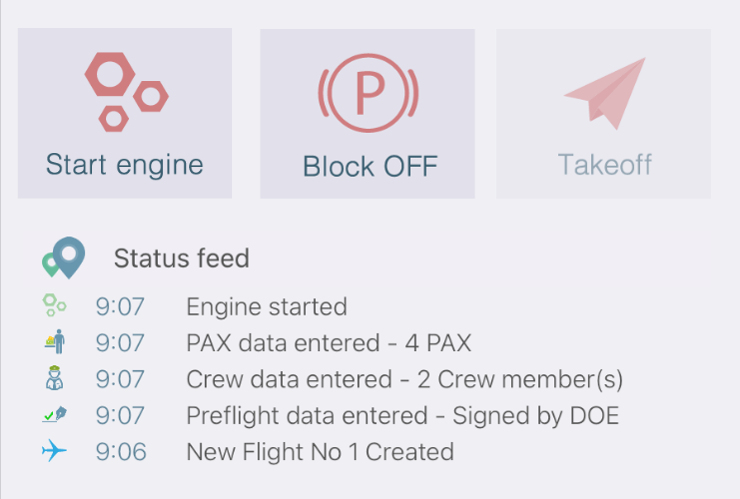
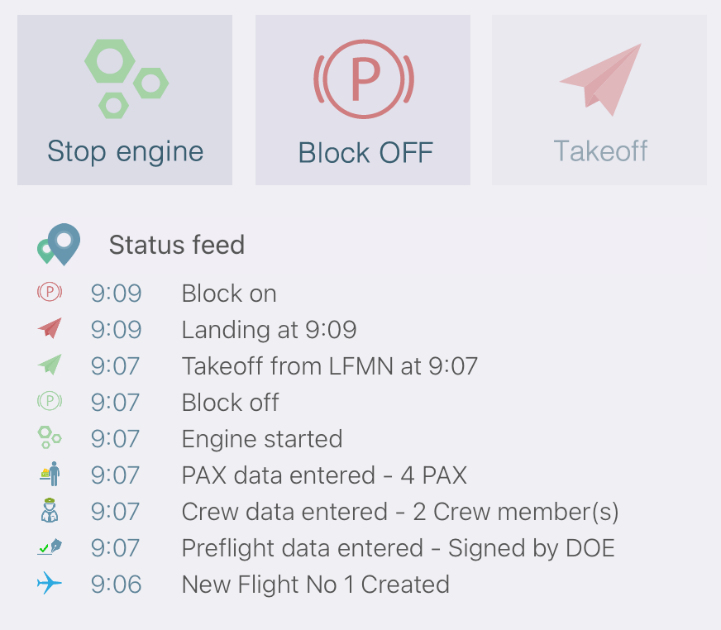
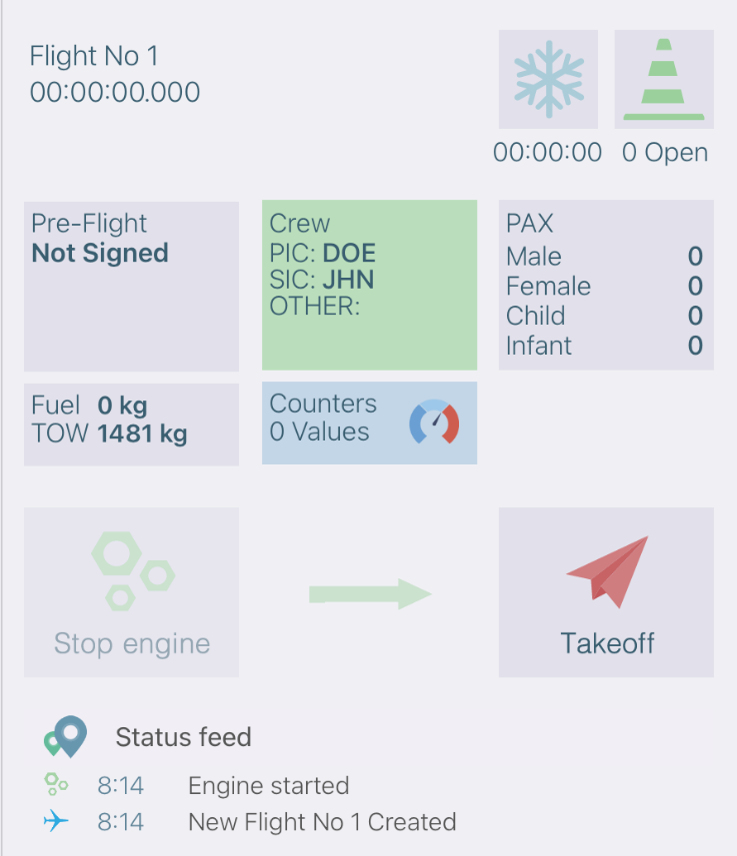
Fill in the fuel information and tap on ‘Start engine’, then tap on ‘Block OFF’. This updates the status feed.
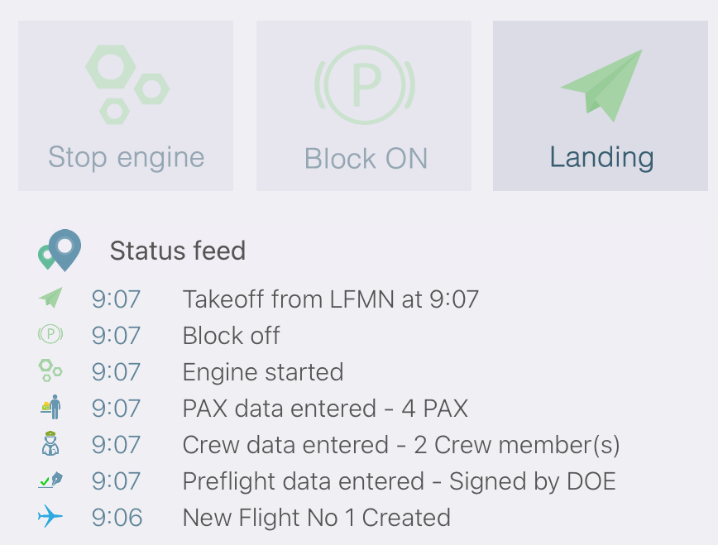
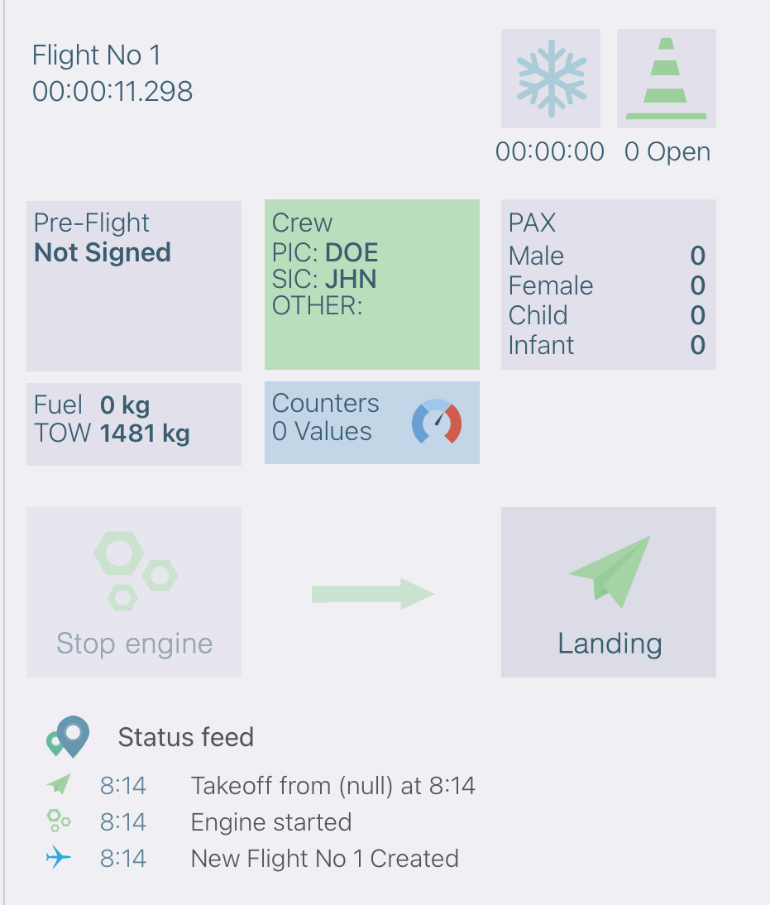
Tap on ‘Landing’ once you have landed.
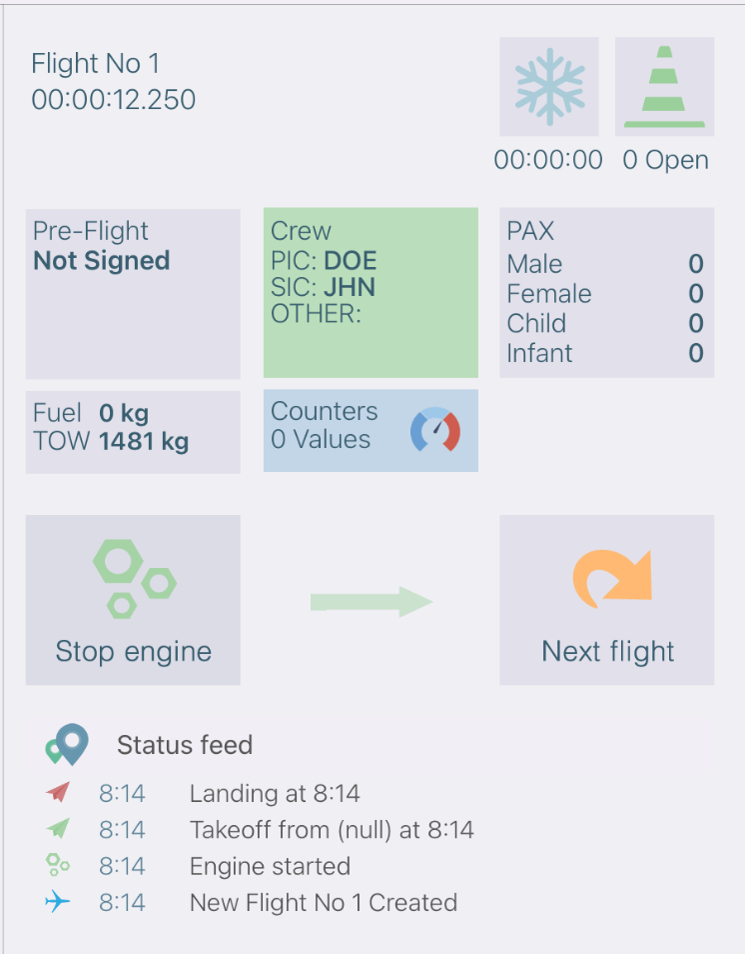
You can either tap on ‘Block ON’ to end the techlog or you can tap on ‘Next flight’.
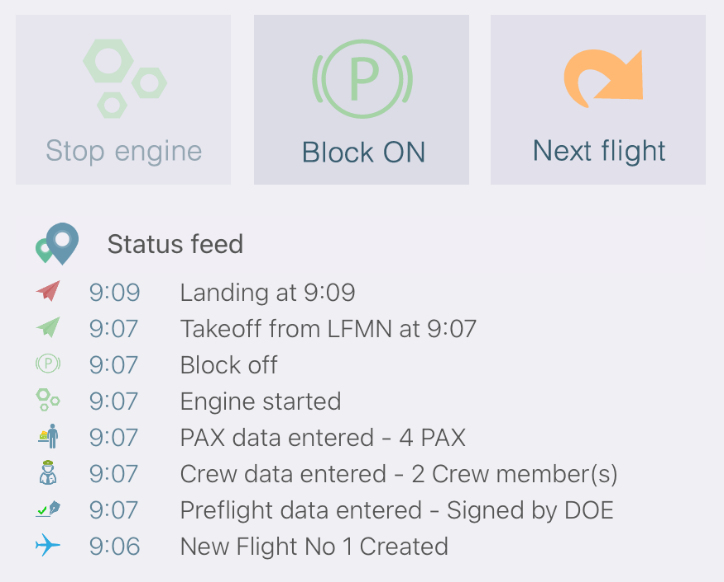
If you tap on ‘Block ON’, the app enables you to tap on ‘Stop engine’.
f. After Flight
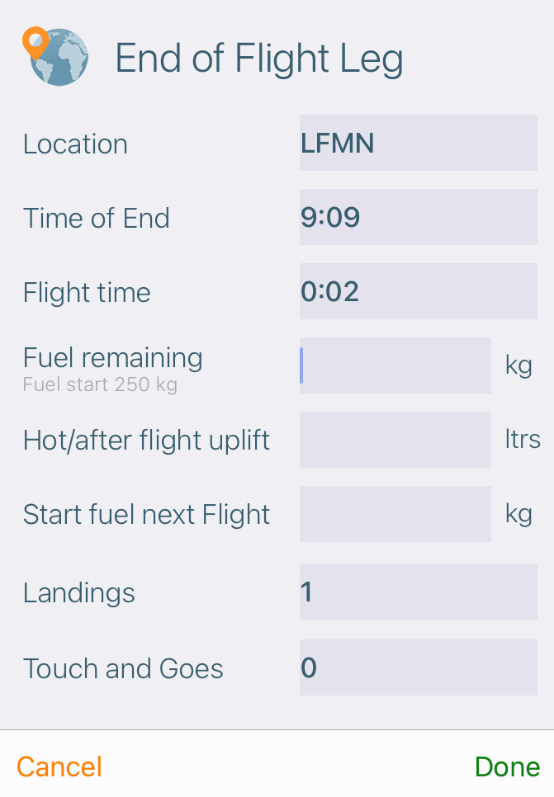
Tapping on 'Stop Engine' will display a window that will allow you to enter the after-flight information.
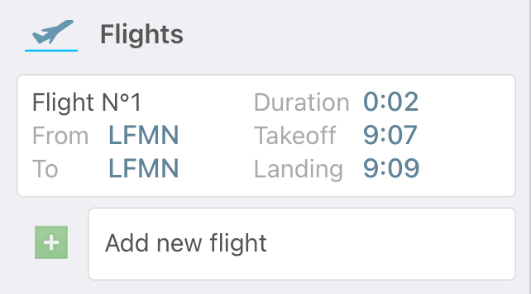
You can still tap on the flight box to display the basic techlog form and modify the information if needed.
Once you are done with the techlog, tap on ‘Done’.
Helicopter Mode
This option allows you to fill in helicopter eTechlogs in a quicker way to be more efficient during operations.
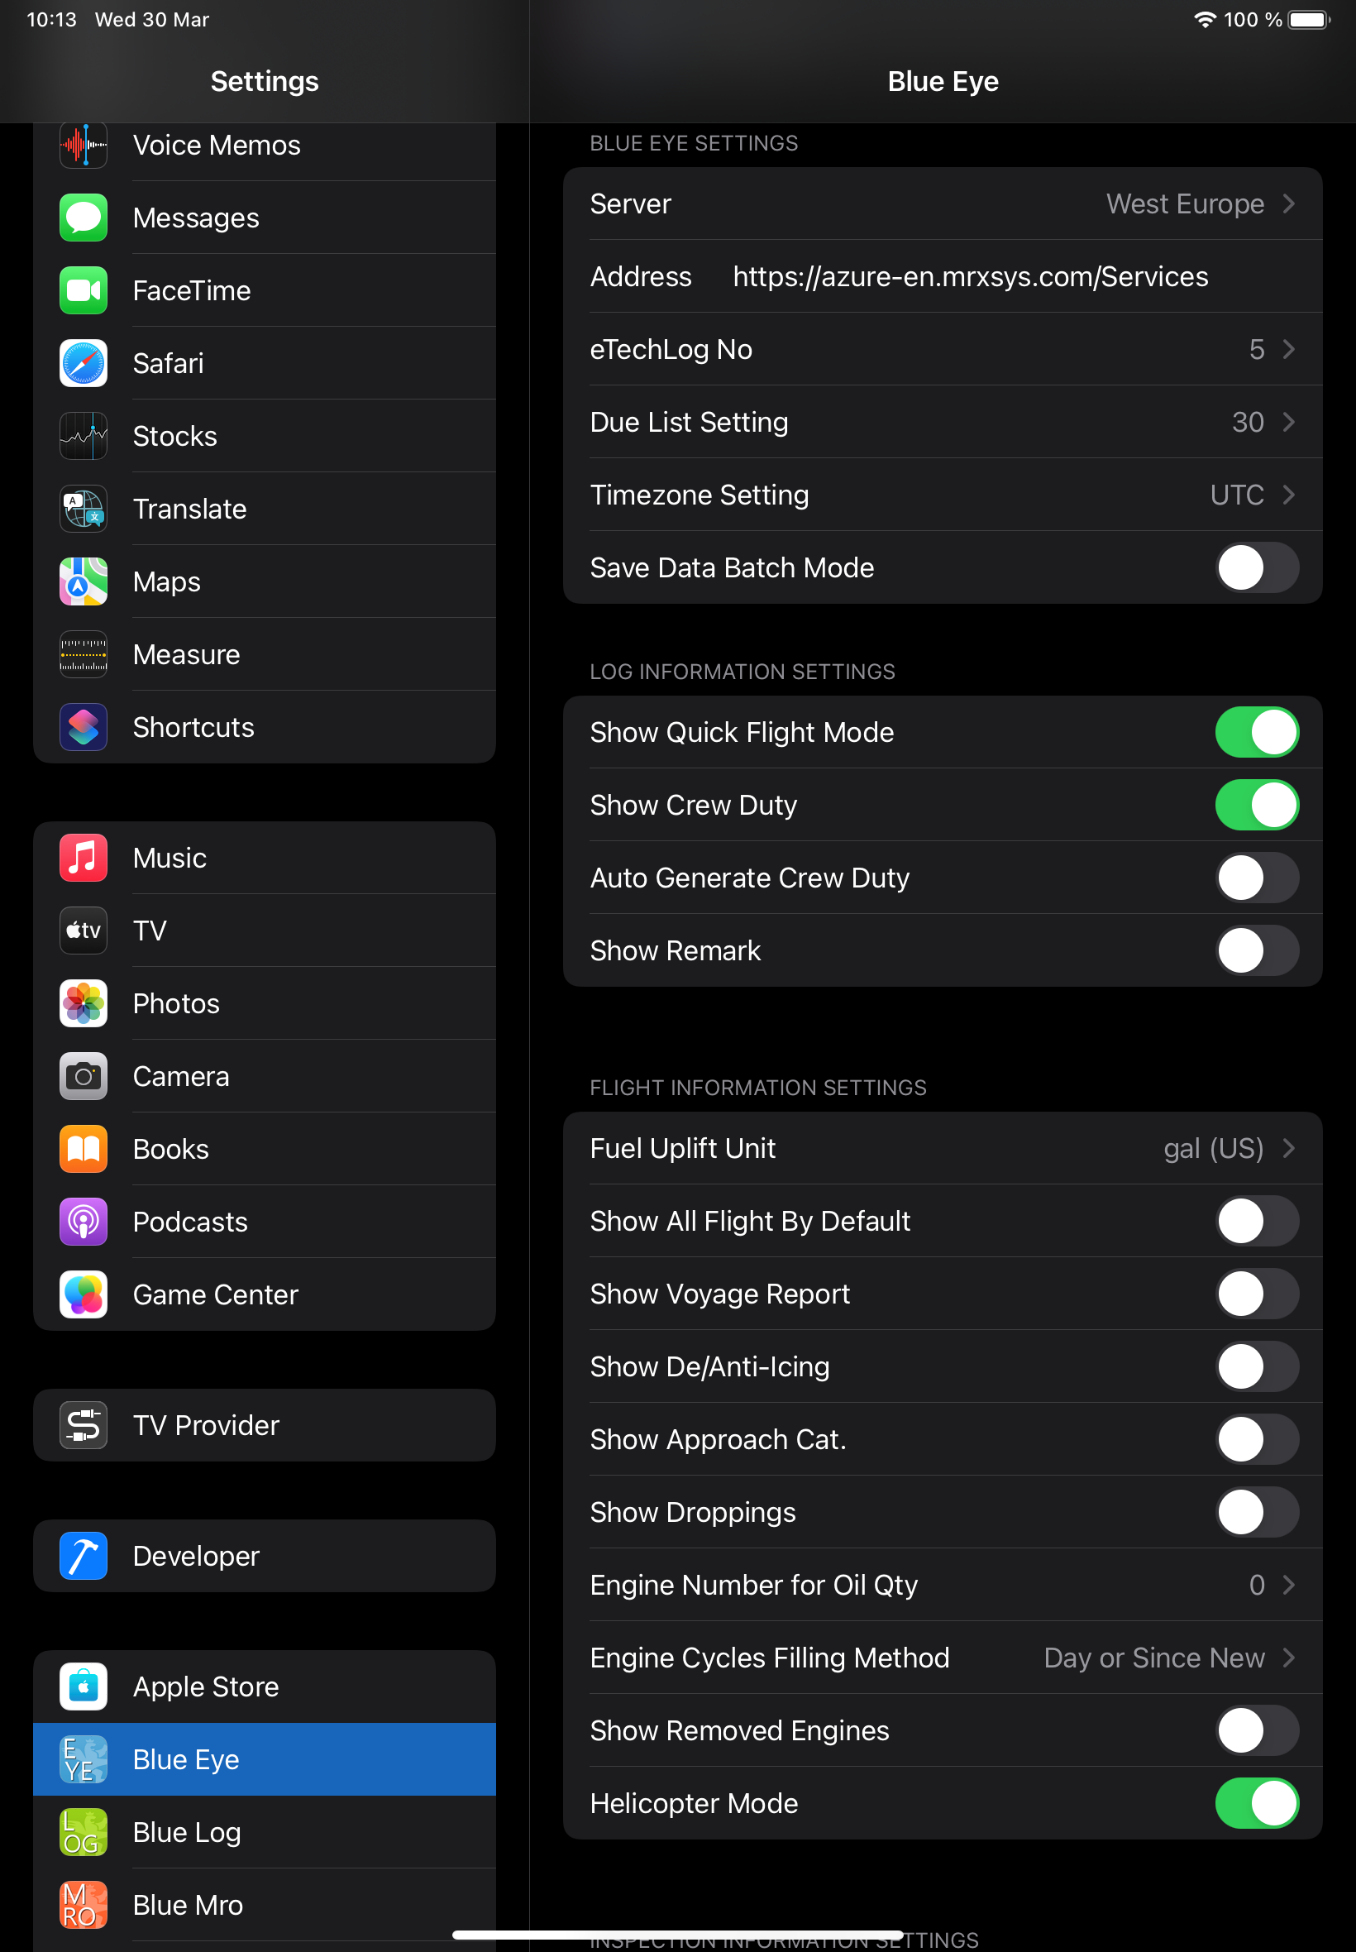
There is an option dedicated to helicopters, the ‘Helicopter Mode’. To benefit from it, you need to activate it in the Blue EYE iPad settings.
Here is what it looks like. It is the same principle as the quick flight mode (which is why you also need to activate the quick flight mode to display the helicopter mode) except that there is no ‘block off/block on’ button.

If you tap on ‘Start engine’, the ‘Takeoff’ button is not greyed out anymore and you can tap on it.
Once you tapped on ‘Takeoff’, the ‘Landing’ button appears. Tap on it once you have landed.
The ‘Next flight’ button appears. You can either perform another flight or stop the engine.
Discrepancy Reporting
Select your aircraft by tapping on it.
Go to the eTechlogs page.
Tap on the plus button in the top right-hand corner to create a new techlog.
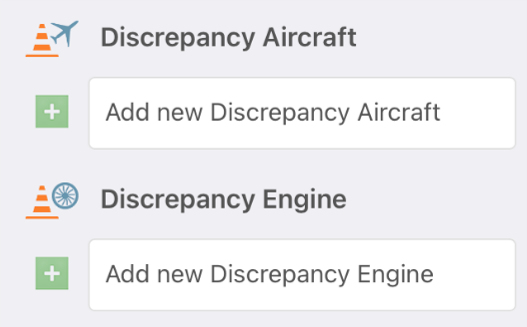
If the issue is related to the aircraft, tap on “add new discrepancy Aircraftâ€.
In the event of a problem related to one of the engines, tap on “Add new discrepany engineâ€.
Here we select “add new discrepancy engineâ€.
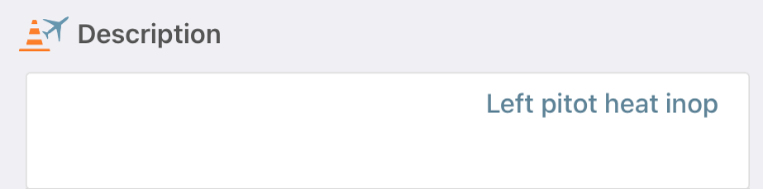
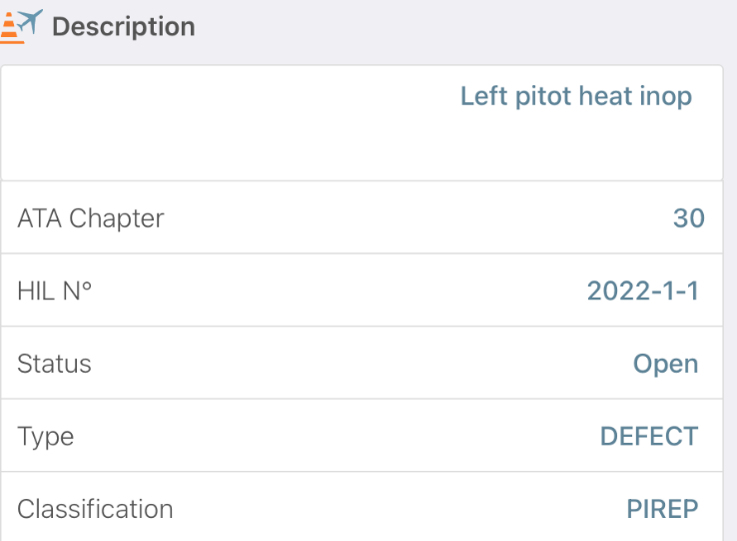
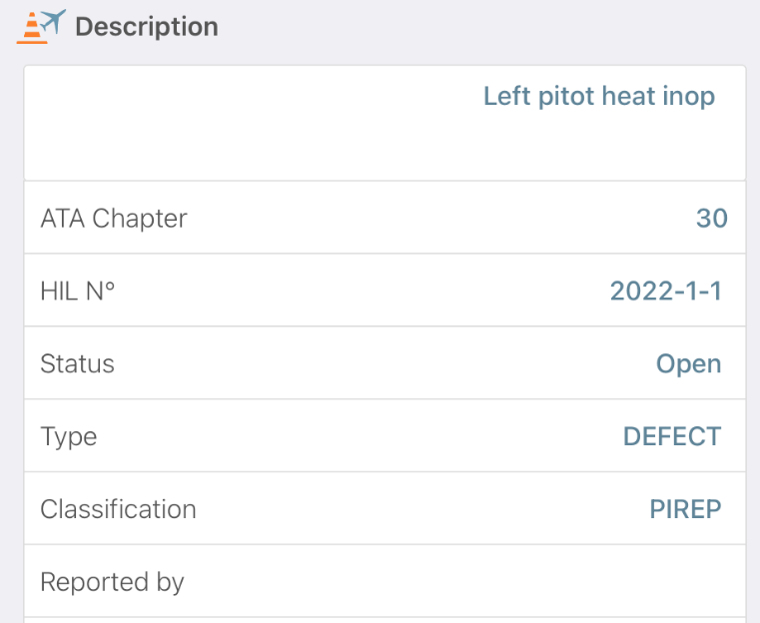
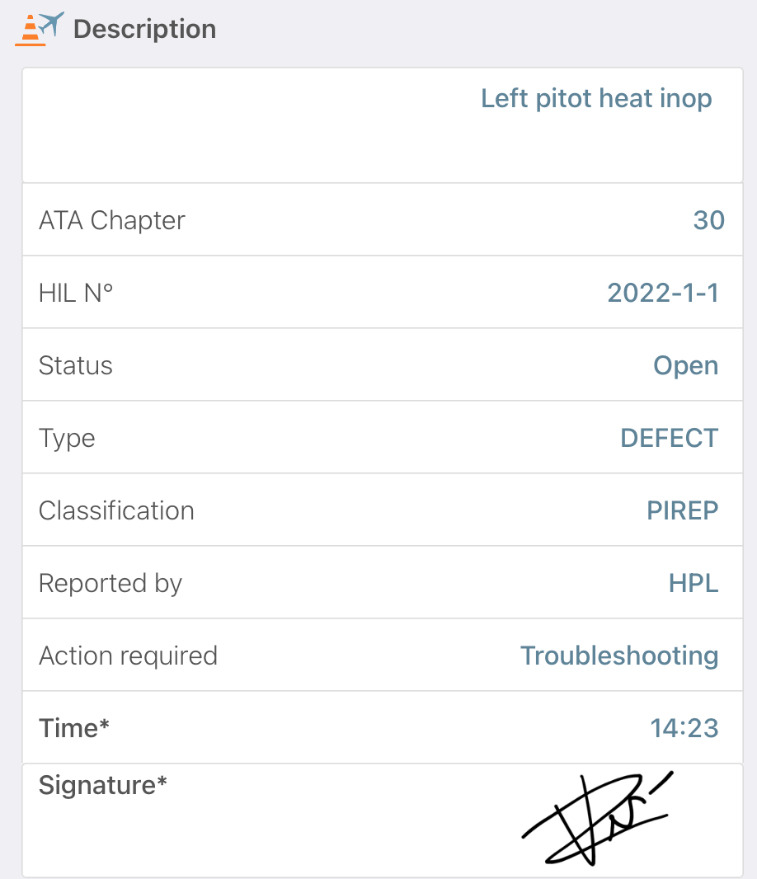
Describe the problem thanks to the free text field.
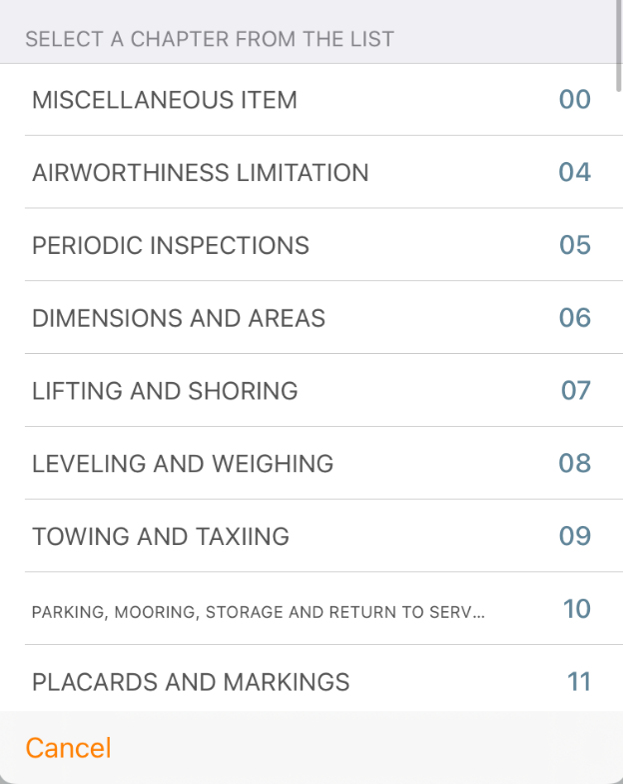
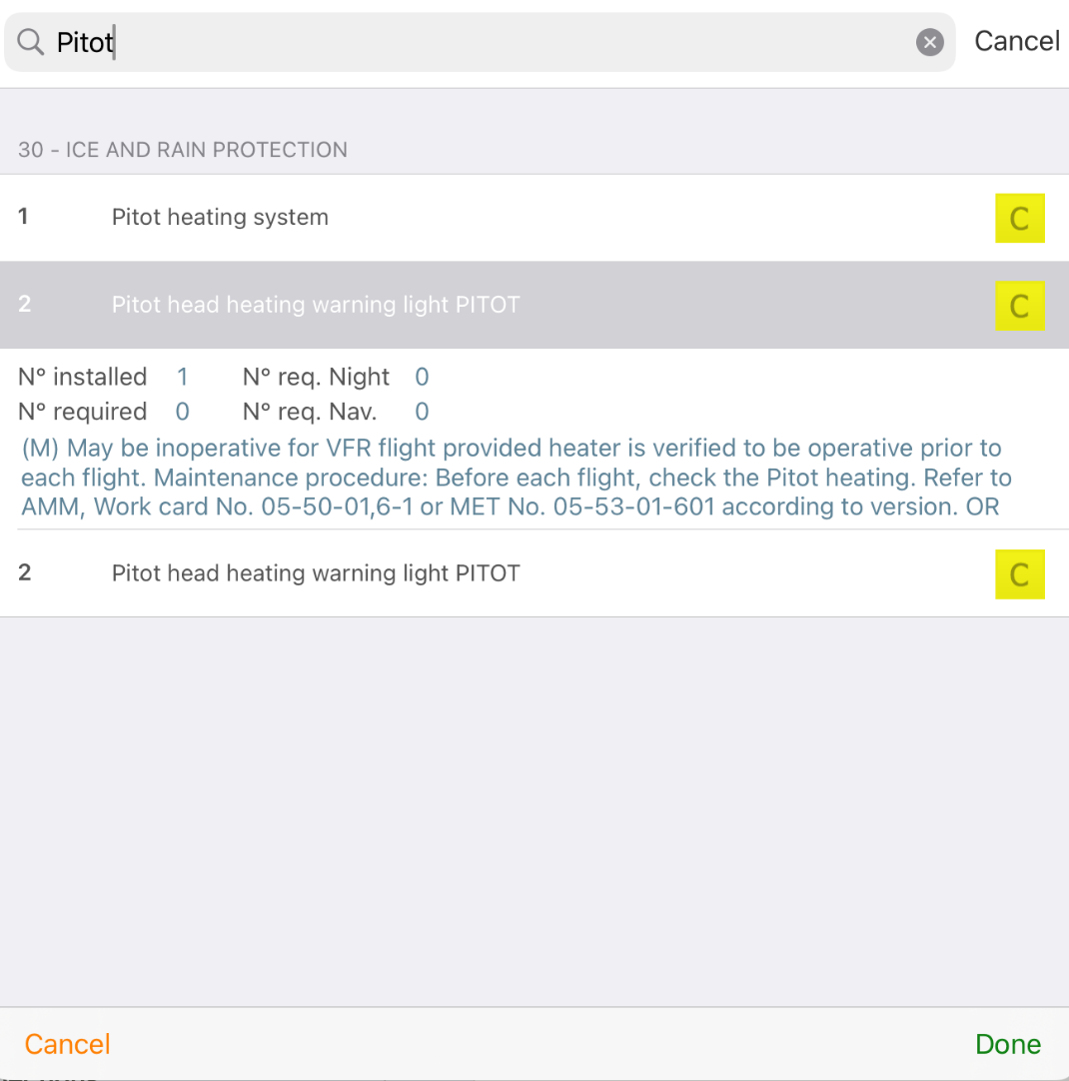
Tap on the ATA Chapter field.

Select the matching ATA chapter from the list.
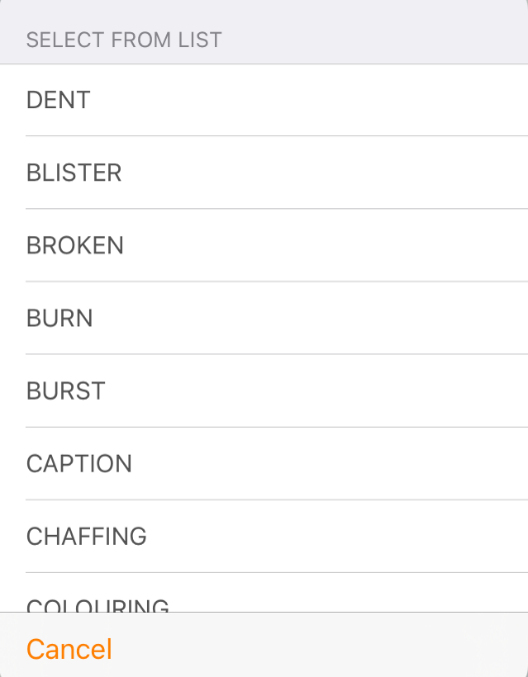
Tap on the Type field.
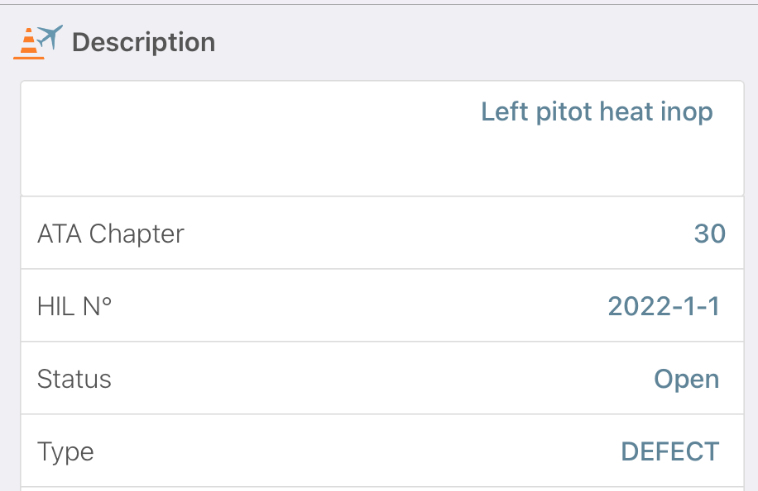
Pick the appropriate element from the list.
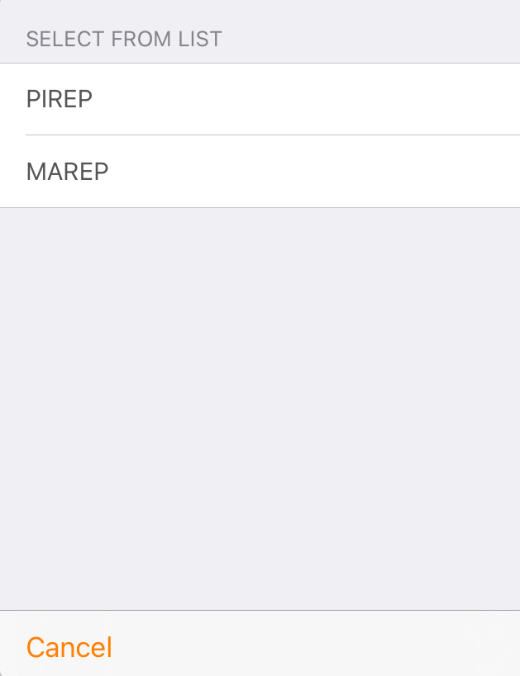
Tap on the classification field. Pick “PIREP†or “MAREP†in the pop-up window.
“PIREP†means “pilot reportâ€. “MAREP†means maintenance reportâ€.
Pick ‘PIREP’ or ‘MAREP’.
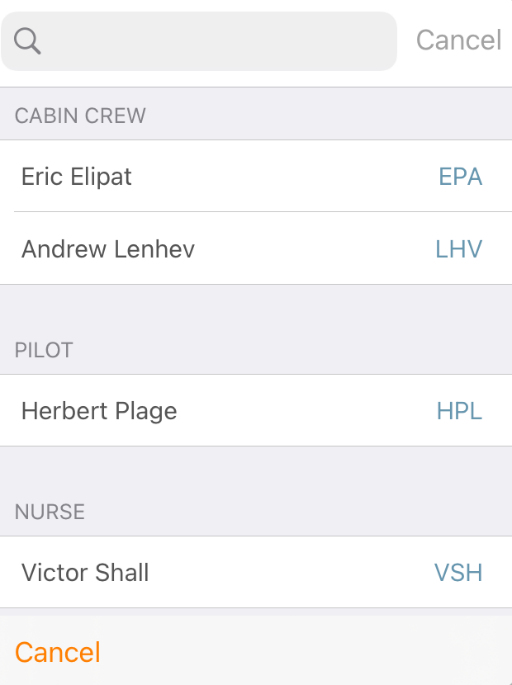
Tap on ‘Reported by’.
Depending on what you select, the app displays either the crew members list or the technicians list when you tap reported by.
If you are not on the list, manually type in your pilot code name.
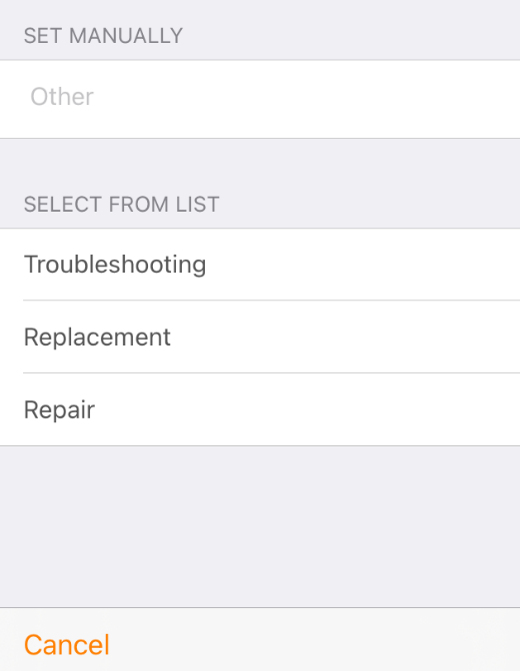
Tap on ‘Action required.
You can manually specify corrective actions to be taken or select an element from the list.
The time is automatically filled but you can modify it.
The format is hour hour minute minute.
Sign to validate the discrepancy.
If you validate the discrepancy without adding an associated deferral, the aircraft will be considered as grounded since it is not differed under an MEL item.
If applicable, you can access the associated minimum equipment list.
Here’s the list. Always updated.
You can type keywords in the search bar to filter.
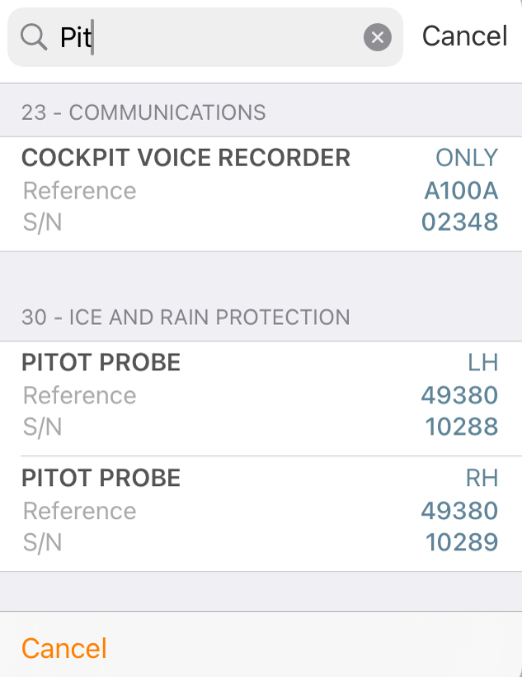
You can link the discrepancy to the specific part that is the source of the issue by accessing the configuration of the aircraft.
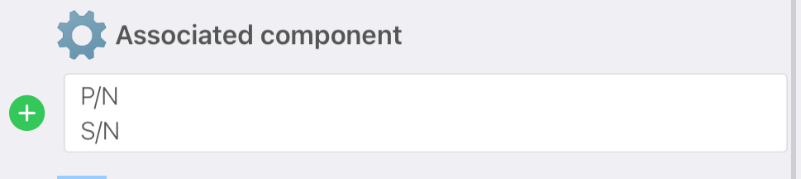
Select an item.
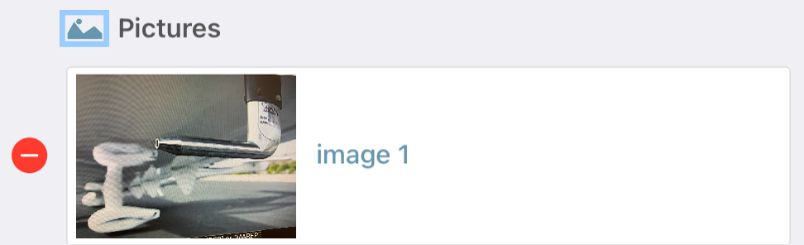
You can take pictures to illustrate the discrepancy.
They will be stored in the related files section of the desktop version.
Once you are done, tap on ‘Validate Disc.’ in the top right-hand corner of the screen.
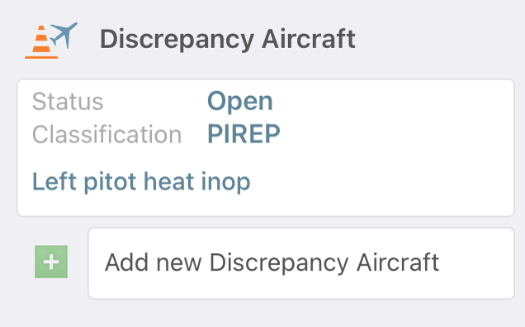
Here you can see the discrepancy you declared.
You can add others if needed. If not, tap done.
In the “not sent†techlogs list we can see the log we just created with an orange flag that indicates that a discrepancy has been declared. Tap on ‘Send Now’.
Tap on ‘Send as final version’.
The log went from the ‘Not Sent’ section to the ‘Retrieved from server’ section.
In this example, we created a log with only one discrepancy, but it is possible to combine a flight and a discrepancy in the techlog.
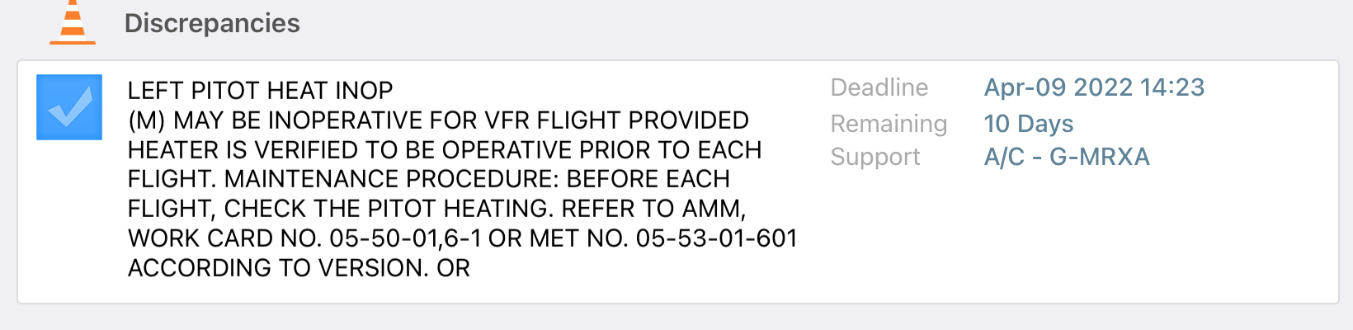
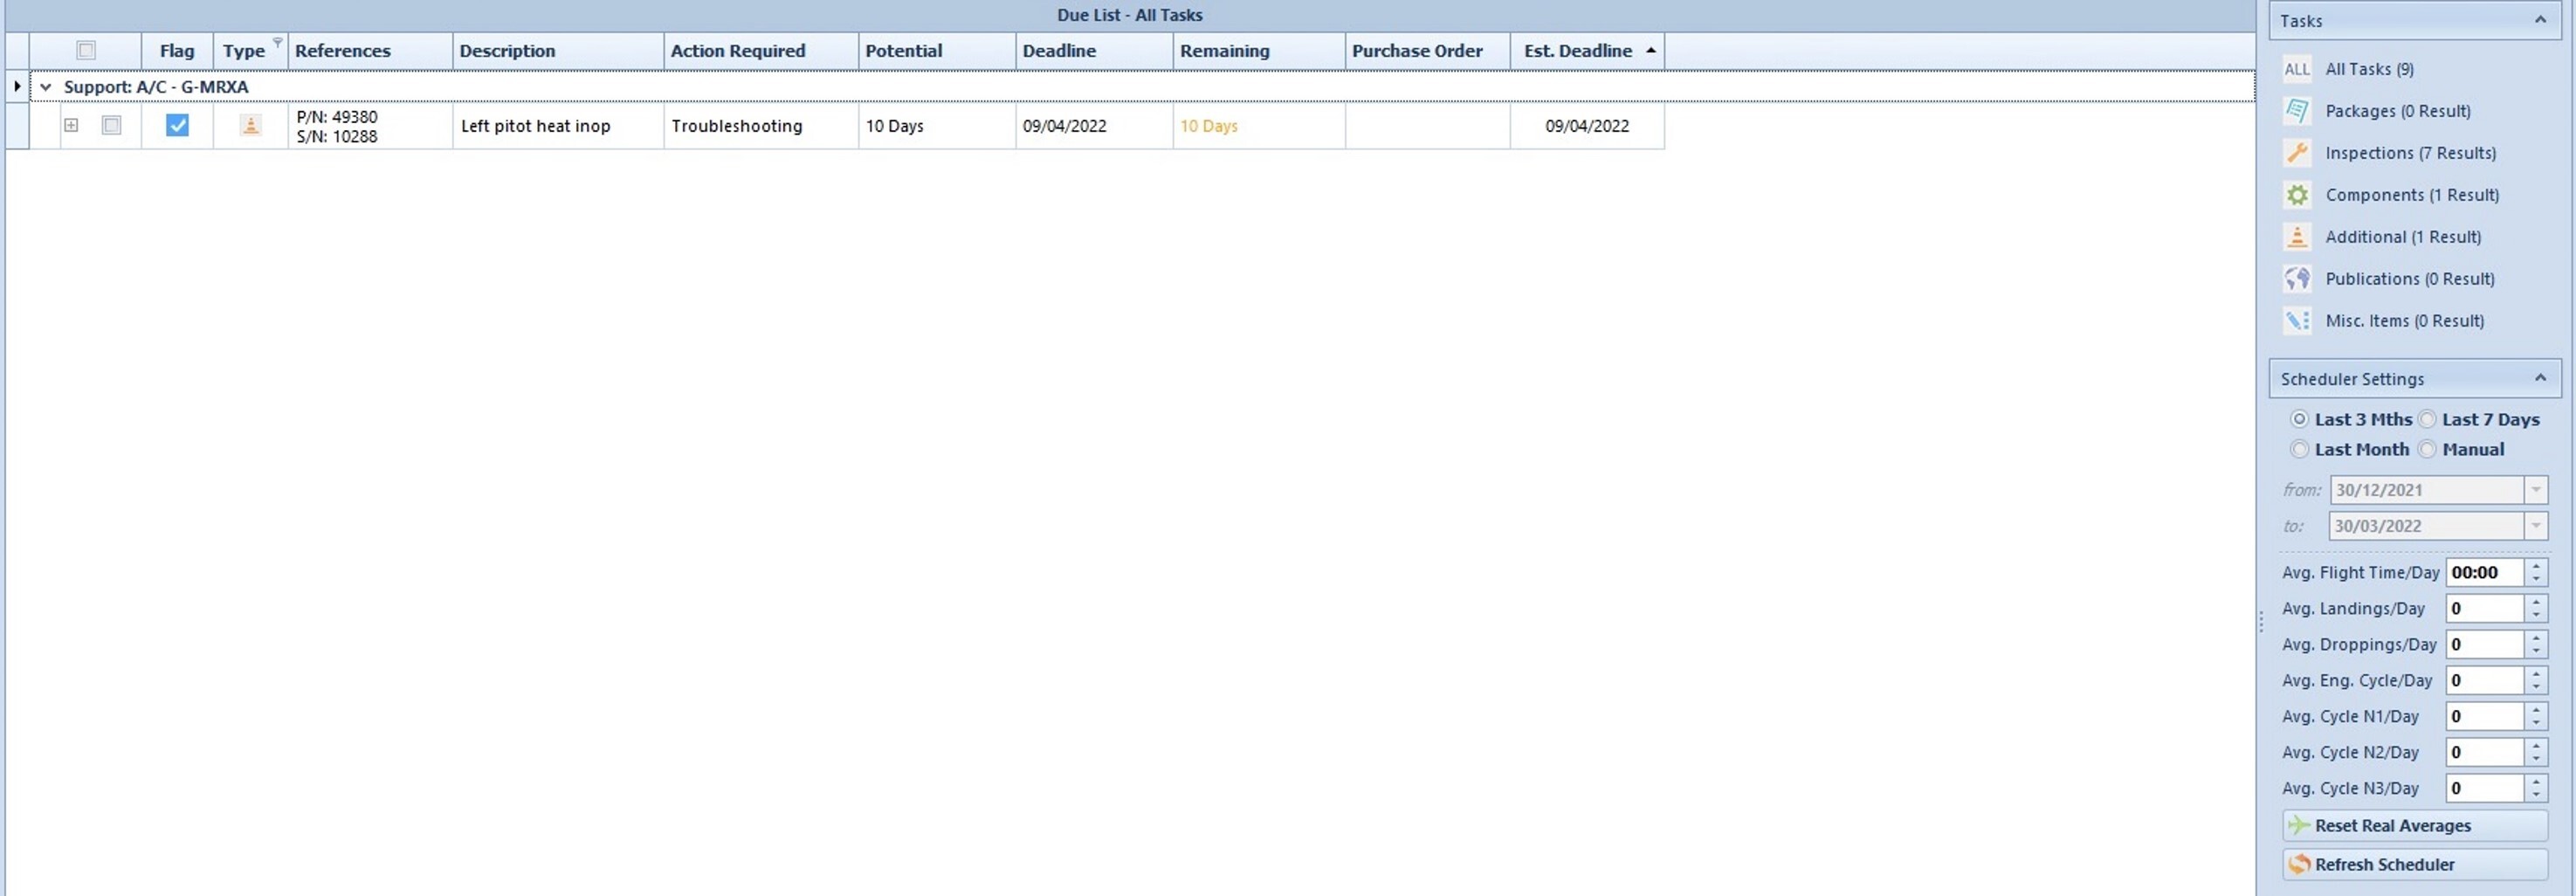
If you check the due list and tap on refresh before the technical staff replies to the open defect, the discrepancy appears.
You can see the description of the problem and the associated MEL remarks.
The blue flag indicates that the discrepancy is differed under a MEL in category C, so you have 10 days to fix the issue. After 10 days, the flag will turn red, and the aircraft will be grounded.
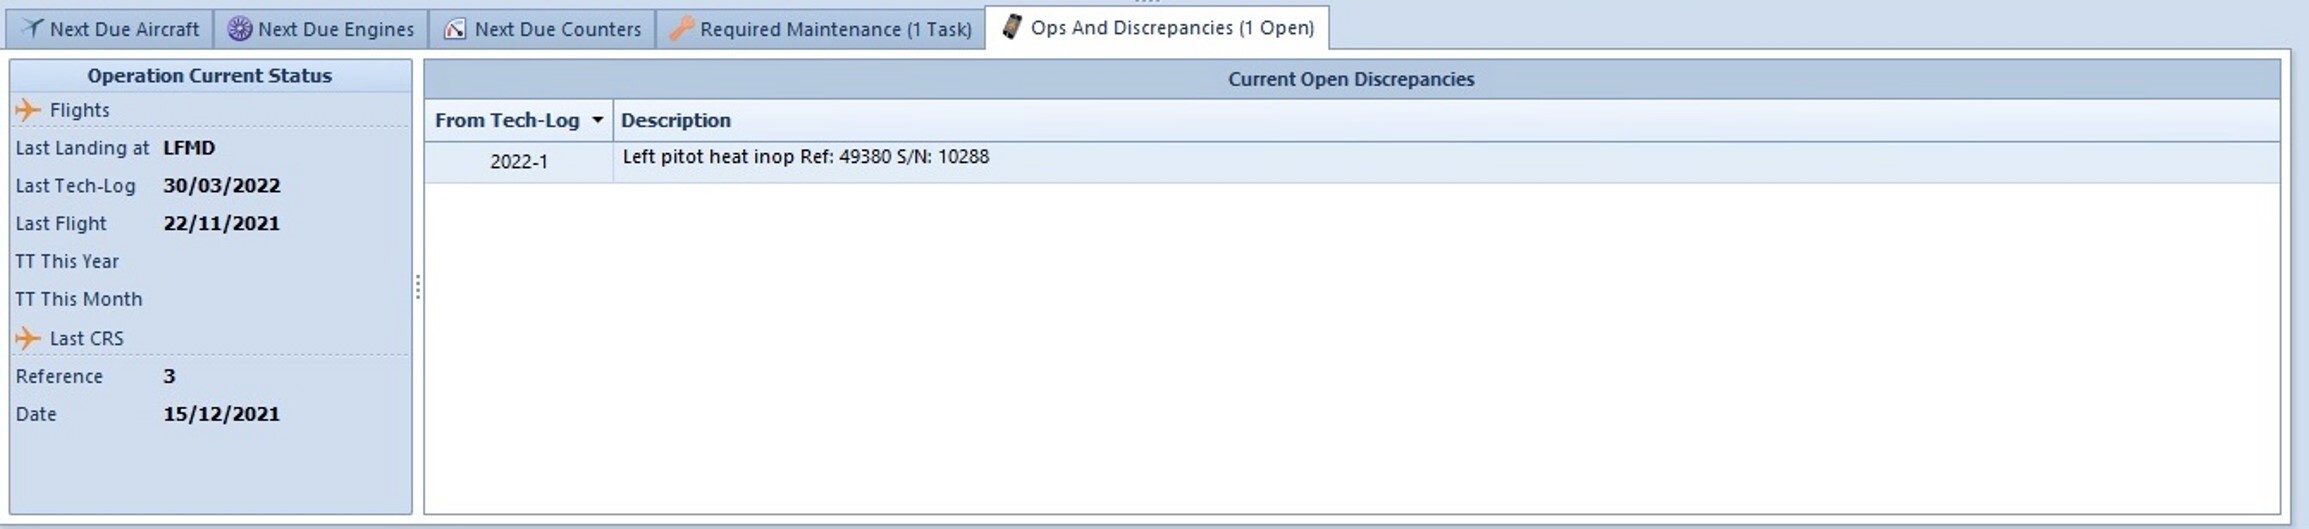
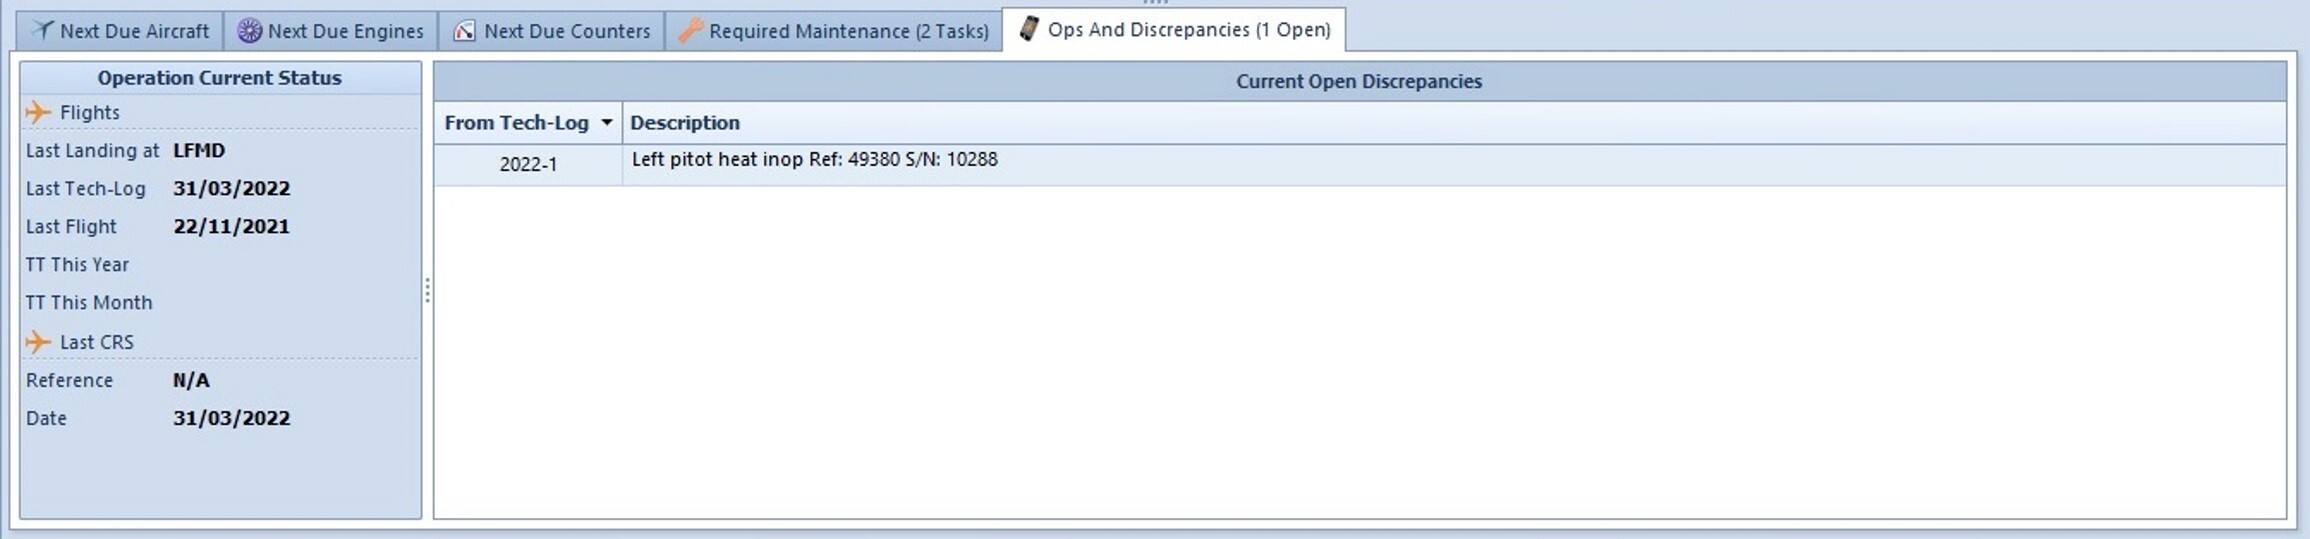
The number one between brackets indicates that there is one open discrepancy.

When you click on ‘OPS and Discrepancies’ you can see the log reference, the description of the problem and the part involved.
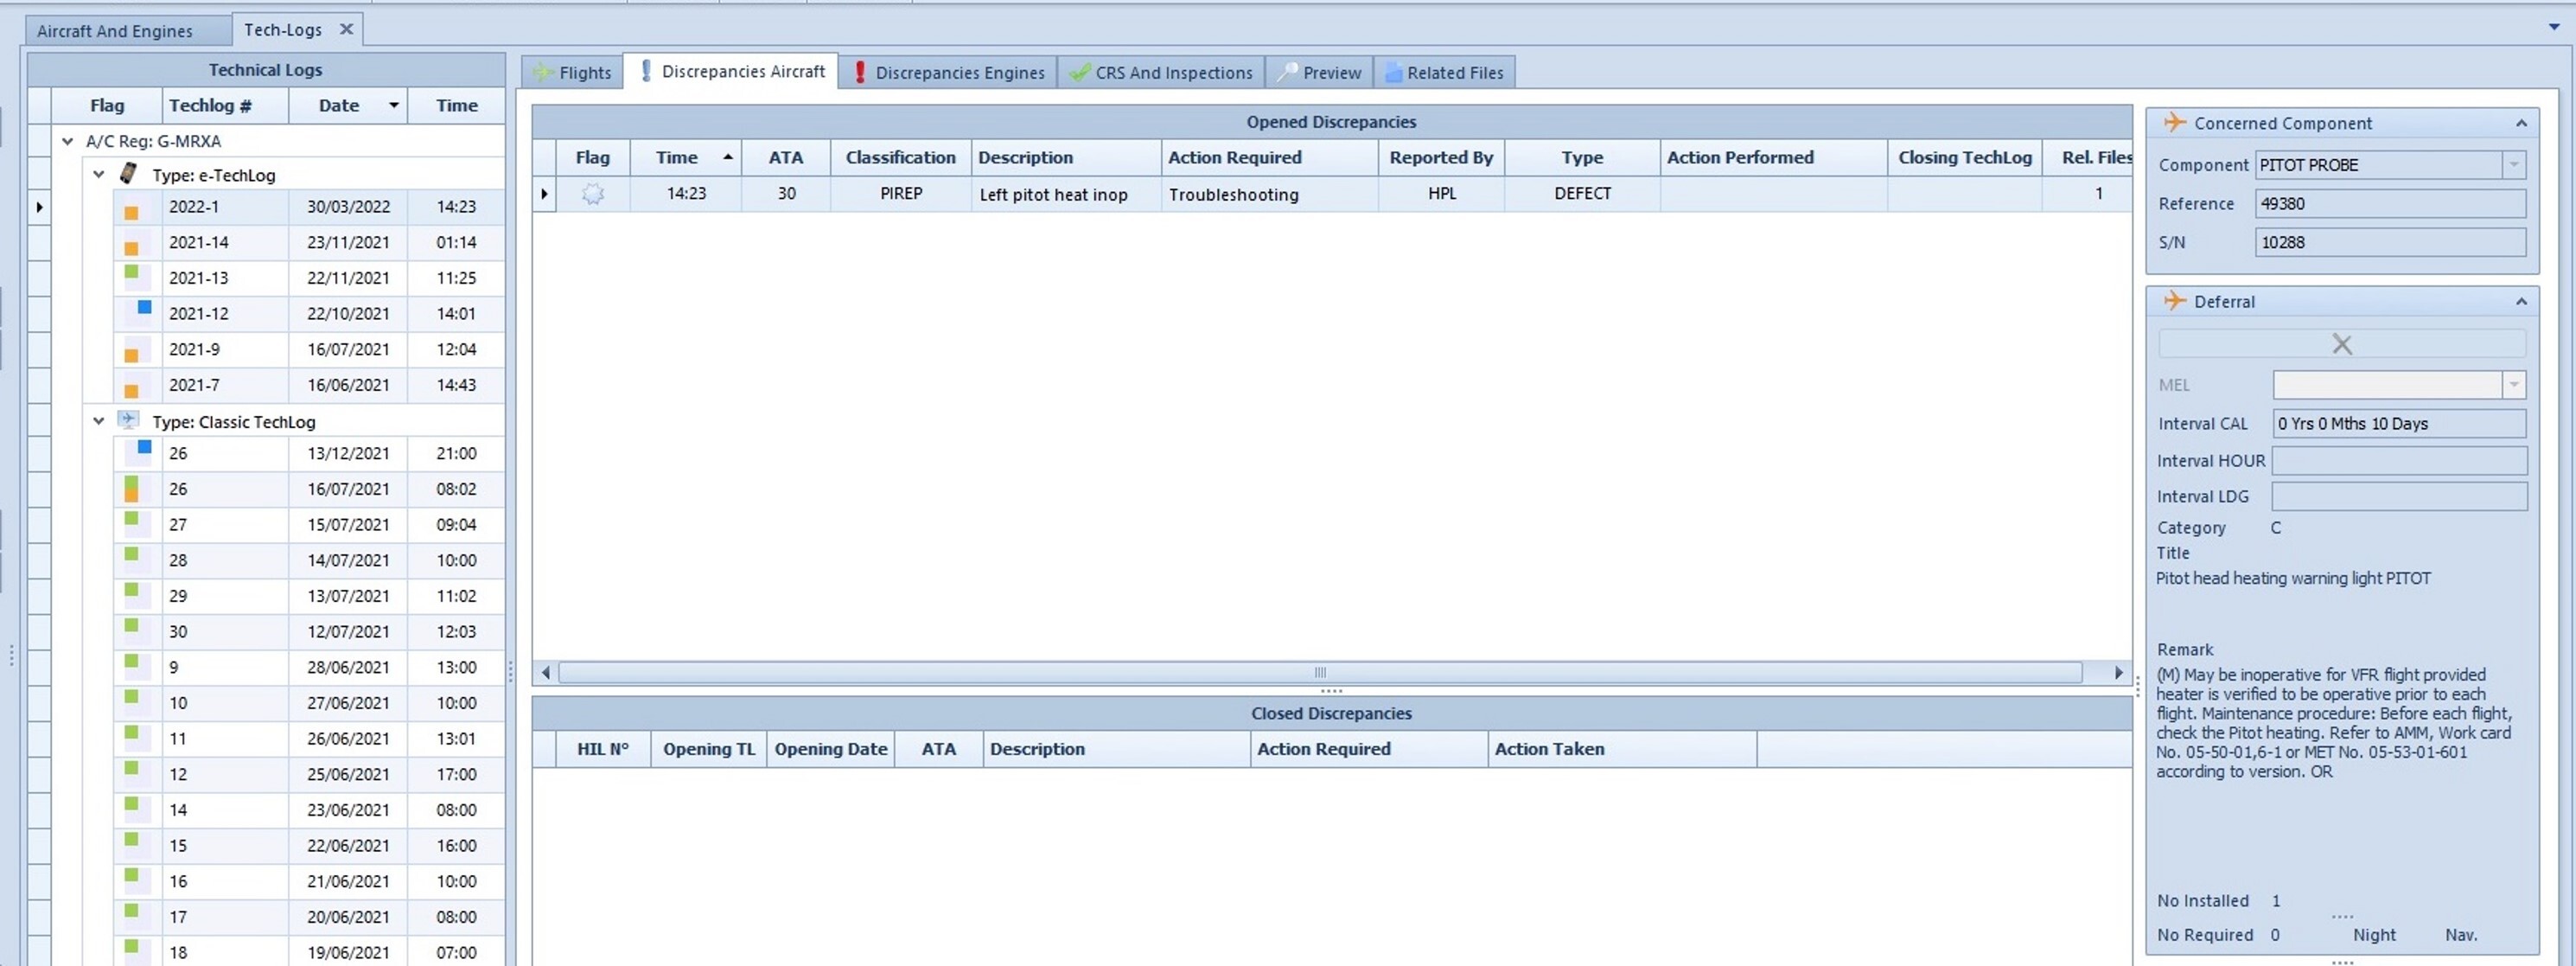
Open the techlog module to see the techlog you created.
Open the ‘Discrepancies Aircraft’ tab to see the details.
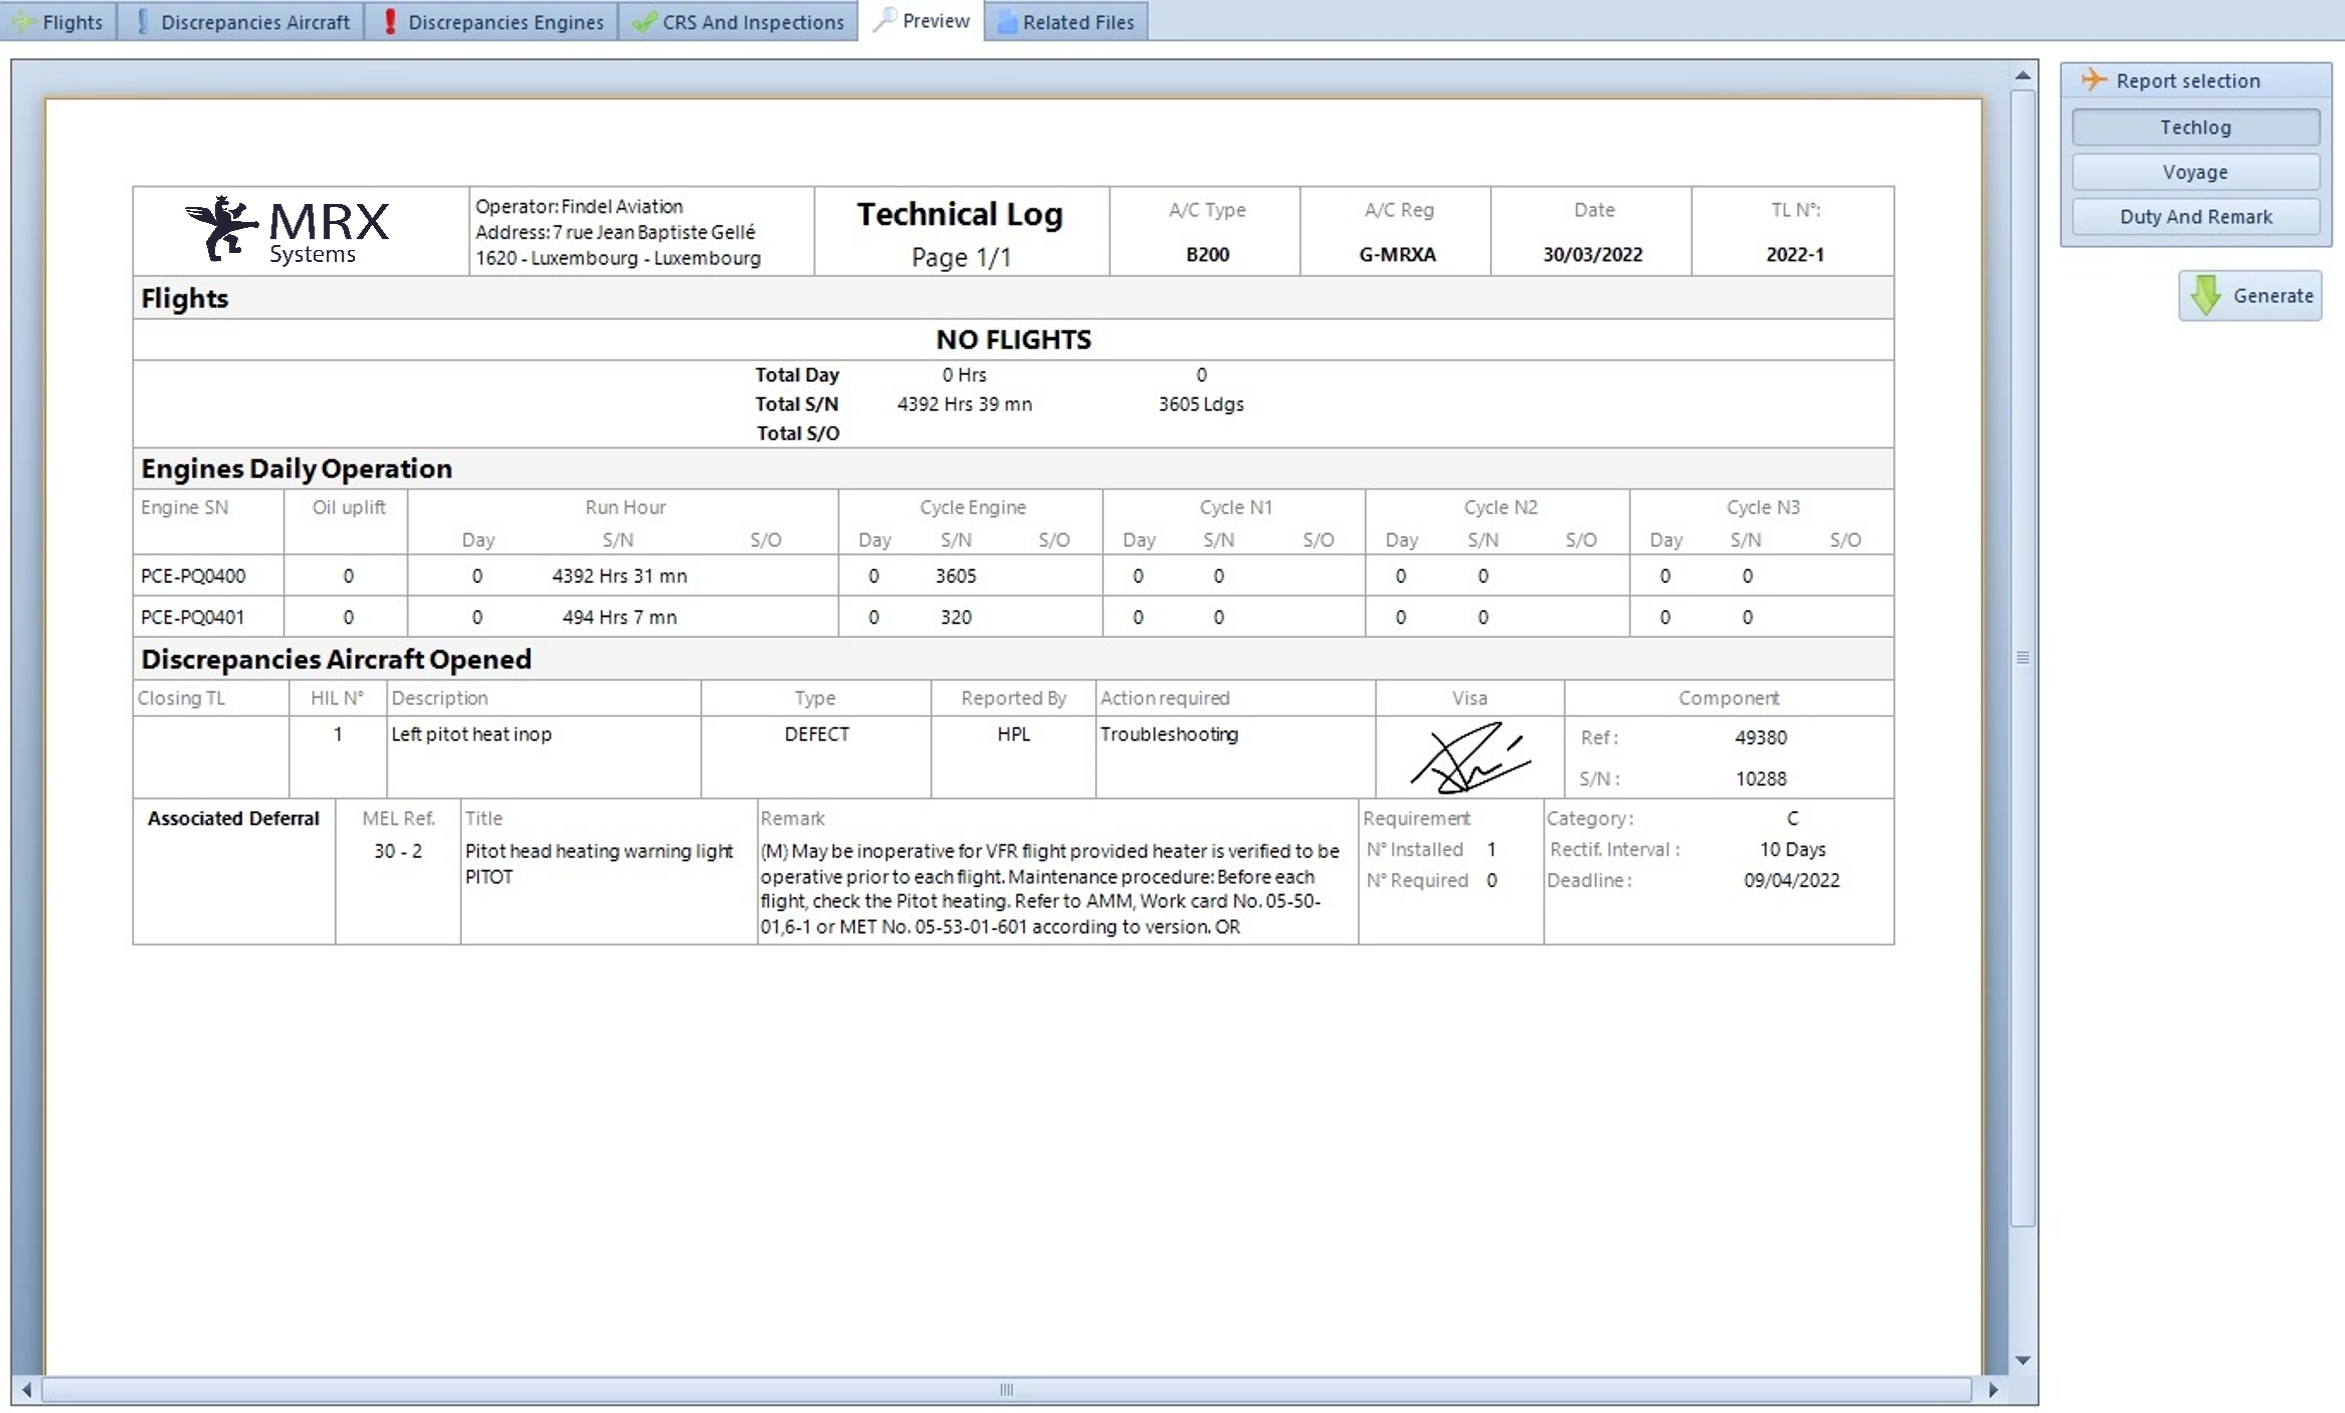
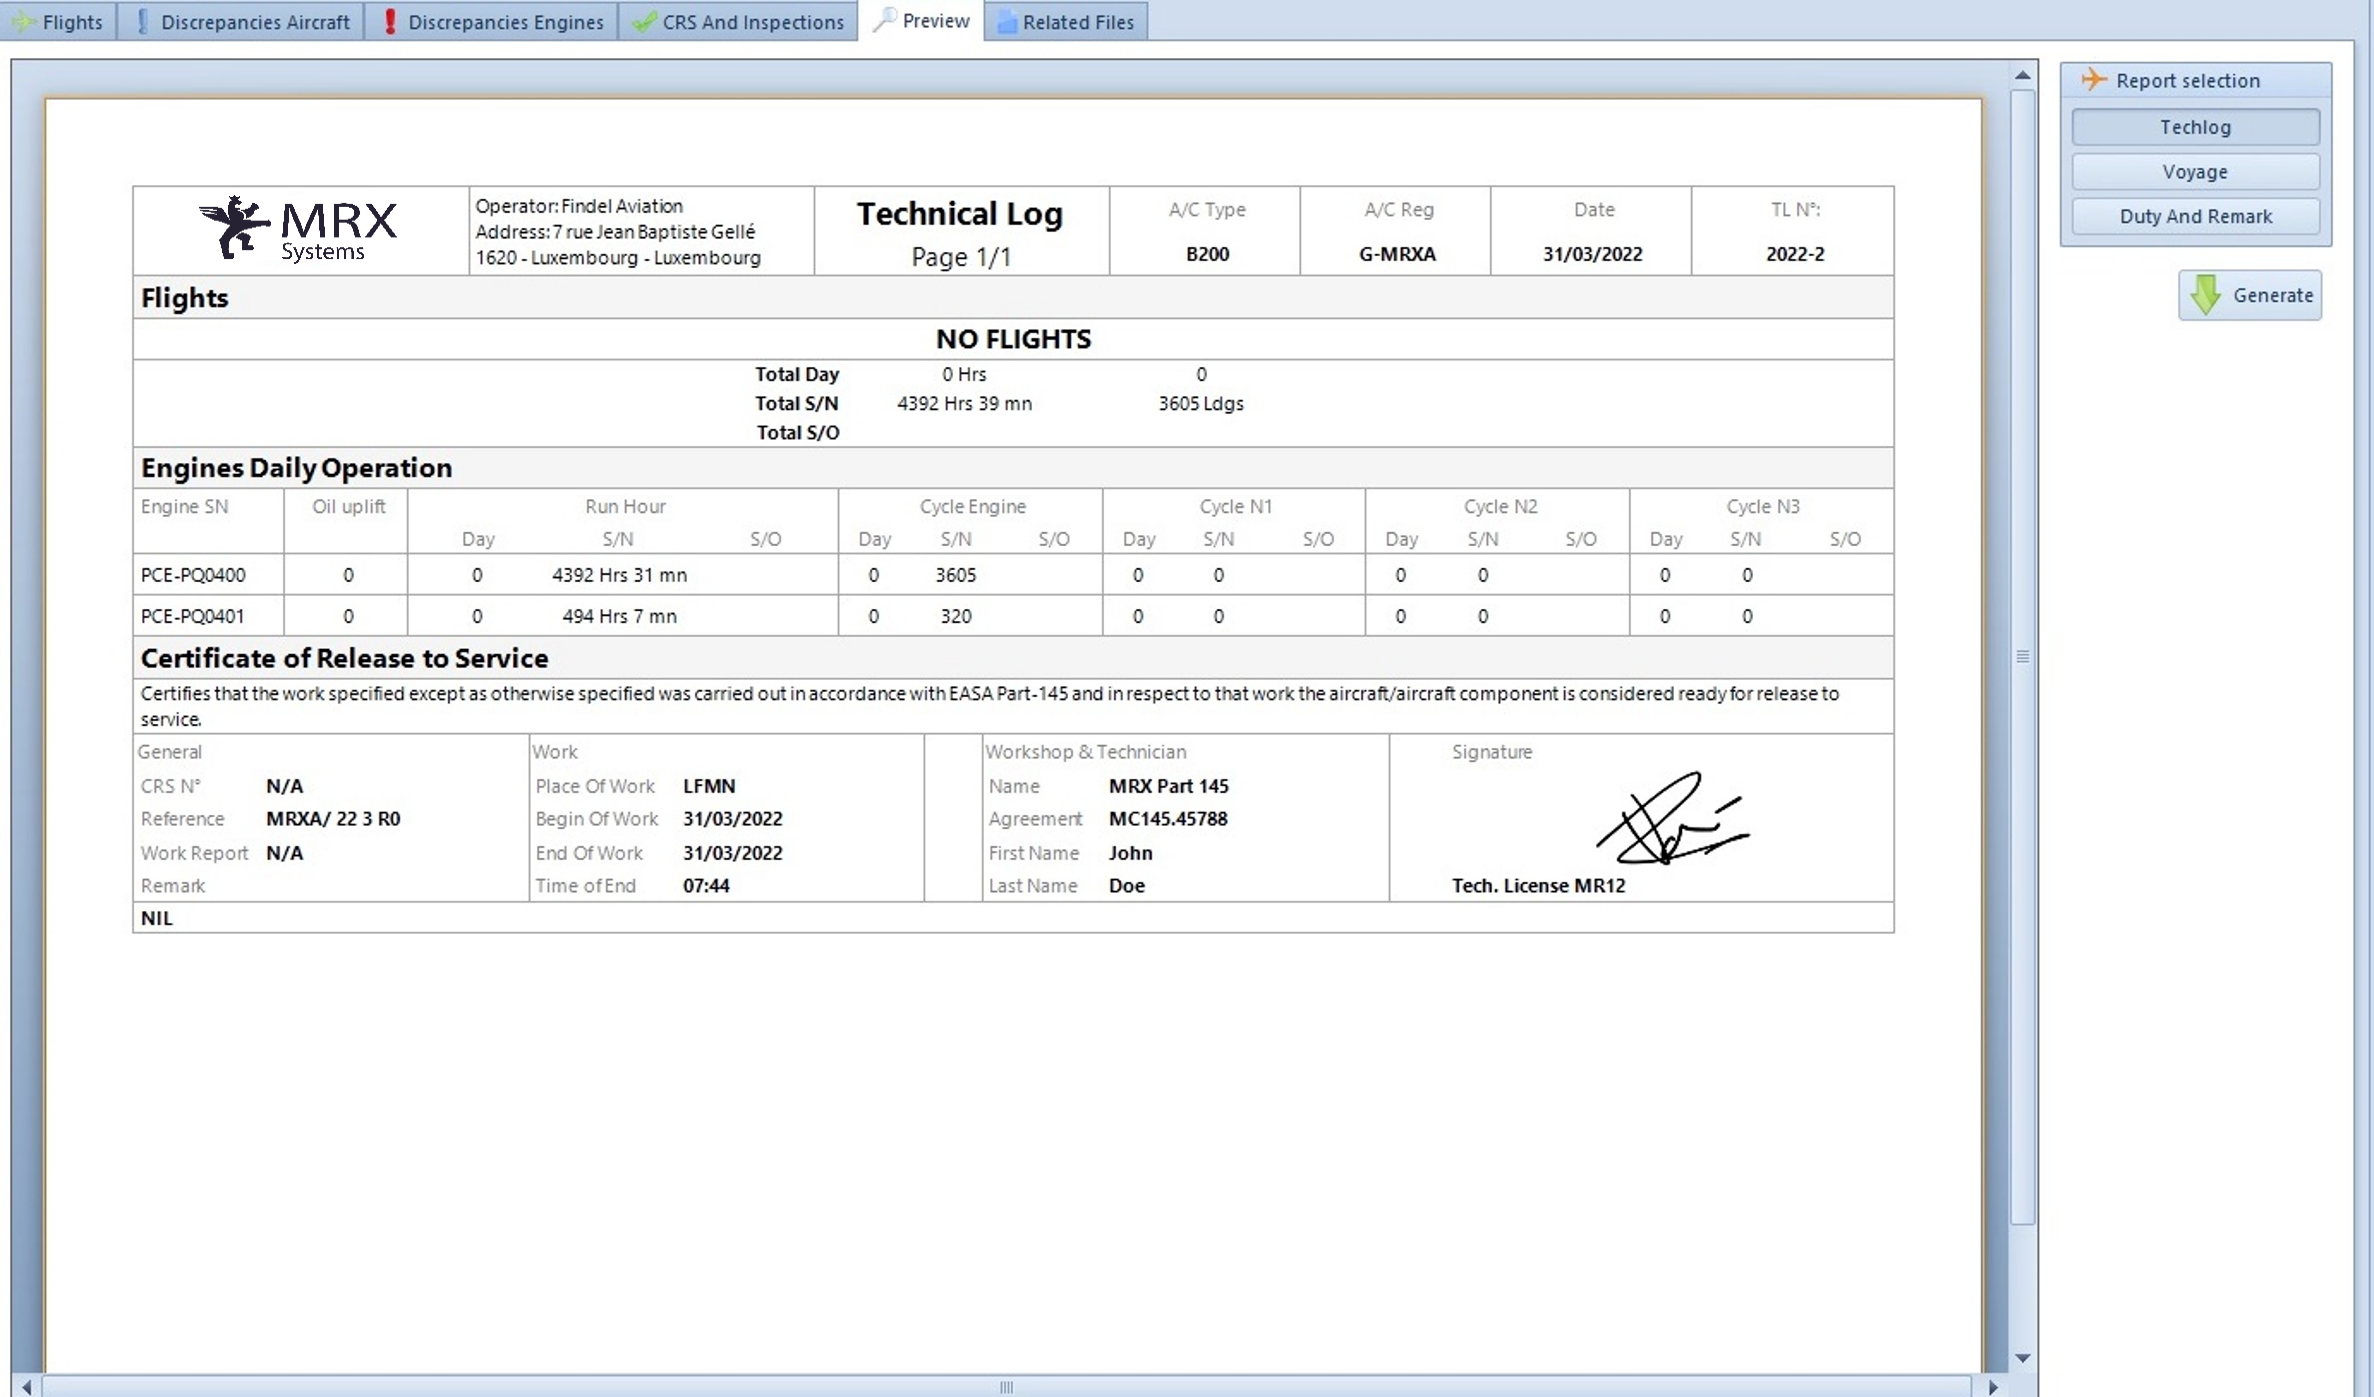
Click on 'Preview' to display the techlog with the aircraft and engine status and the open discrepancy differed under a MEL.
Open the maintenance scheduling module and click on 'Display Due List' in the main ribbon.
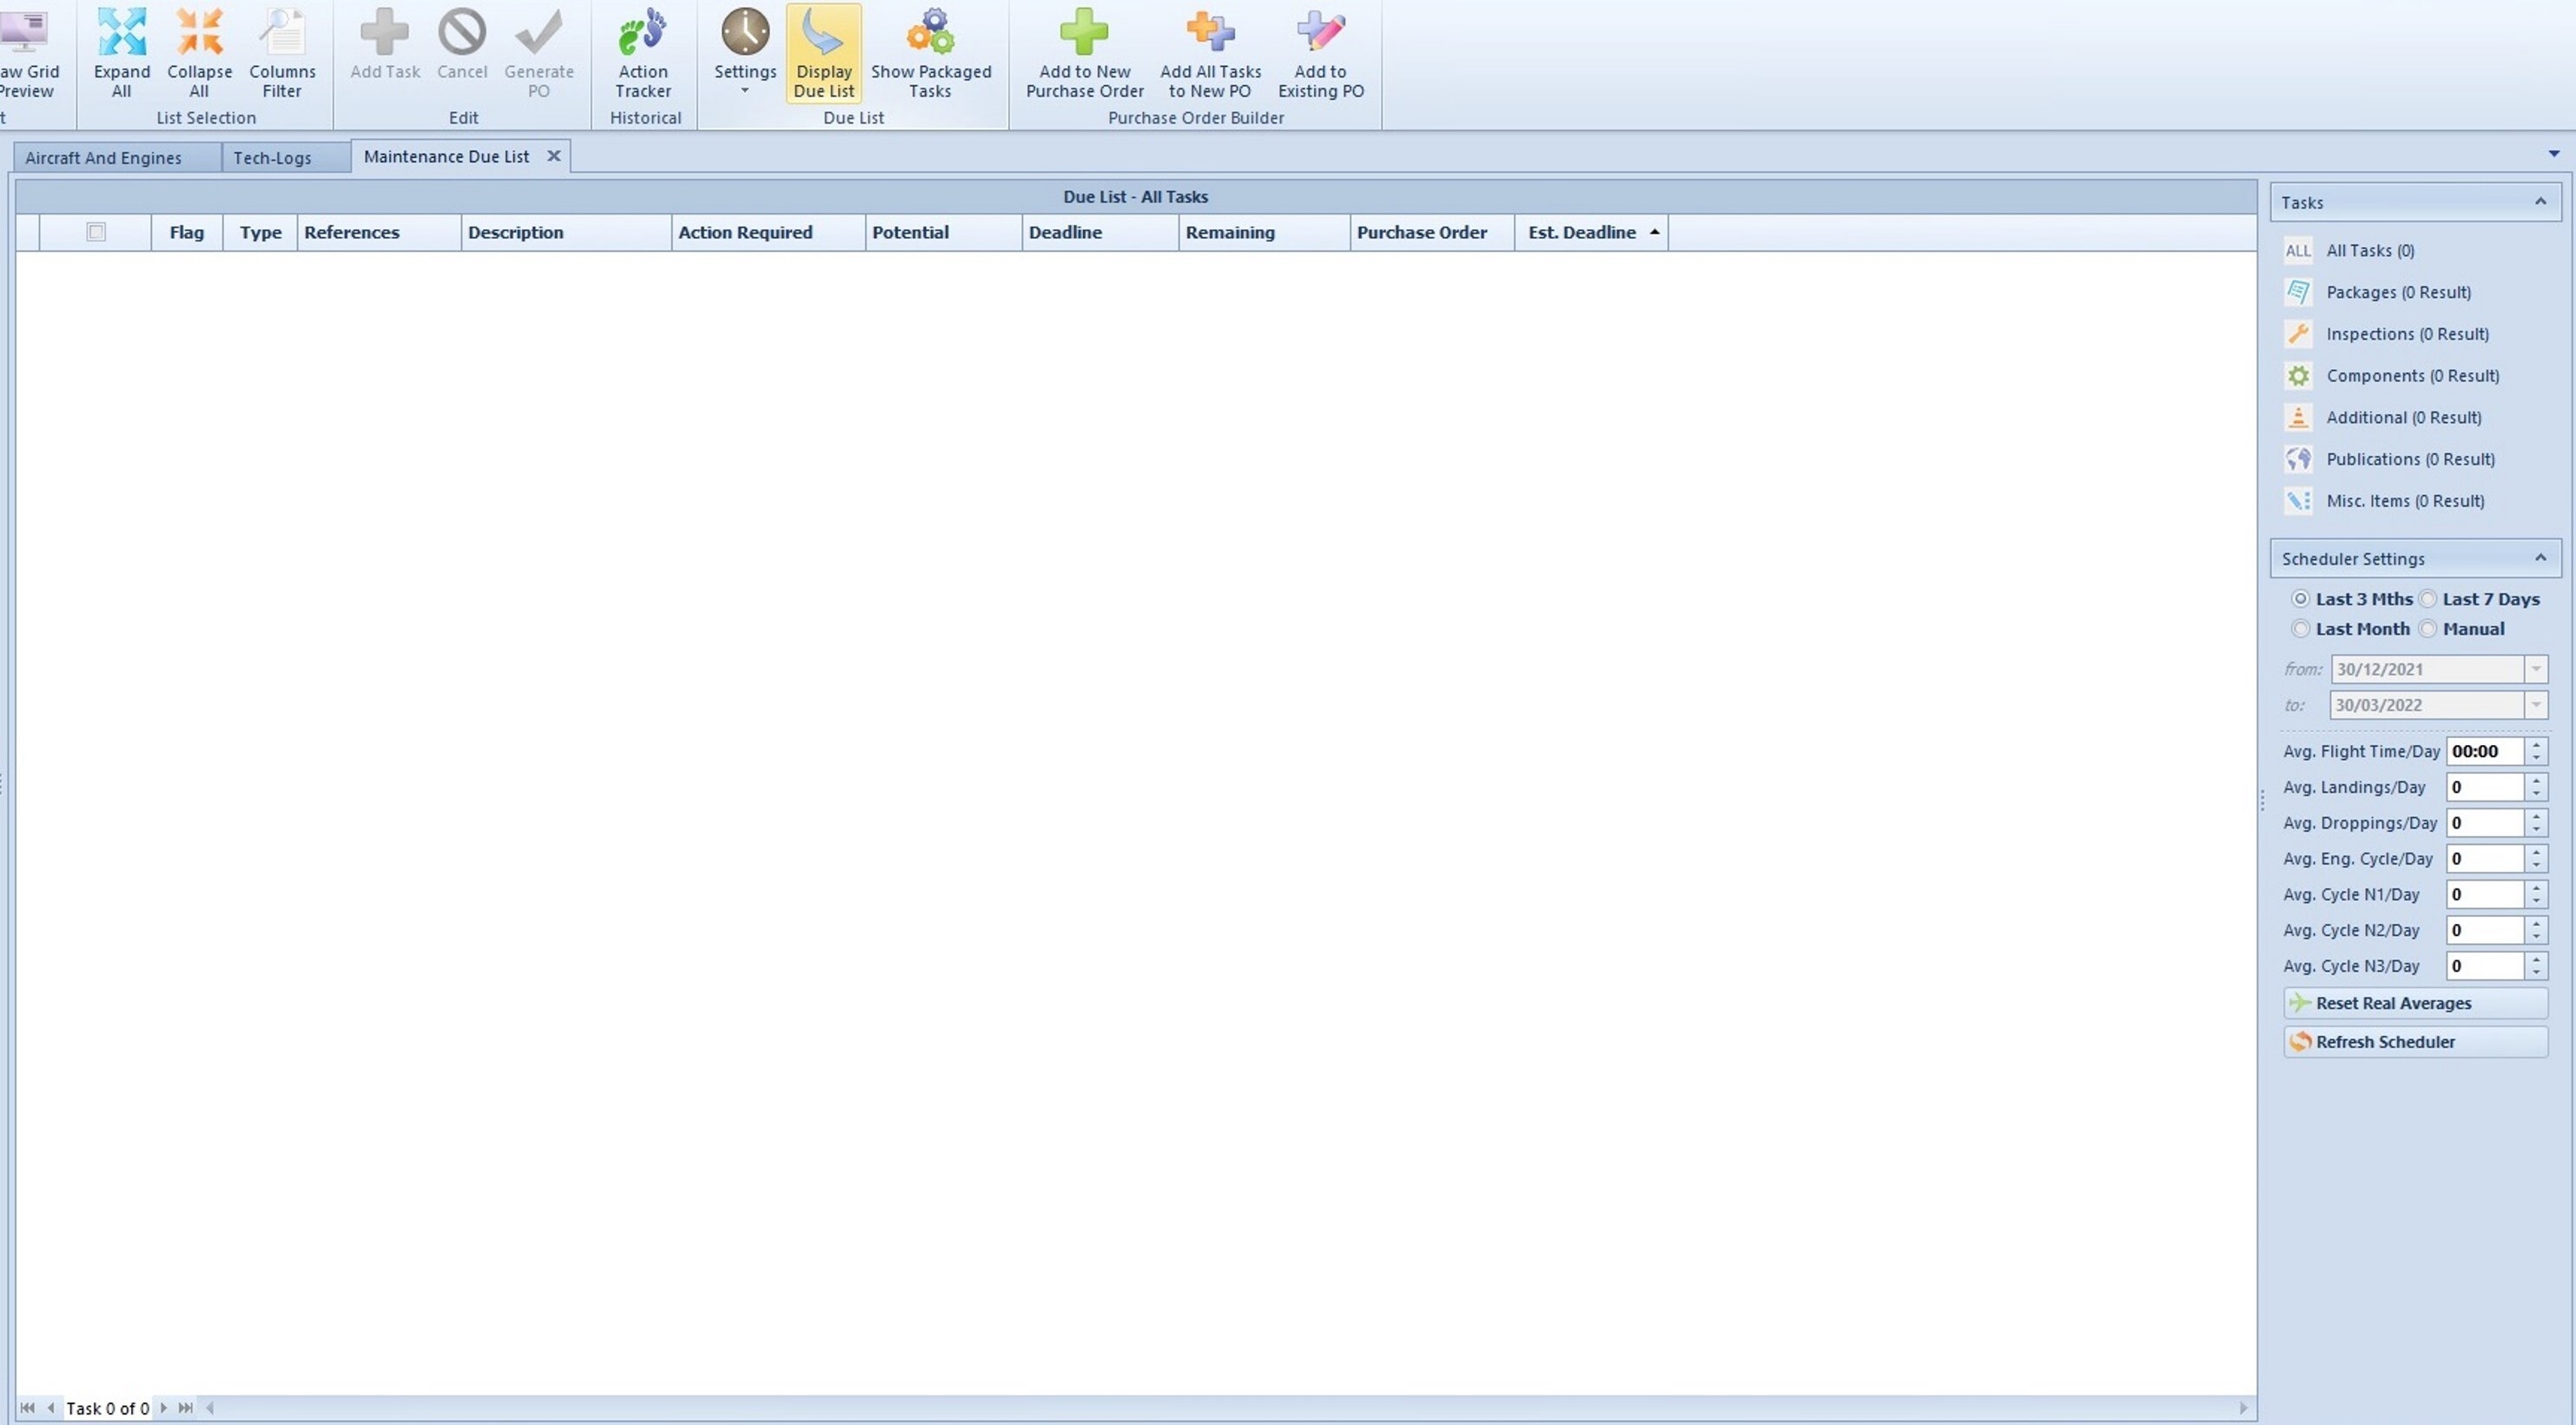
The due list of the aircraft is automatically updated and now includes the unscheduled maintenance event.
Sign a CRS
After synchronizing the data and selecting an aircraft, open the menu and tap on ‘Due List’.
As you can see, a discrepancy has been declared.
In this demonstration, we will consider that a corrective action has been performed by an approved technician, so we will now open a new log to specify the actions taken and sign a Release to Service while using the Blue EYE eTechlog app.
Open the ‘eTechlogs’ page and tap on the plus button in the top right-hand corner.
Tap on ‘Add new CRS’.
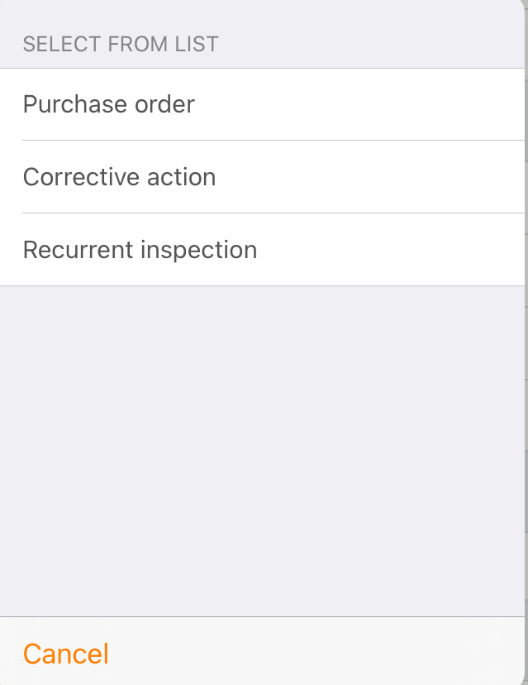
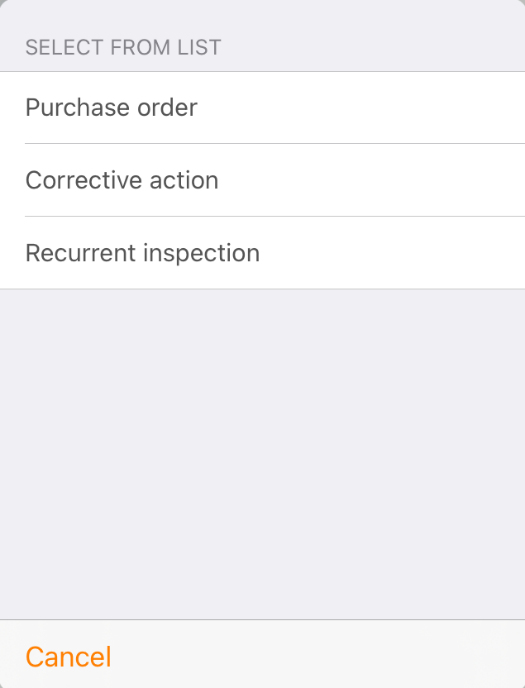
A form appears, the first required information is the type of CRS.
Tap on ‘Type’ to pick an element from the list.

Three types of CRS are available.
The Purchase Order is the perfect fit when the airworthiness manager has ordered a scheduled or unscheduled maintenance operation.
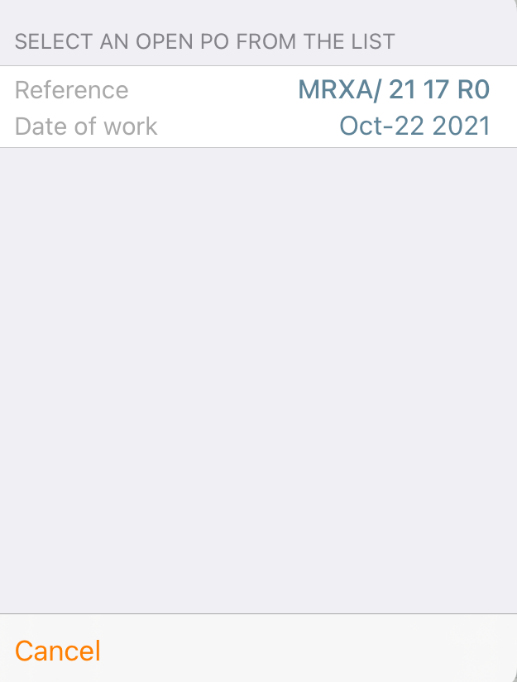
Tap on the Reference field.

The app displays the list of open maintenance orders.
Pick the relevant one.
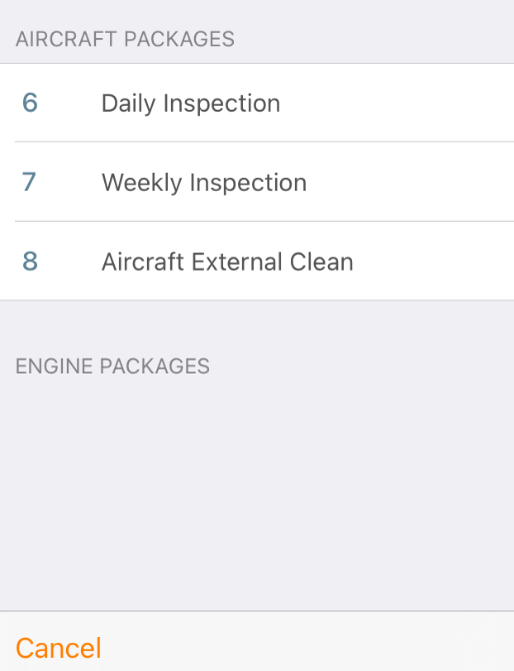
You can also choose the “Recurrent inspection†type.
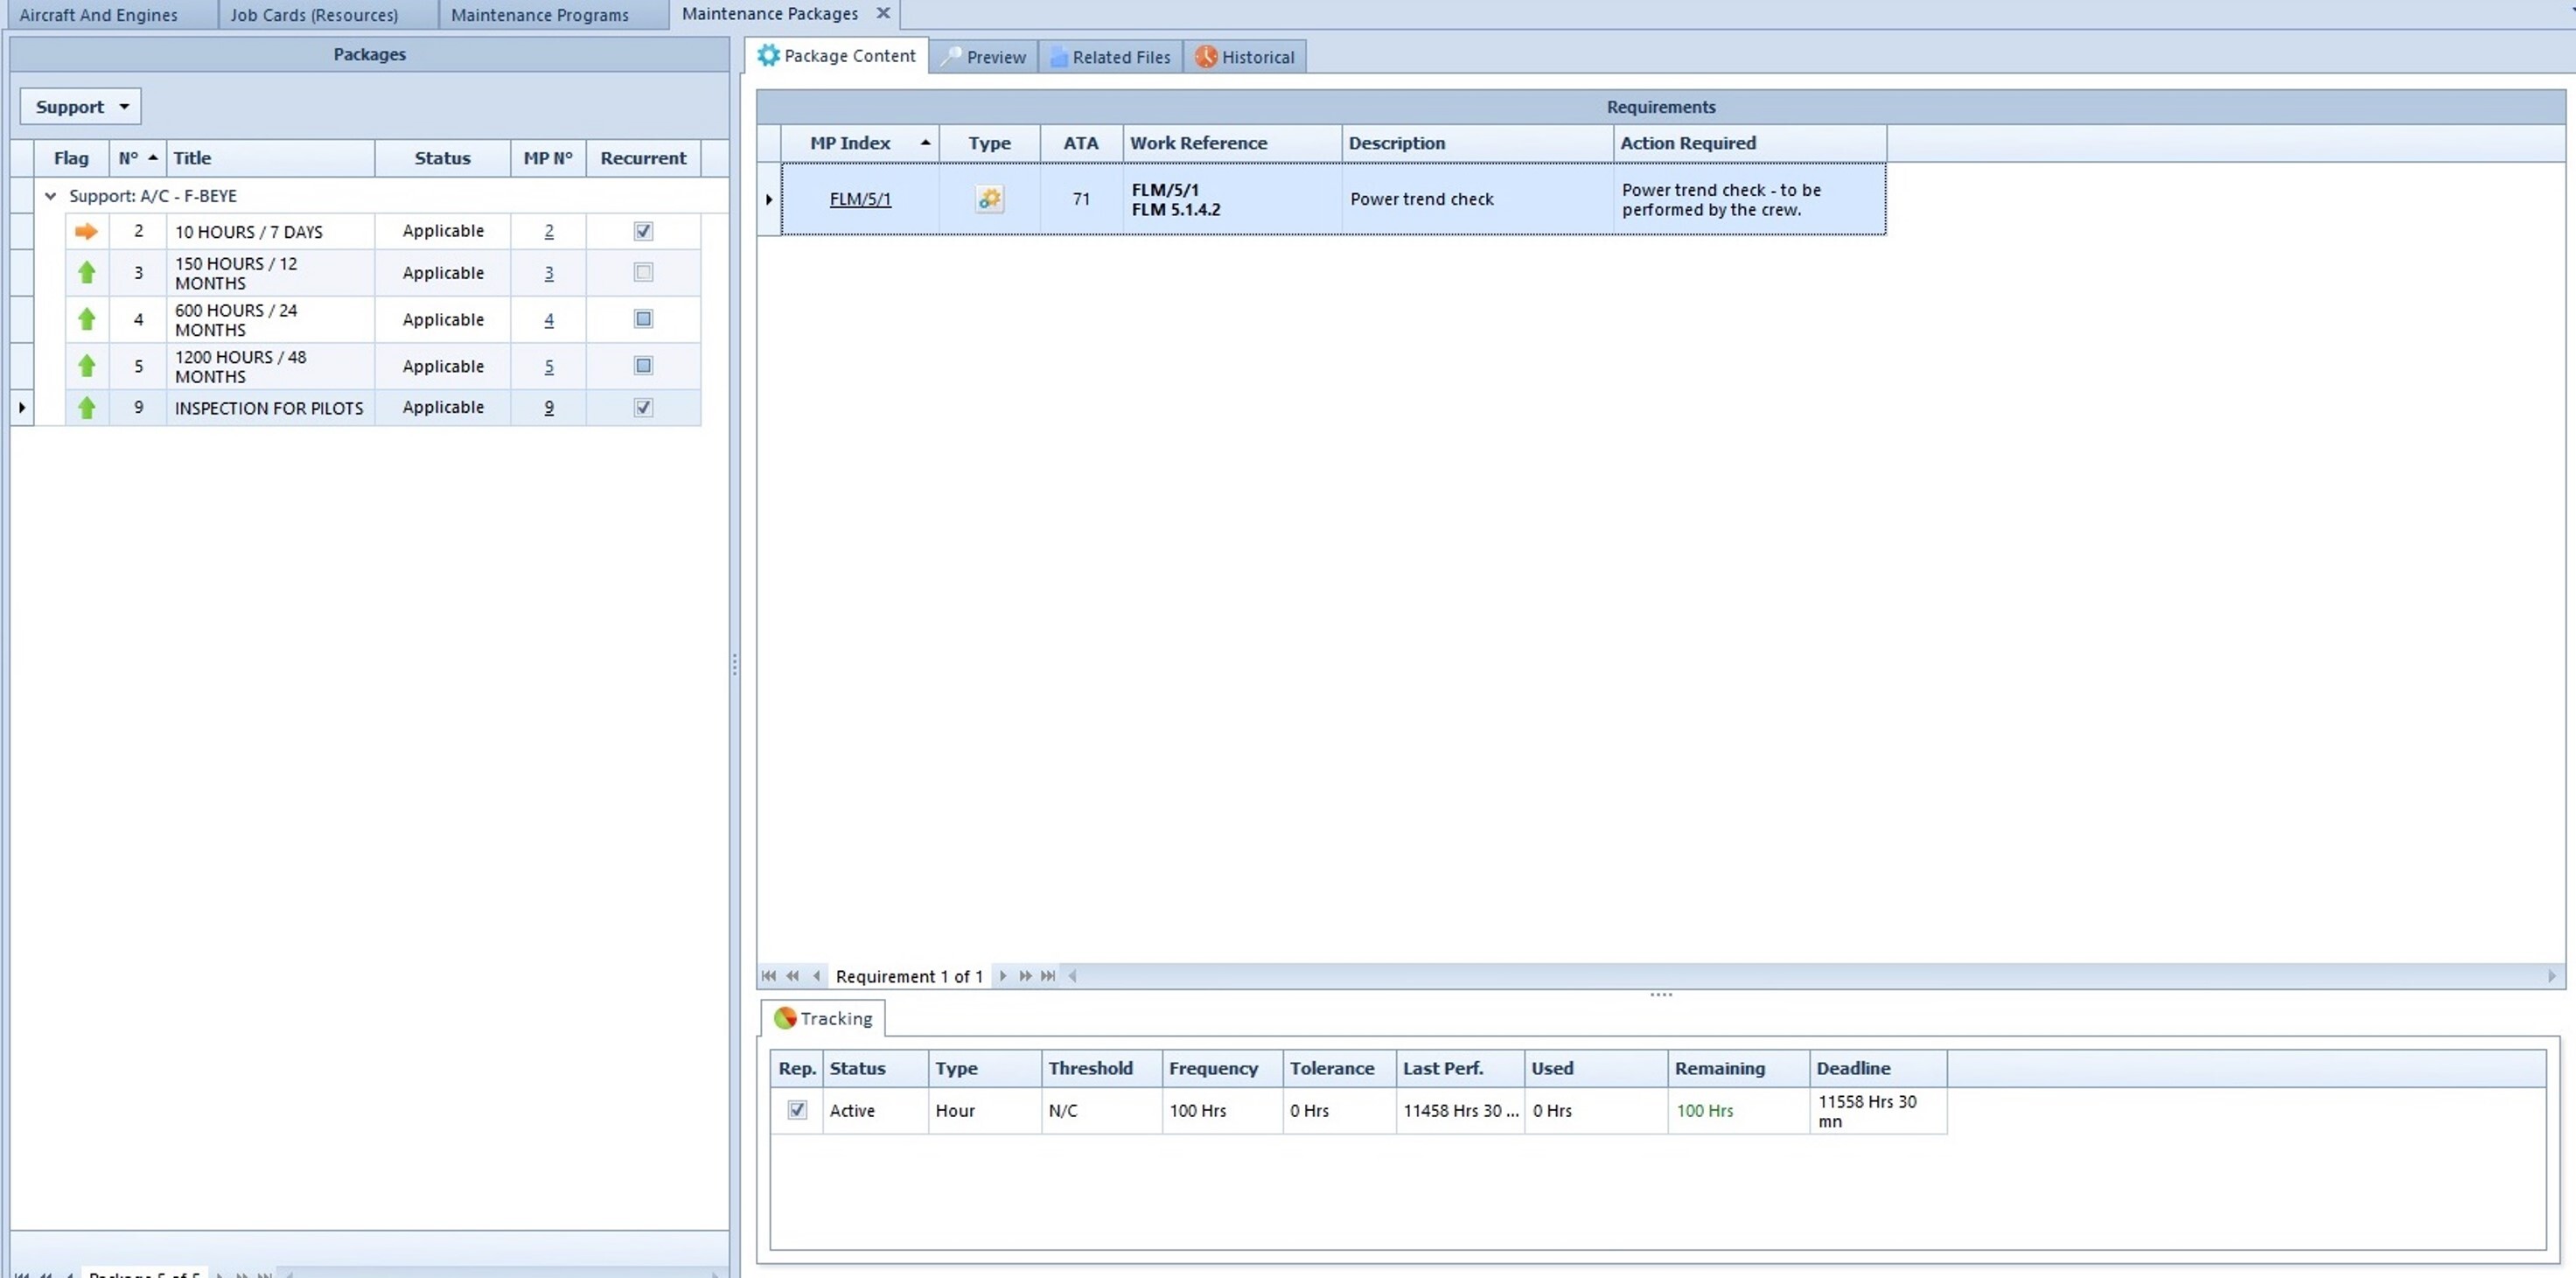
In Blue EYE desktop version, you can create and set maintenance packages as “Recurrentâ€.
In other words, the inspections that are set to be automatically ordered on a regular basis, daily or weekly checks for example.
This removes the need for technical staff to create a large amount of maintenance orders for simple and high frequency tasks.
Tap on the 'Reference' field.
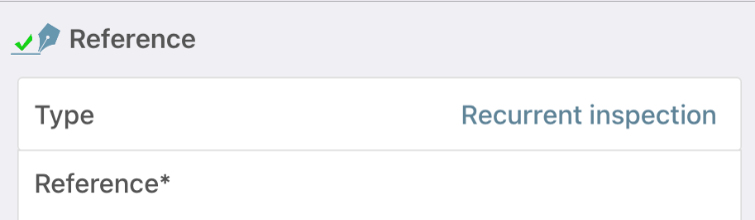
The list of recurrent packages appears.
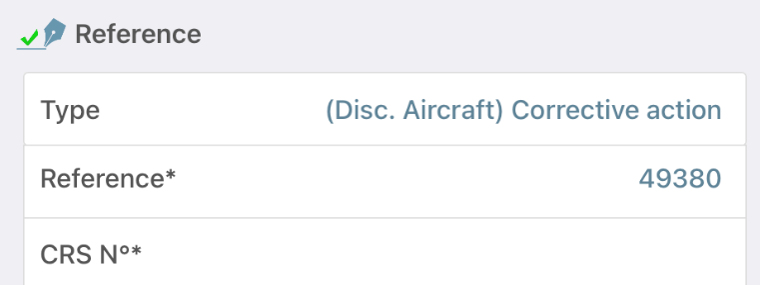
If you need to reply directly to a discrepancy declared by a pilot or a technician, select corrective action.
Tap on the Reference field.
You access the list of all the aircraft and engine discrepancies that are currently open.
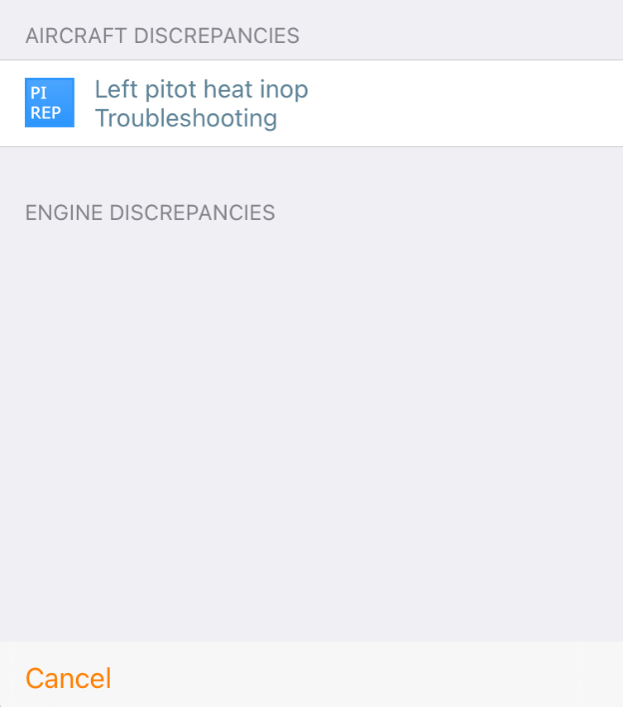
The reference appears.
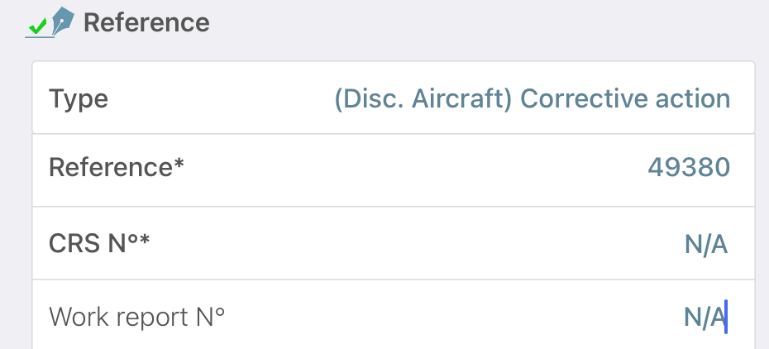
Tap on the CRS N° field.
Type the CRS N°.
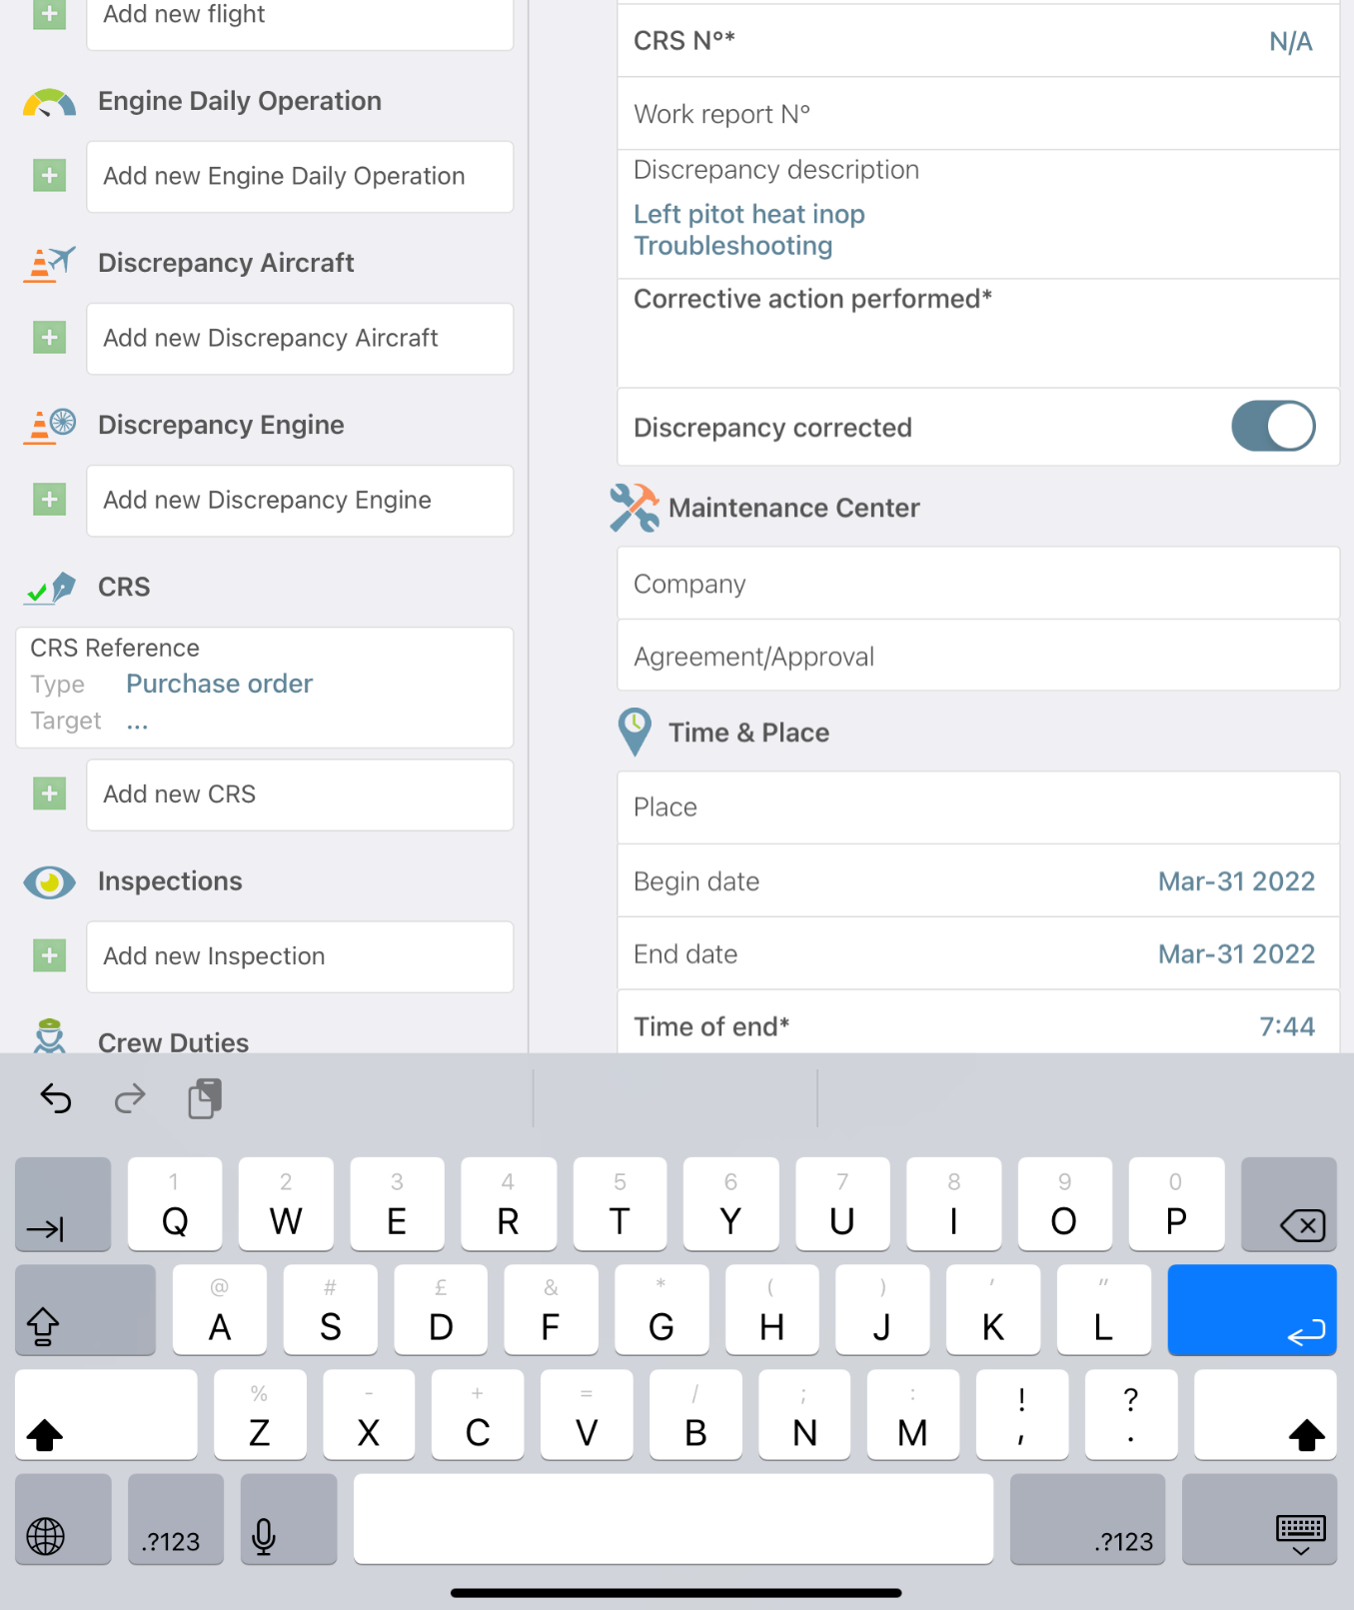
Type the Work Report N°.
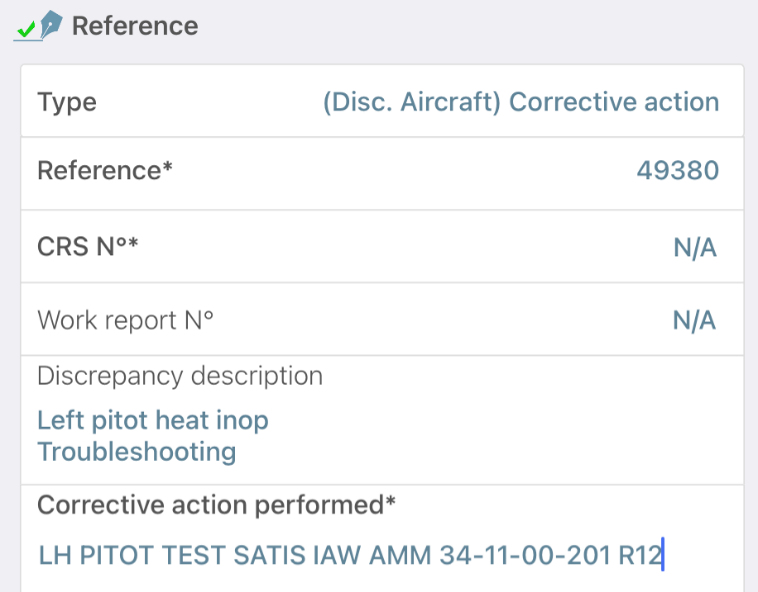
Tap on the Corrective action performed field.
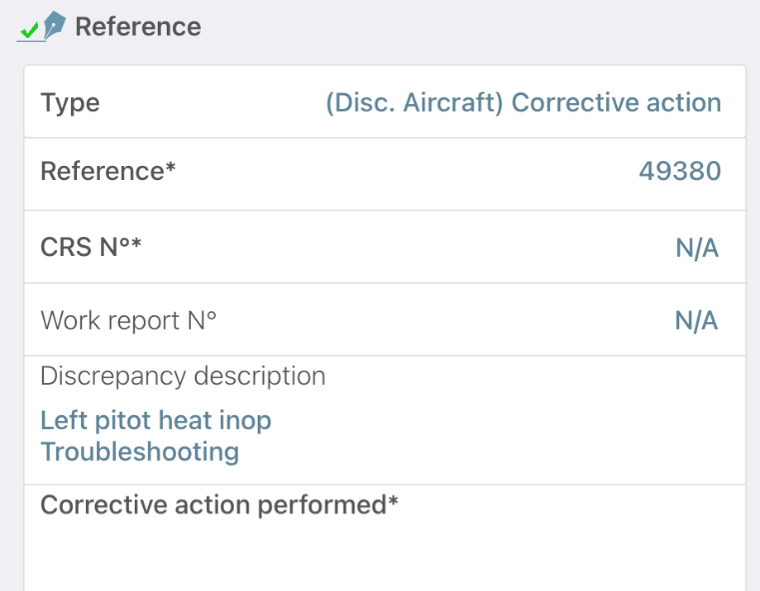
Describe the action taken by the technician.
The toggle indicates that the completed action is enough to fully fix the issue.

If the problem is temporarily solved because the maintenance has been differed under an MEL reference for e.g., you can specify it and tap on the toggle to state that the discrepancy remains open.
The discrepancy will not be removed from the duelist on the app.

For the purpose of this tutorial, we are going to fill in the form as if the problem has been corrected.
Tap on the Company field. You can either select an entity of the address book or type the name of a company.
If you pick an address book entity, the Agreement/Approval field will be automatically filled in. Otherwise, you will need to type it.

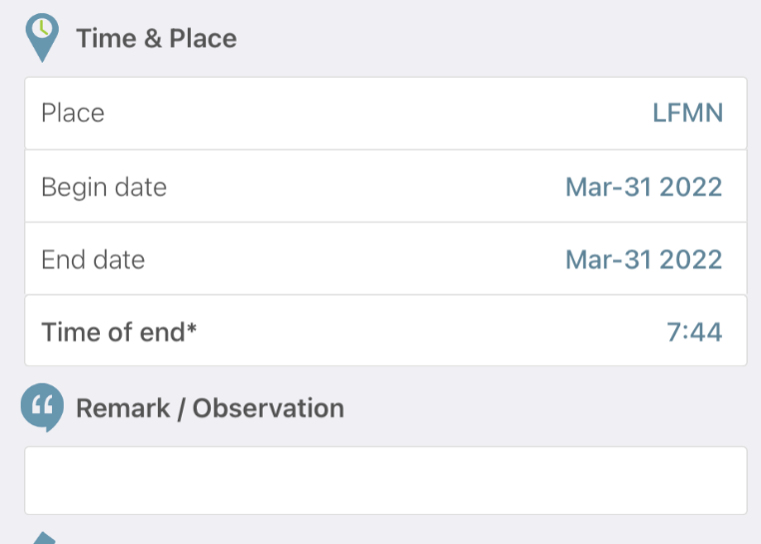
Indicate the place of work.
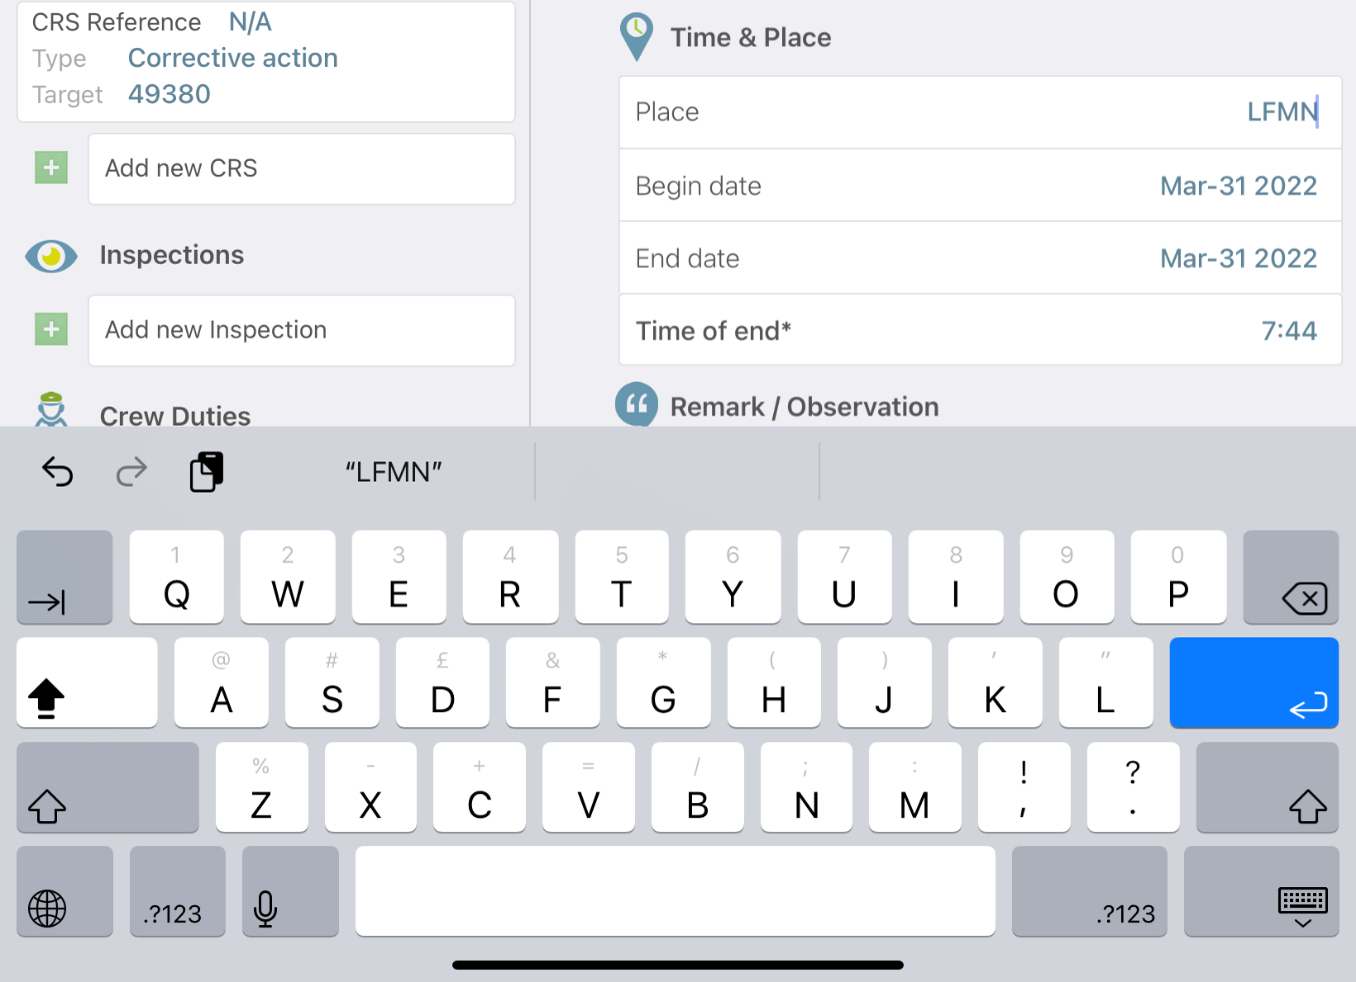
The time of end field can be overridden.
Tap on the Remark/Observation field to type.
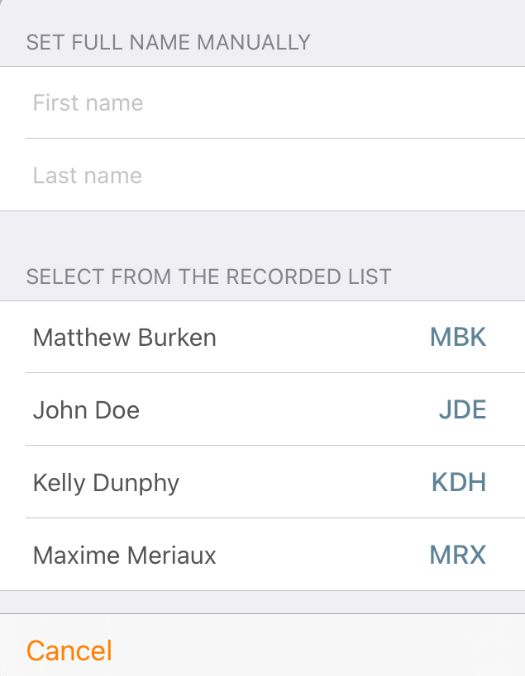
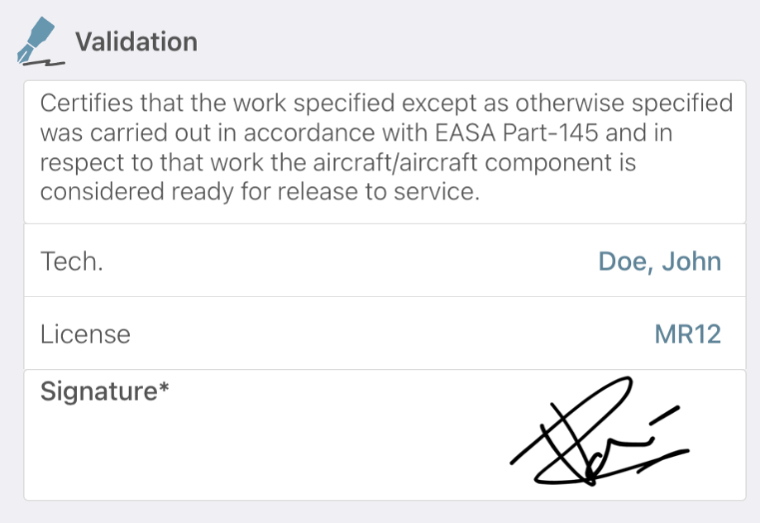
Tap on ‘Tech.’ to access the list of technicians that are part of the selected MRO center based on the information recorded in the address book module of the desktop version.
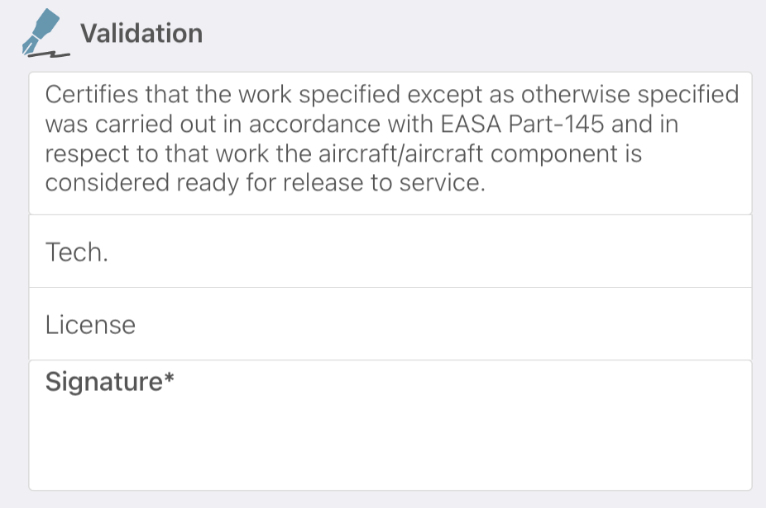
Pick a technician or set full name manually.
Either the License is automatically displayed according to the information registered in the address book or you can type it.
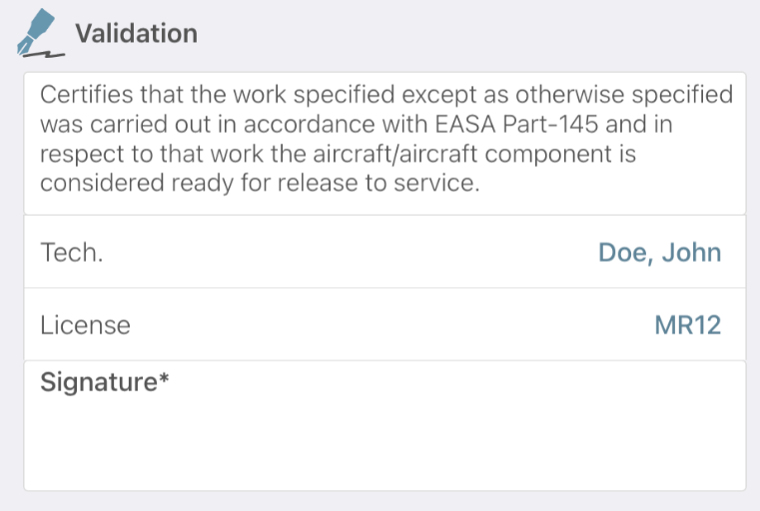
Sign to validate the CRS and tap on ‘Validate CRS’.
Tap on ‘Done’ on the top right-hand corner of the screen.
In the not-sent techlogs list, you can see the log we created with a green flag that indicates that a CRS has been added.
Tap on ‘Send now’.
Tap on ‘Send final version’.
The CRS went from the ‘Not Sent’ section to ‘Retrieved from server’ section.
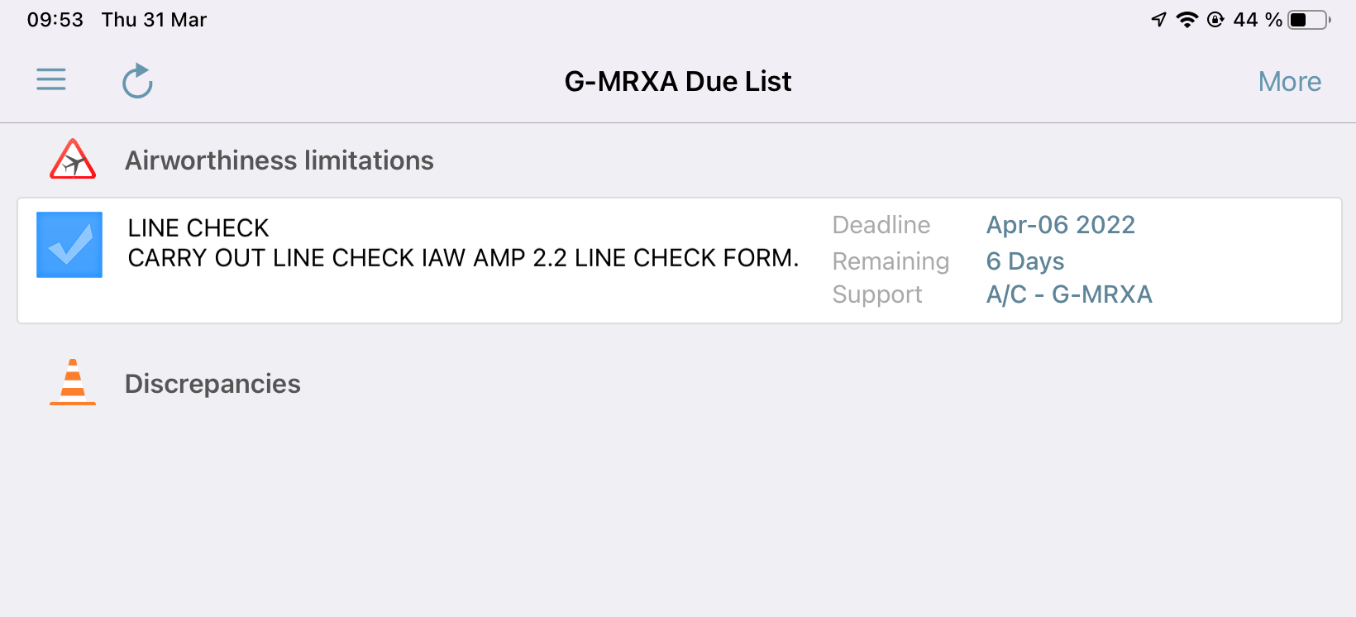
Open the Due List and tap on Refresh.
The discrepancy disappeared from the Due List.
If you switch to the desktop version, even if you click on 'Refresh Data', there is still the number between brackets that indicates that there is one open discrepancy, and you can still see the problem in the list of discrepancies.
The technical staff needs to be informed that a problem has been declared, the discrepancy cannot disappear because a technician signed an associated CRS.
The airworthiness manager has to approve the action performed.

Open the Techlogs module to see the log we created.
Click on ‘CRS and Inspections’ to access the list of information signed by the technician.

Click on preview to generate the log report.
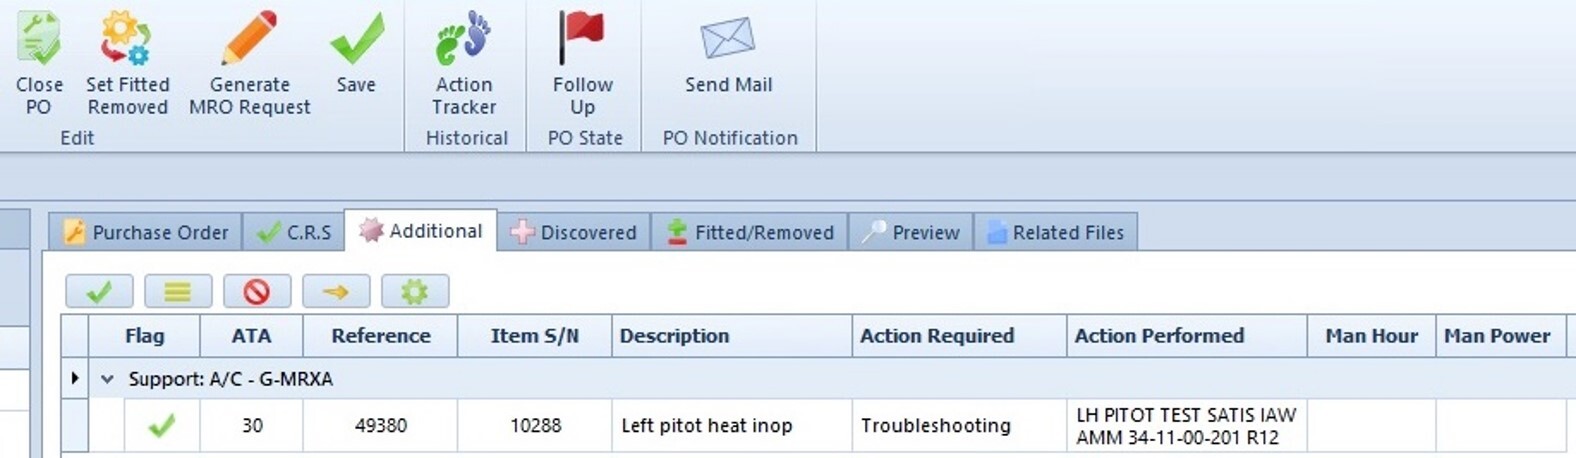
In the reference, you can see that the system has automatically generated a work order and integrated all the information of the discrepancy and the corrective action.
The airworthiness manager only has to open the Purchase Orders module.
Here you see the generated purchase order.
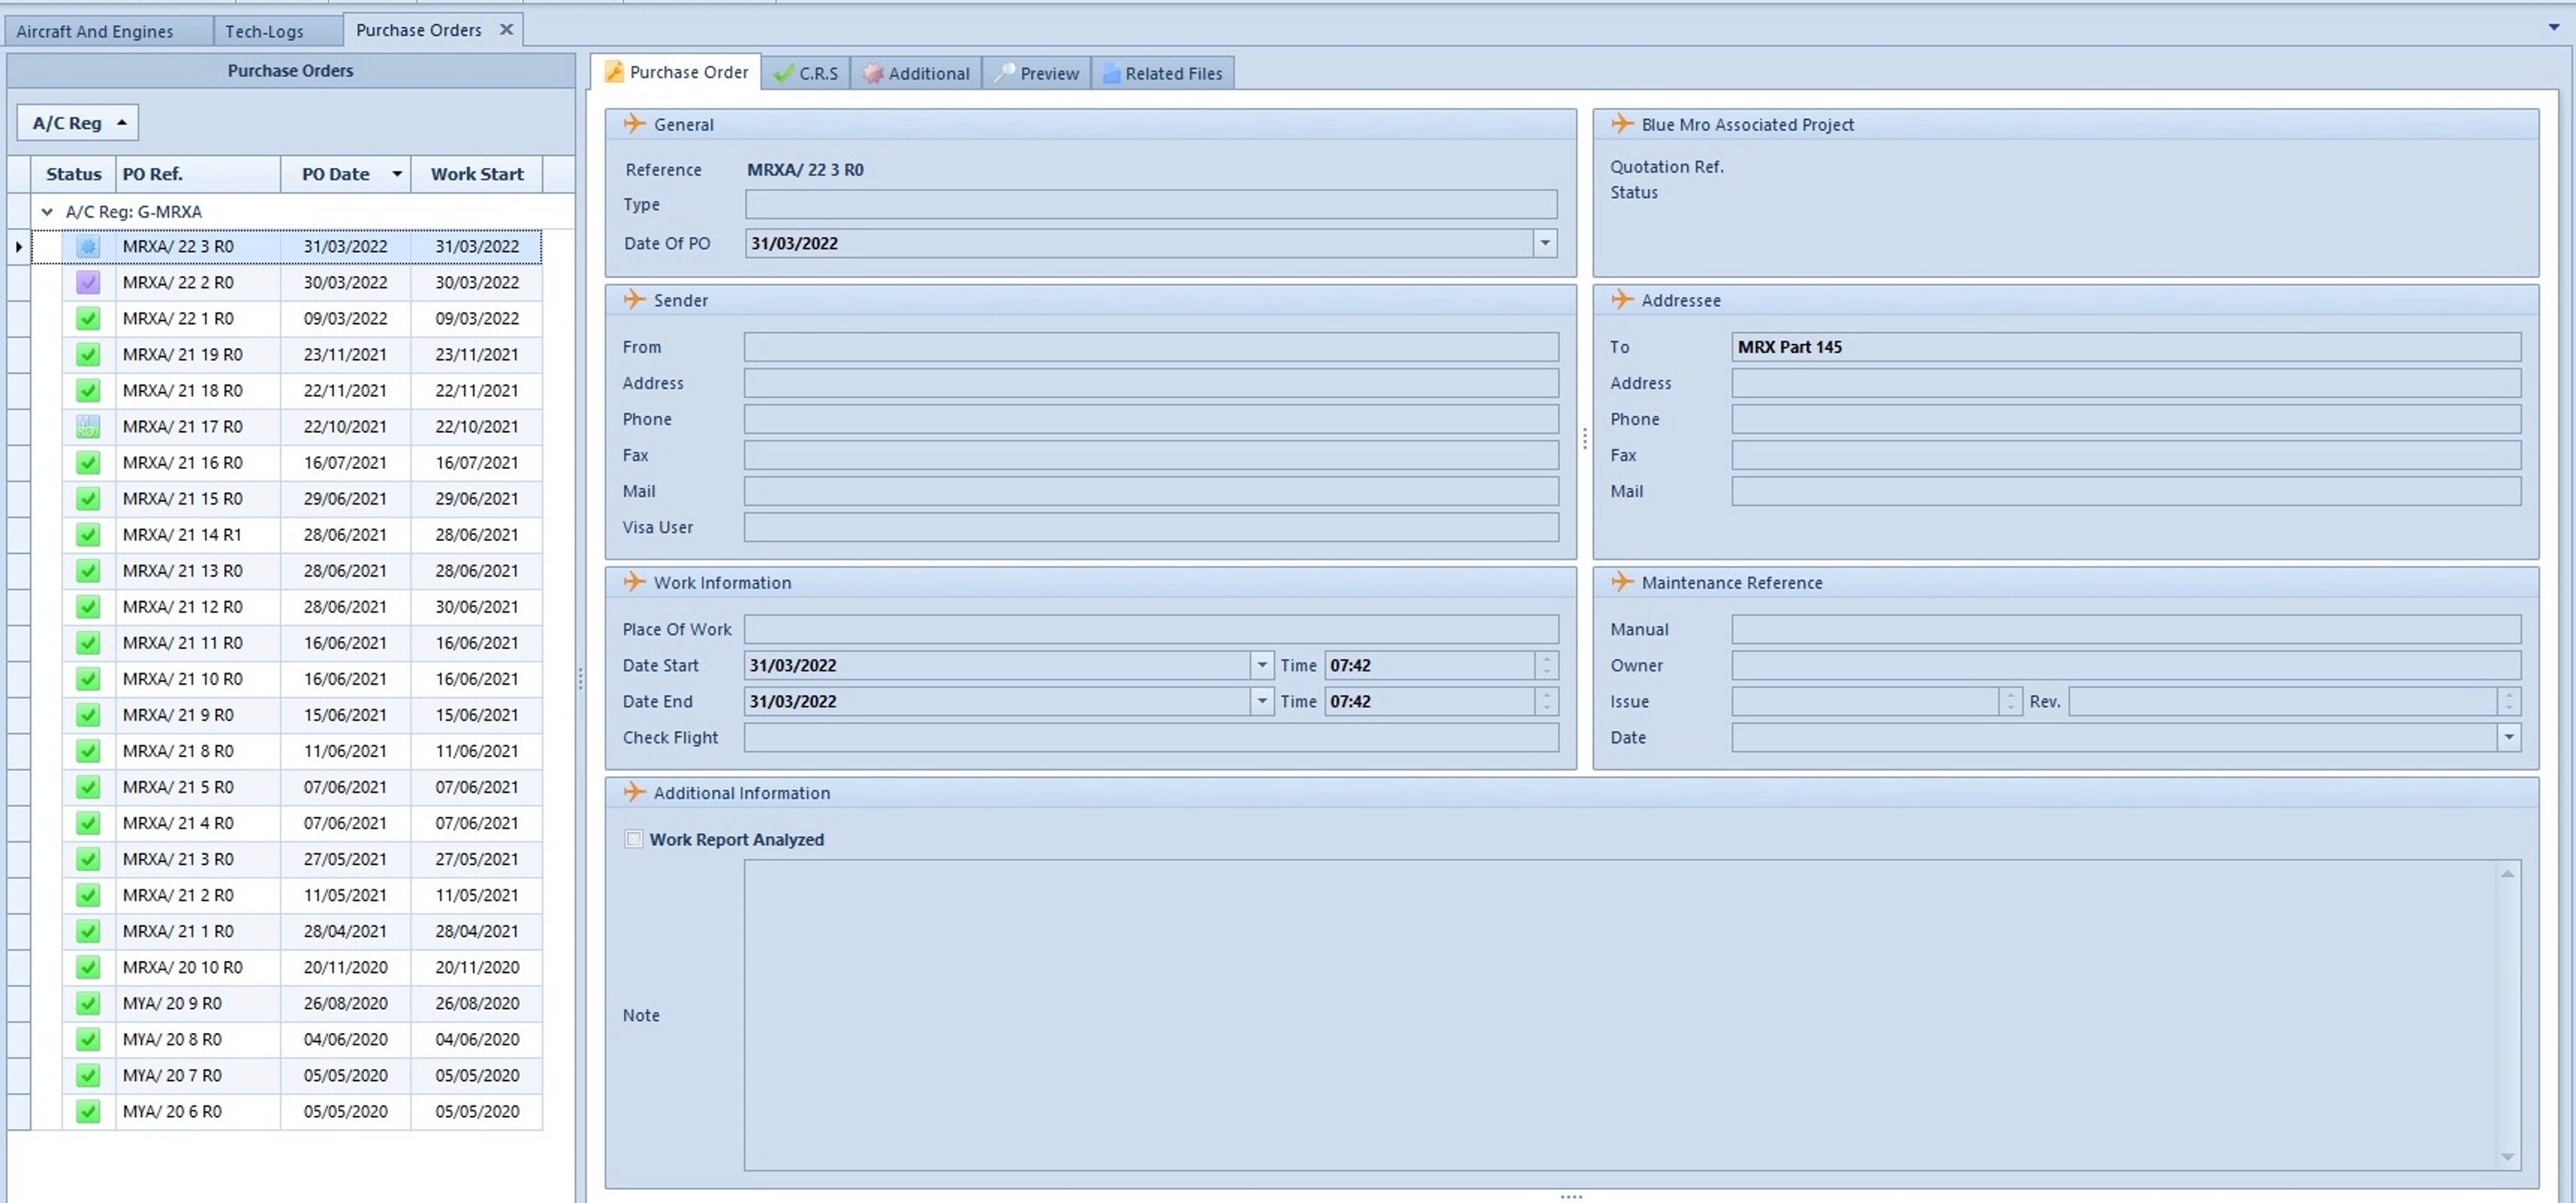
Open the ‘CRS’ tab to display it.

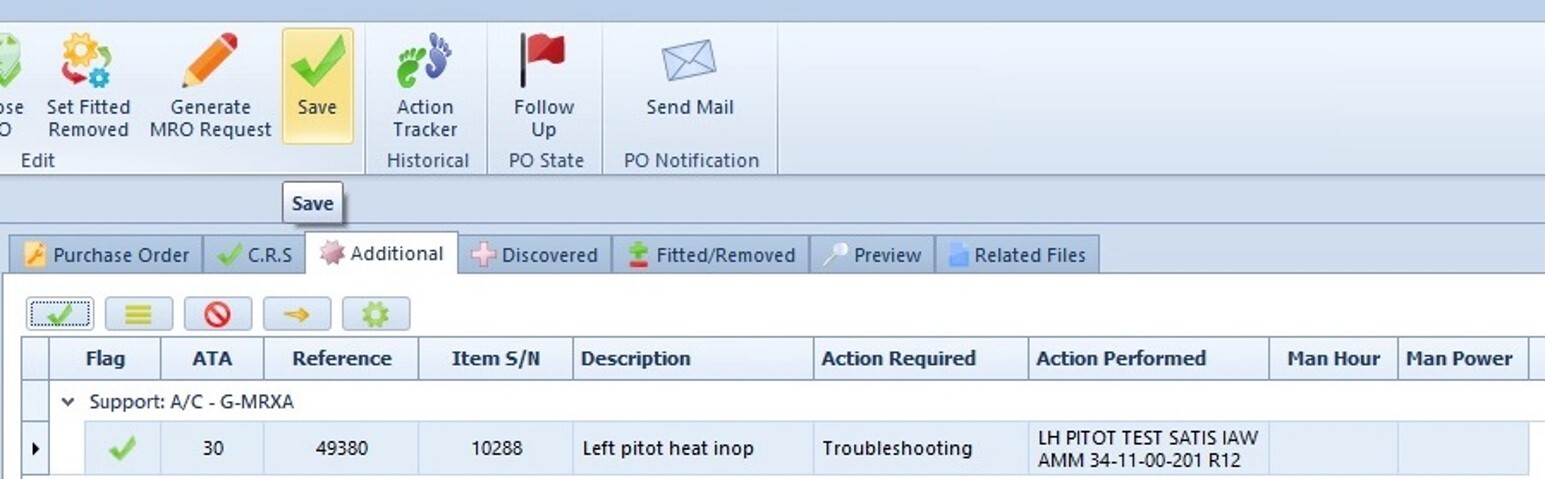
Click on 'Additional' to access the description, the action required, and the action performed.
Switch
to edit mode  to validate or invalidate the CRS.

If
the airworthiness manager decides to invalidate the work that has been
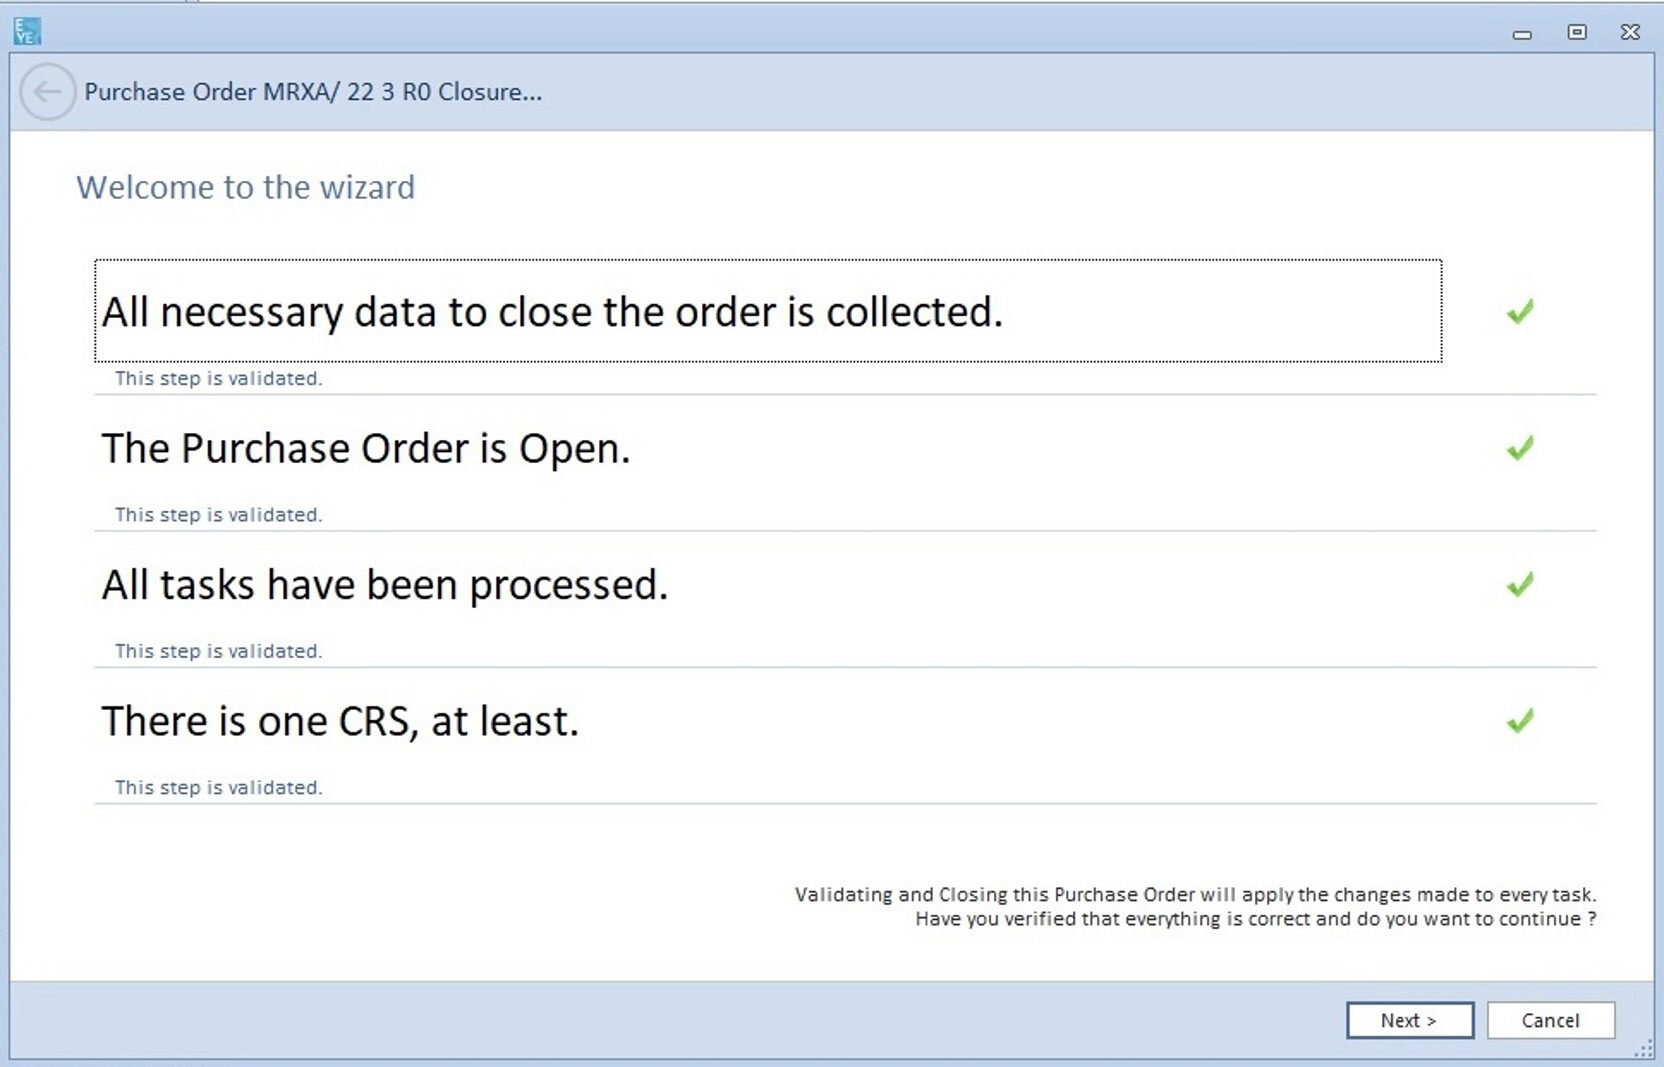
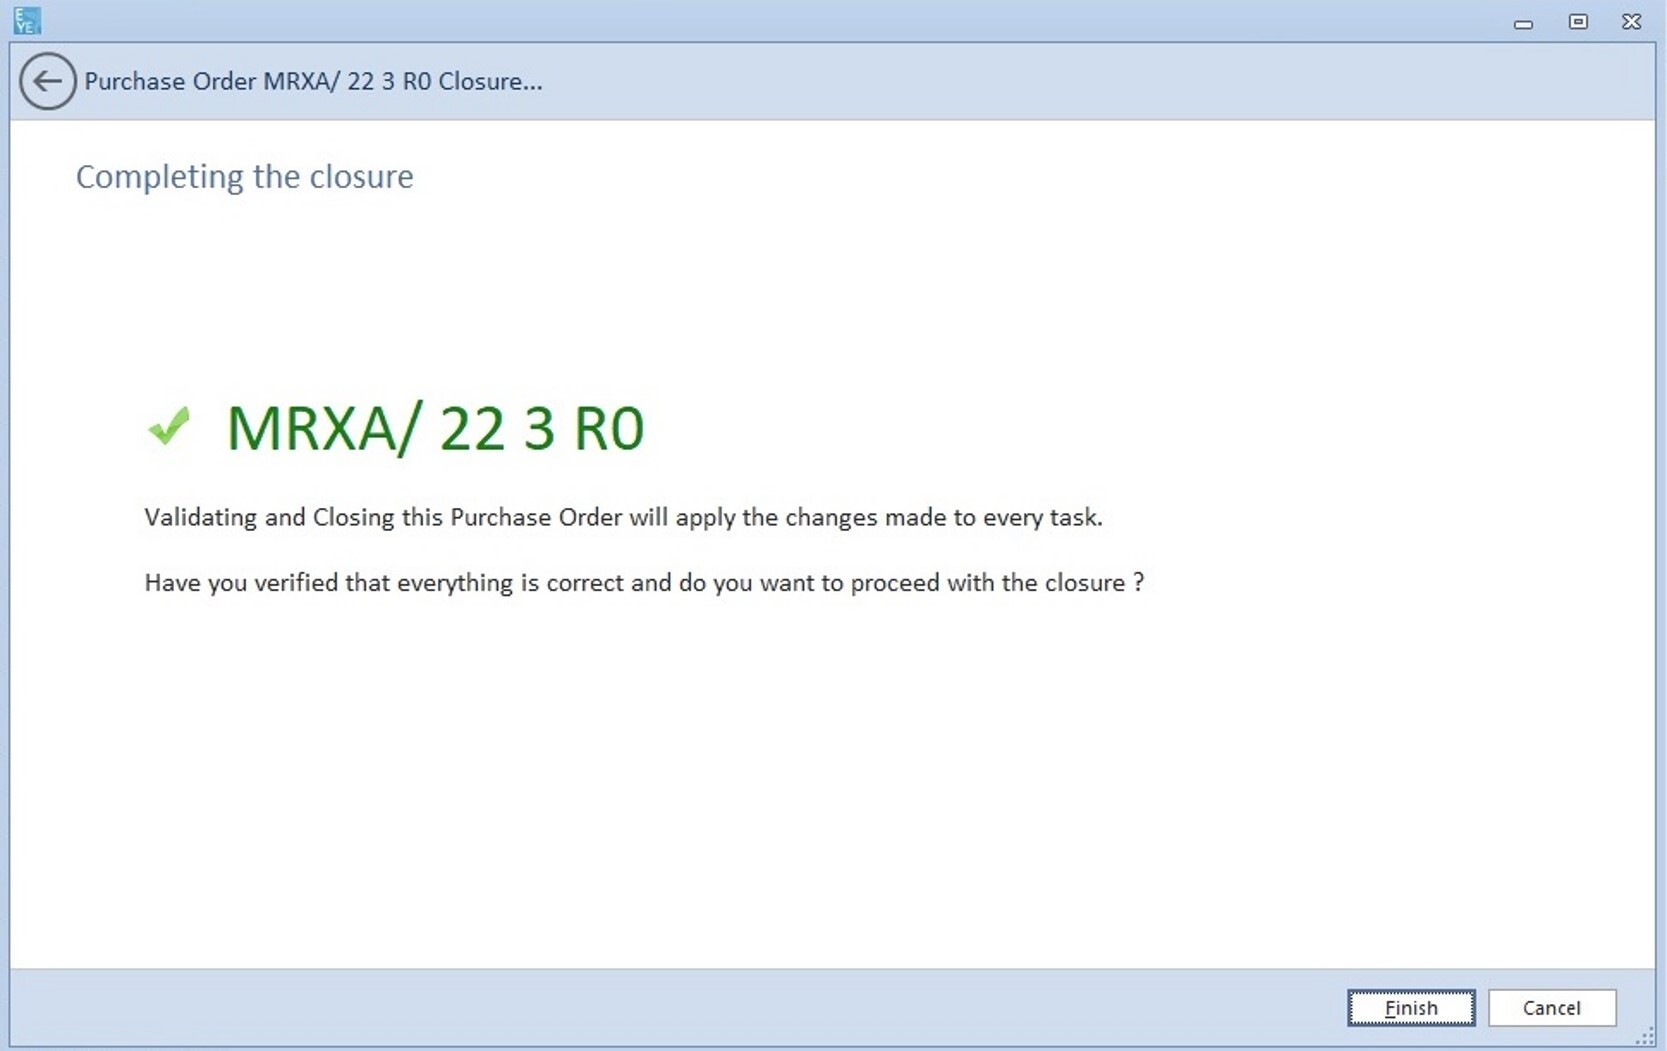
performed, he clicks on the cancellation button to cancel the task  , then he closes the purchase order.
Otherwise,
the airworthiness manager validates the action taken  , clicks
“Close POâ€
, clicks
“Close PO† , closes the purchase order, and saves data .
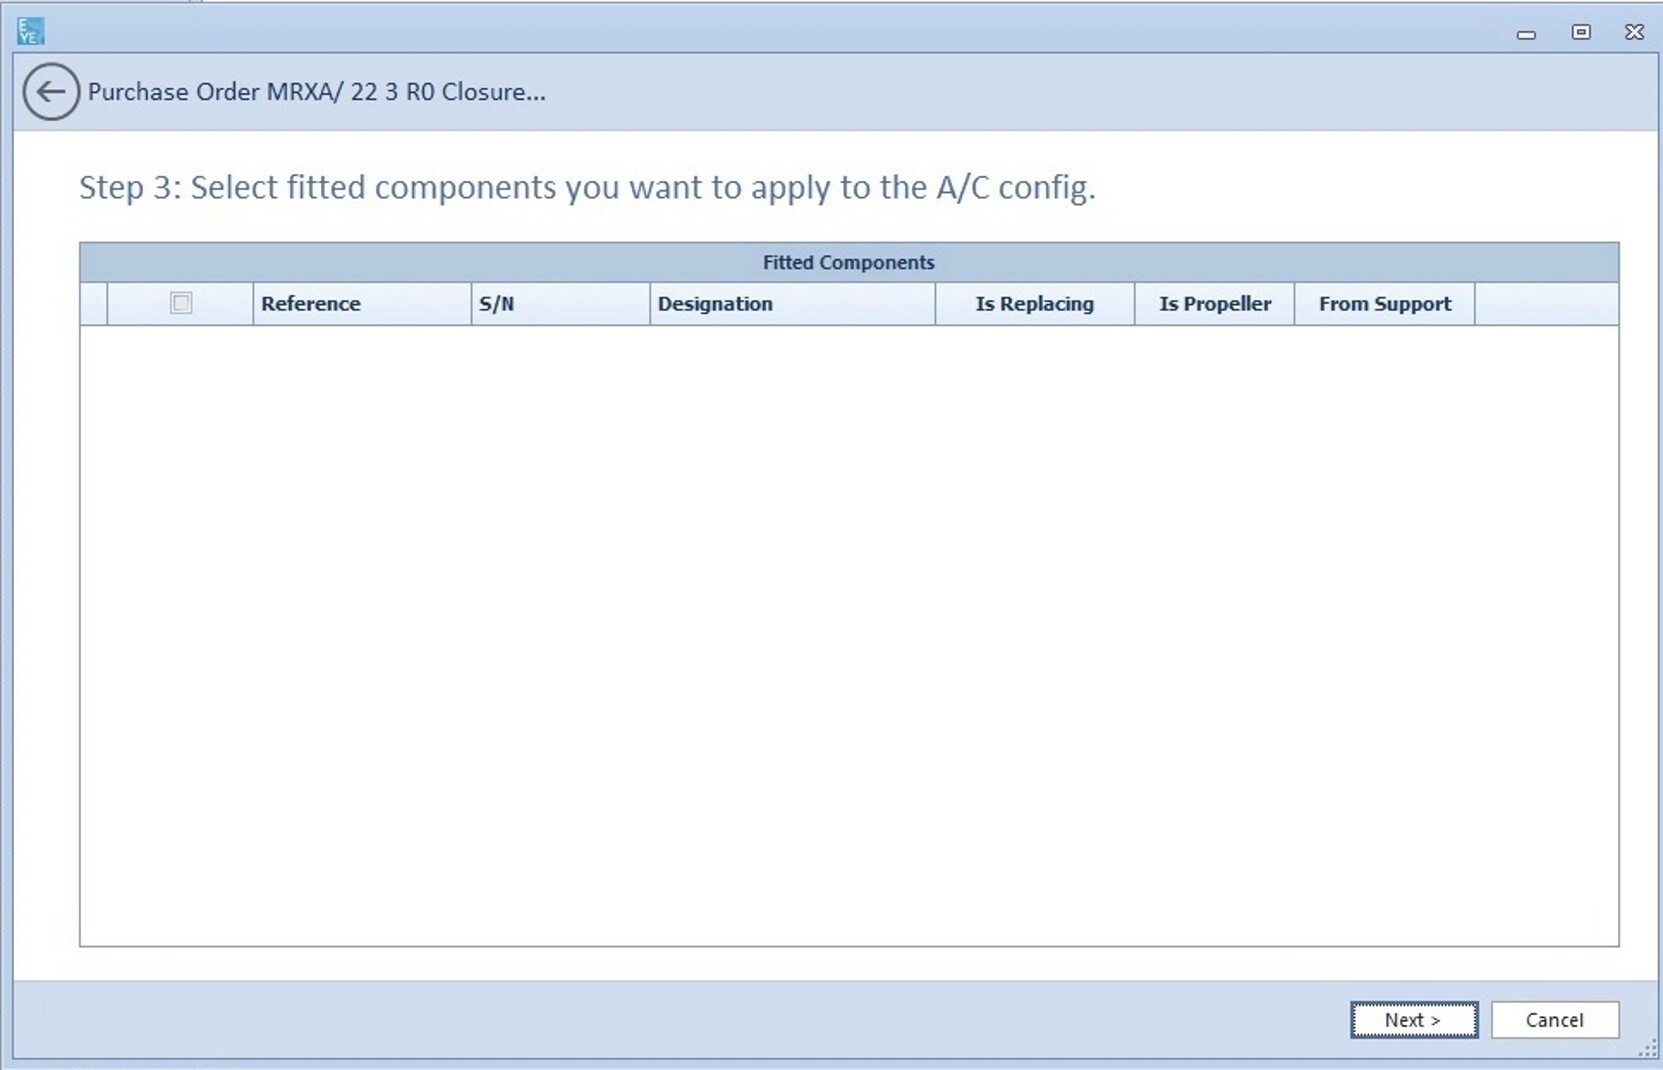
Click on ‘Next’.
Click on ‘Next’.

Click on ‘Next’.
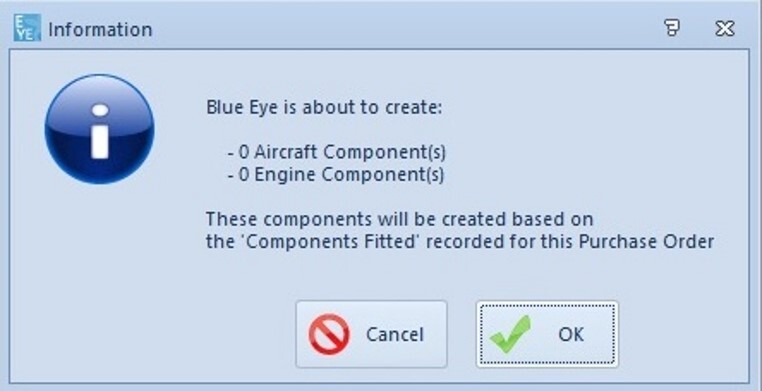
Click on ‘Finish’.
Click on ‘OK’.
Click
on ‘Save’ .
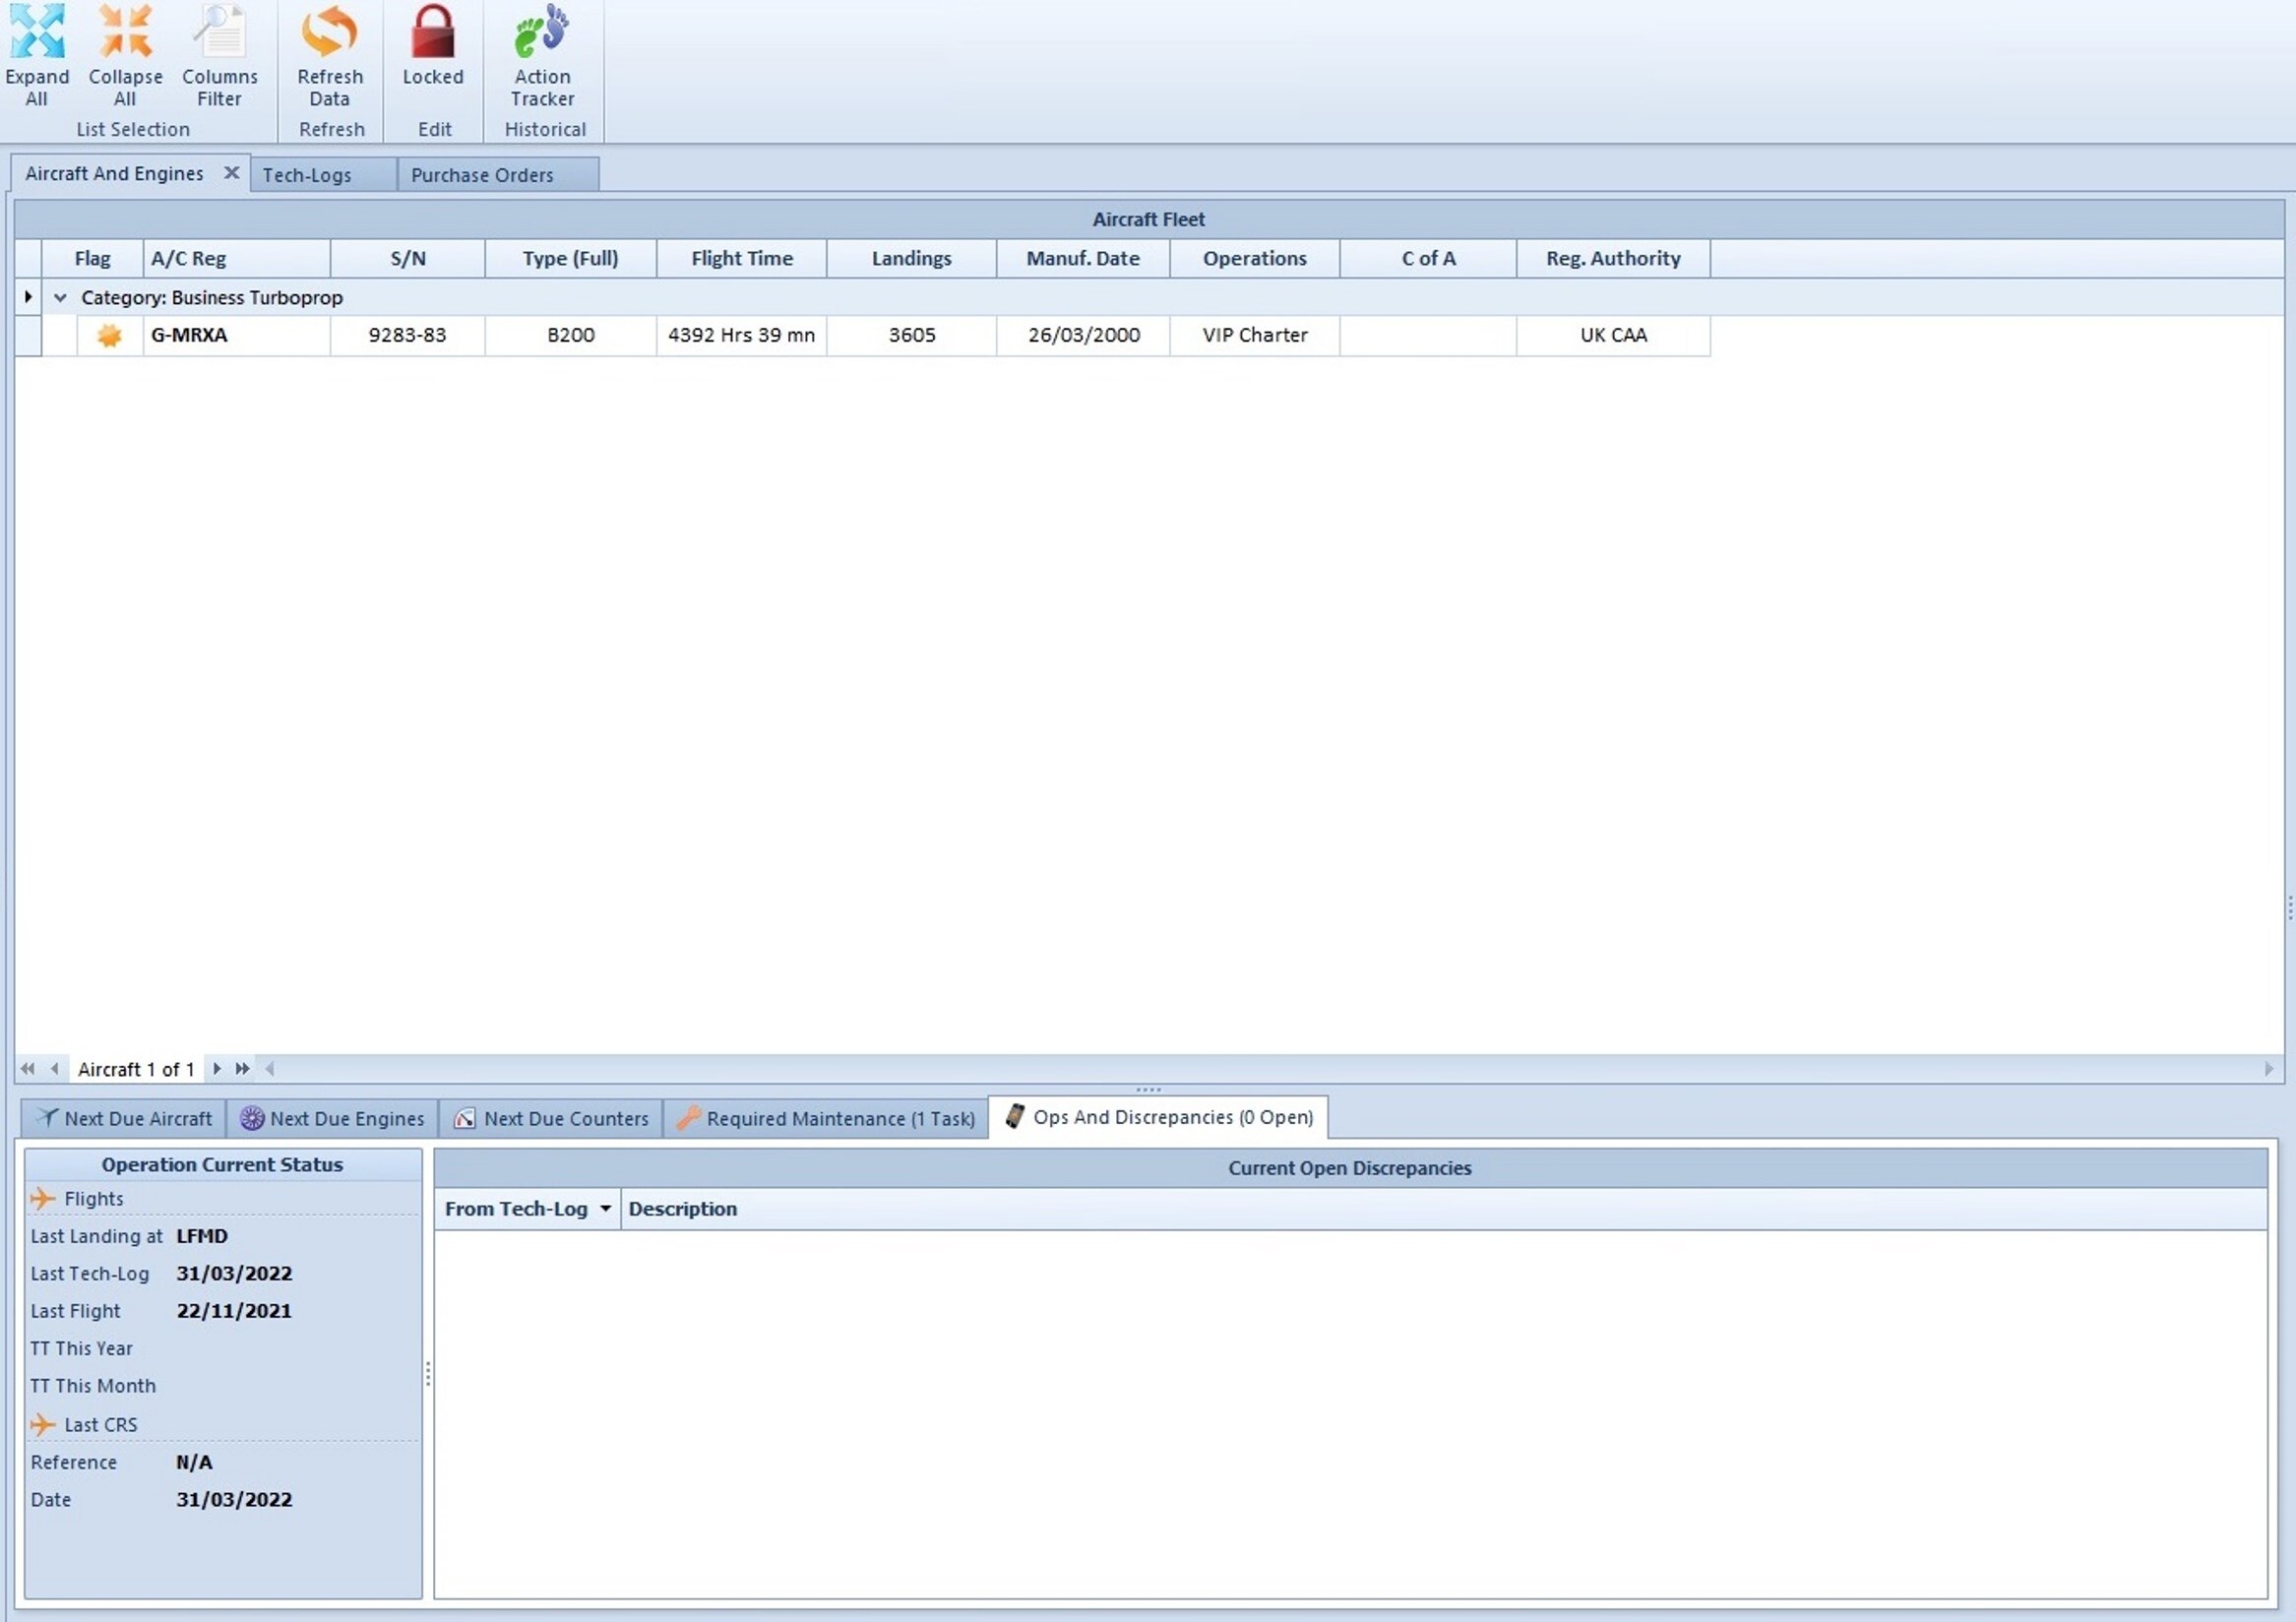
Now go back to the 'Aircraft and Engines' module and click on ‘Refresh Data’ (button), the discrepancy and the alert have disappeared.
Pilots can sign CRS of recurrent inspection type.
Pilots are trained to complete specific tasks so they can sign CRS corresponding to the specific action. If you create an inspection package and set it as recurrent by ticking the ‘Recurrent’ box, the pilots will be able to sign CRSs related to the inspections carried out.
You will not need to add the inspections to a Purchase Order.
The deadline for the inspections will be re-forecasted at the date of the CRS.
The inspection package is available in the due list of the iPad app.
