
Navigate & Customize
Action Ribbon & Selection
This article explains how to get started with the system, how to navigate between the different windows and modules and how to use the different filters and sorting options.
That way, you will be able to get the views that are the most relevant for the task you have to carry out and reduce the time you spend looking for the information you need.
The window is divided into different panels and grids.
On the top of the page, you have the action ribbon, this is where you will find all the buttons you need to preview, expand, collapse or refresh your data, switch to edit mode… basically every action that will you will need to use the system.
Preview: 

Expand or collapse lists: 
Filter: ‘columns filter’ button
To refresh: ‘refresh data’ button
Switch to edit mode: 
On top of the ribbon, you will also find the session switcher (button) that will allow you to change sessions quickly, without having to restart the software. This feature is very handy for anyone who needs multiple user sessions working in parallel.
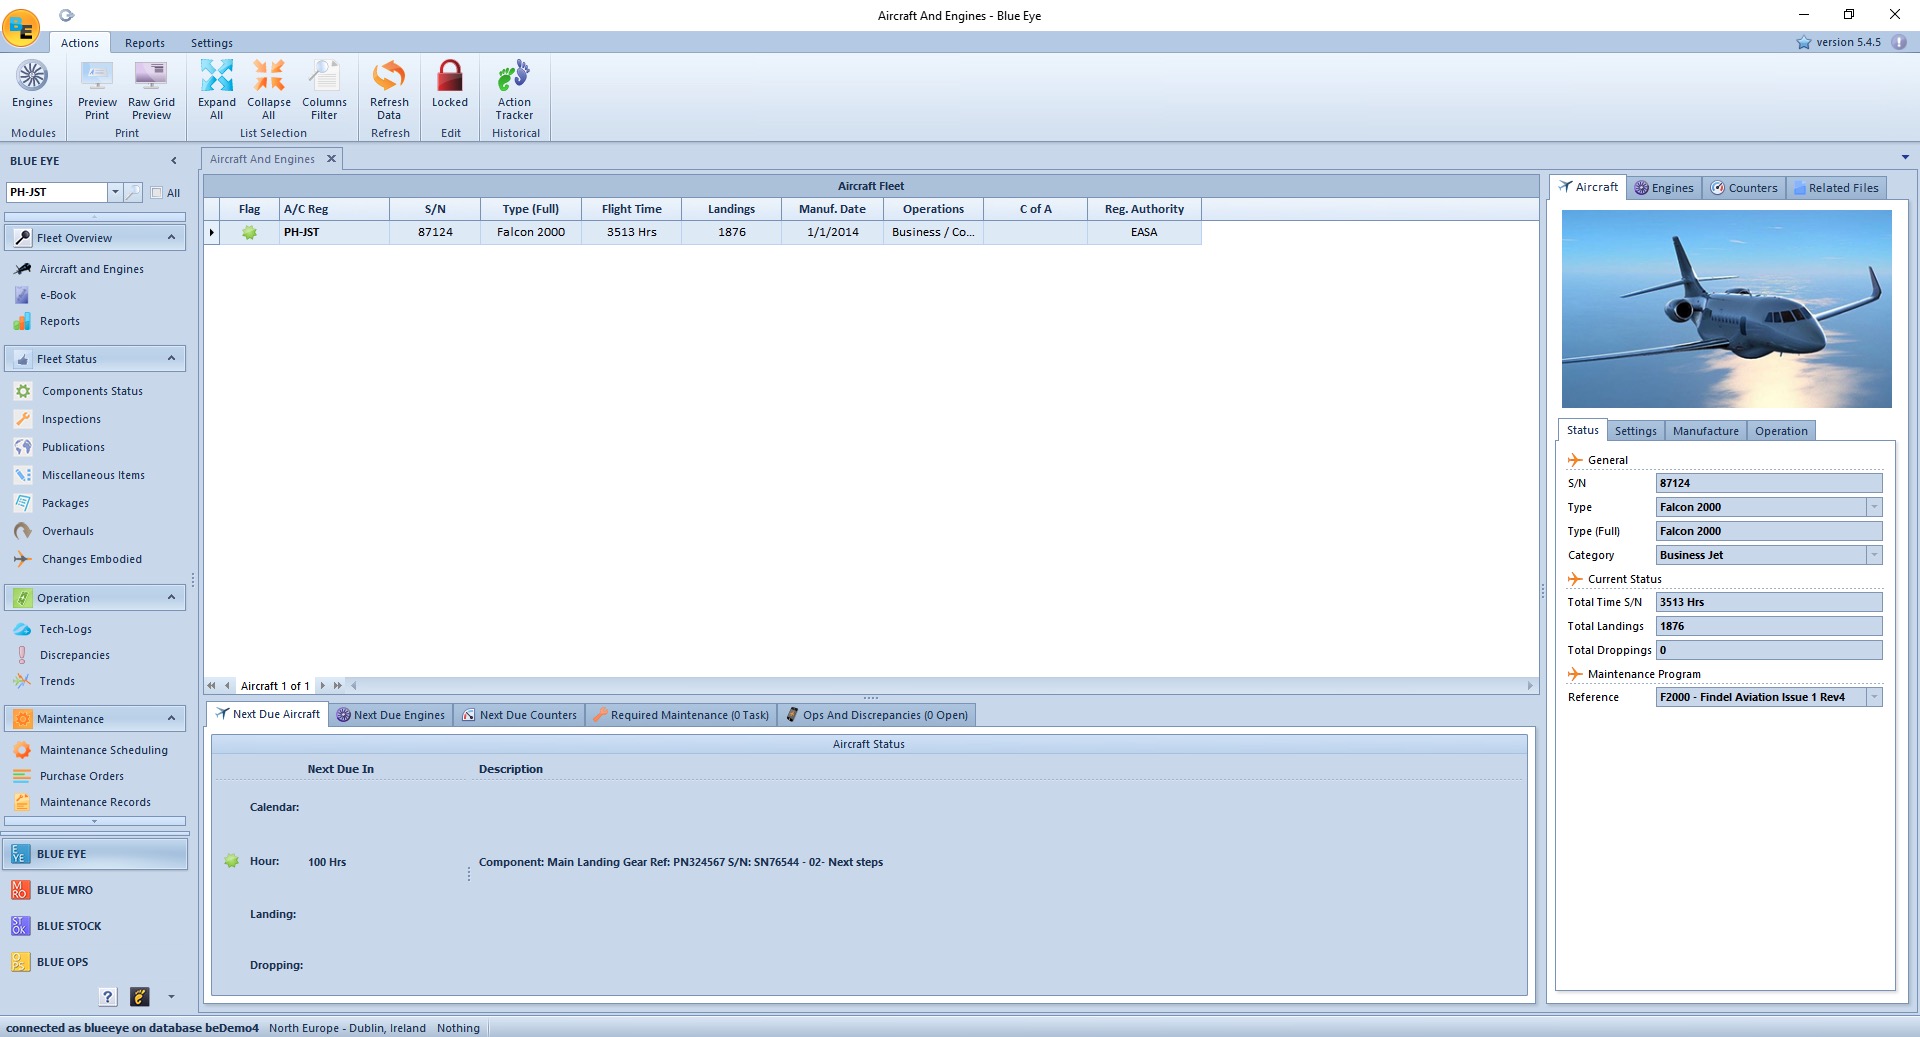
On the left panel, you have the module list. You can see that you have different sections in there, you can expand or collapse the menus using the arrows.
This is where you will select the section you want to open.
On the bottom of this panel, you will find the main module selector. Depending on which main module you have to use, you can switch in one click.
Edit Mode
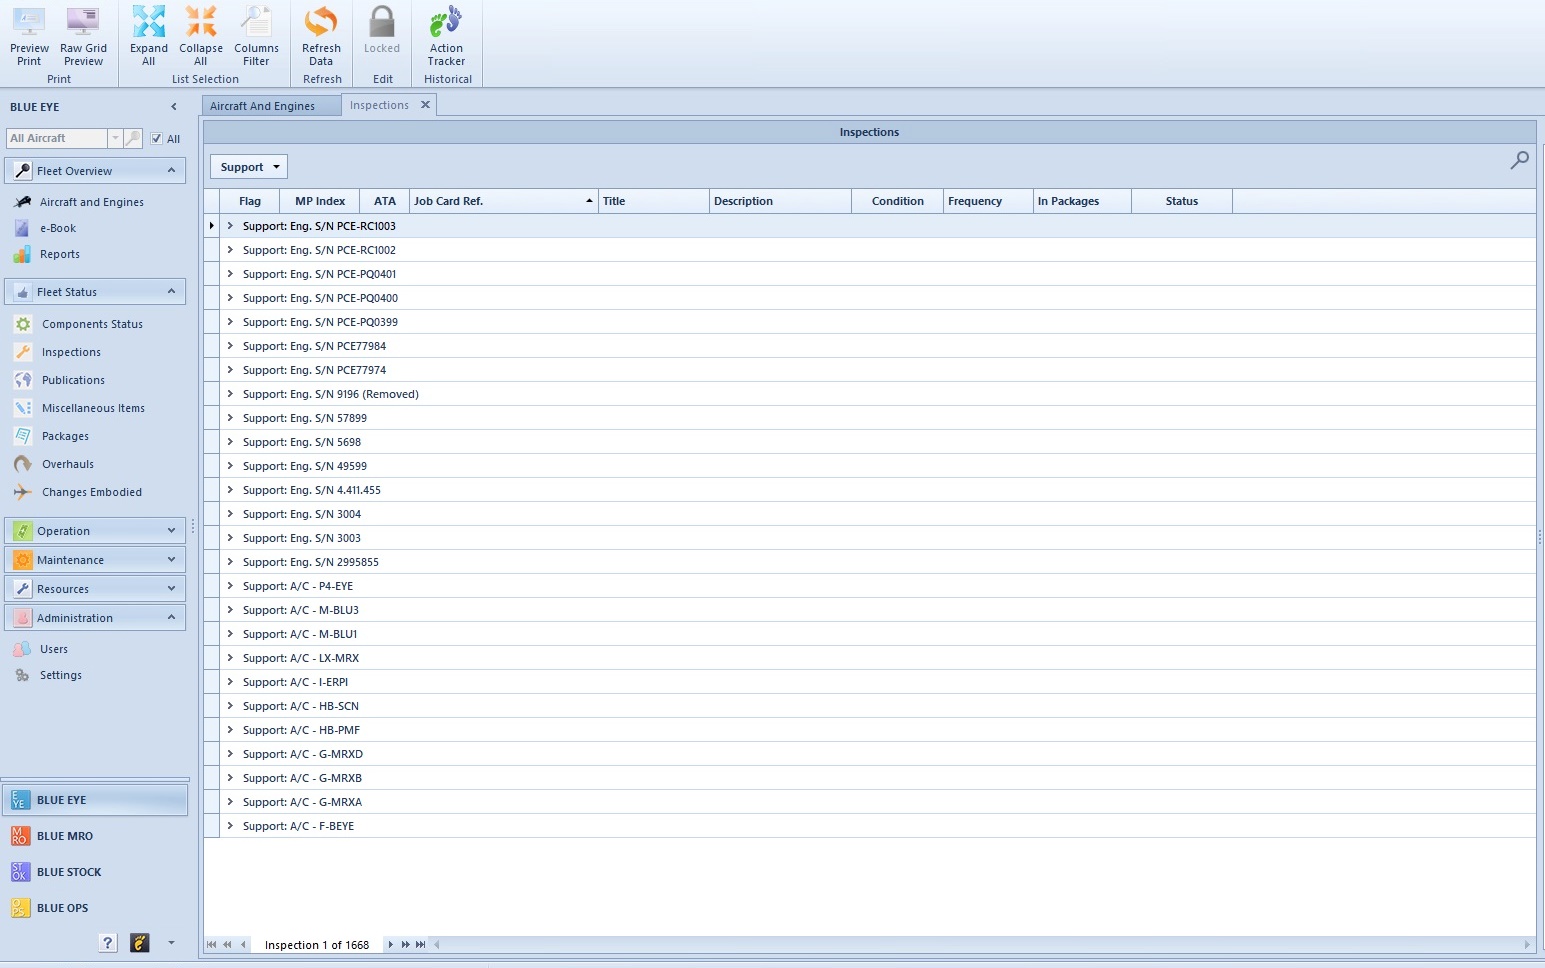
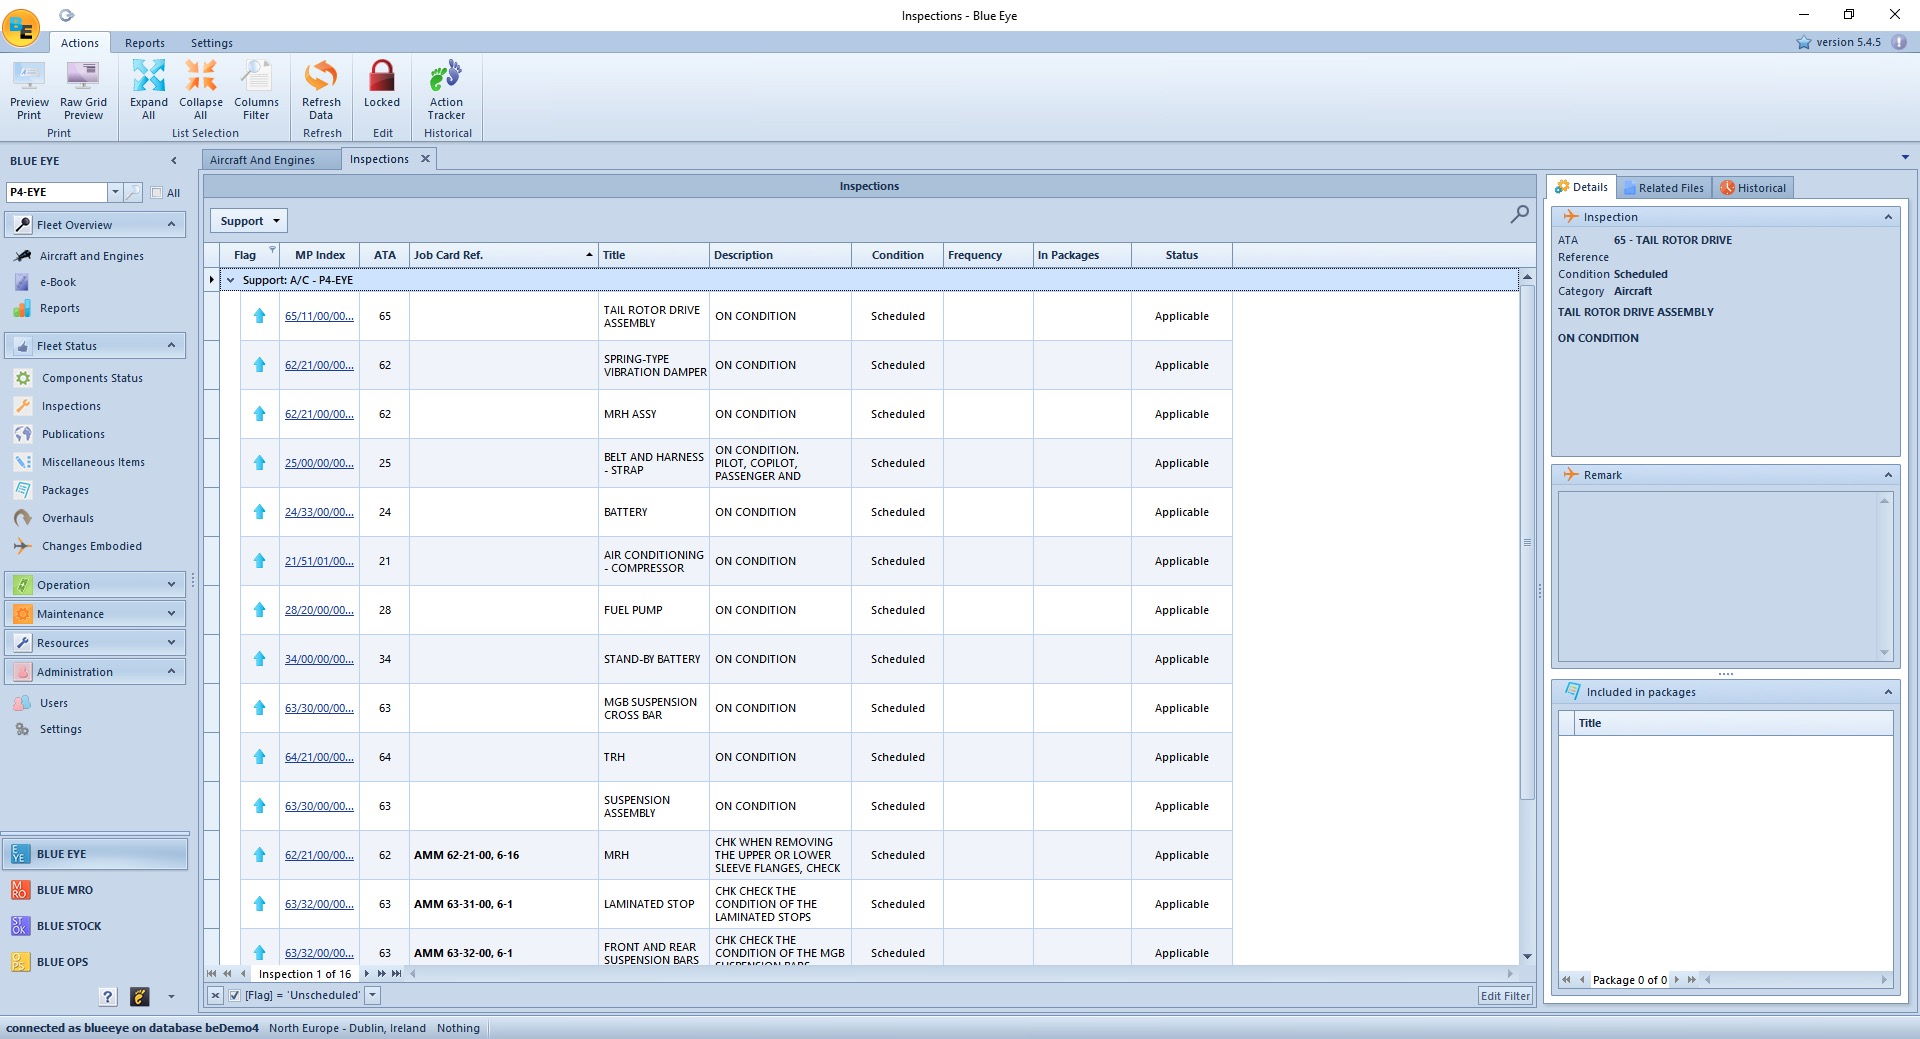
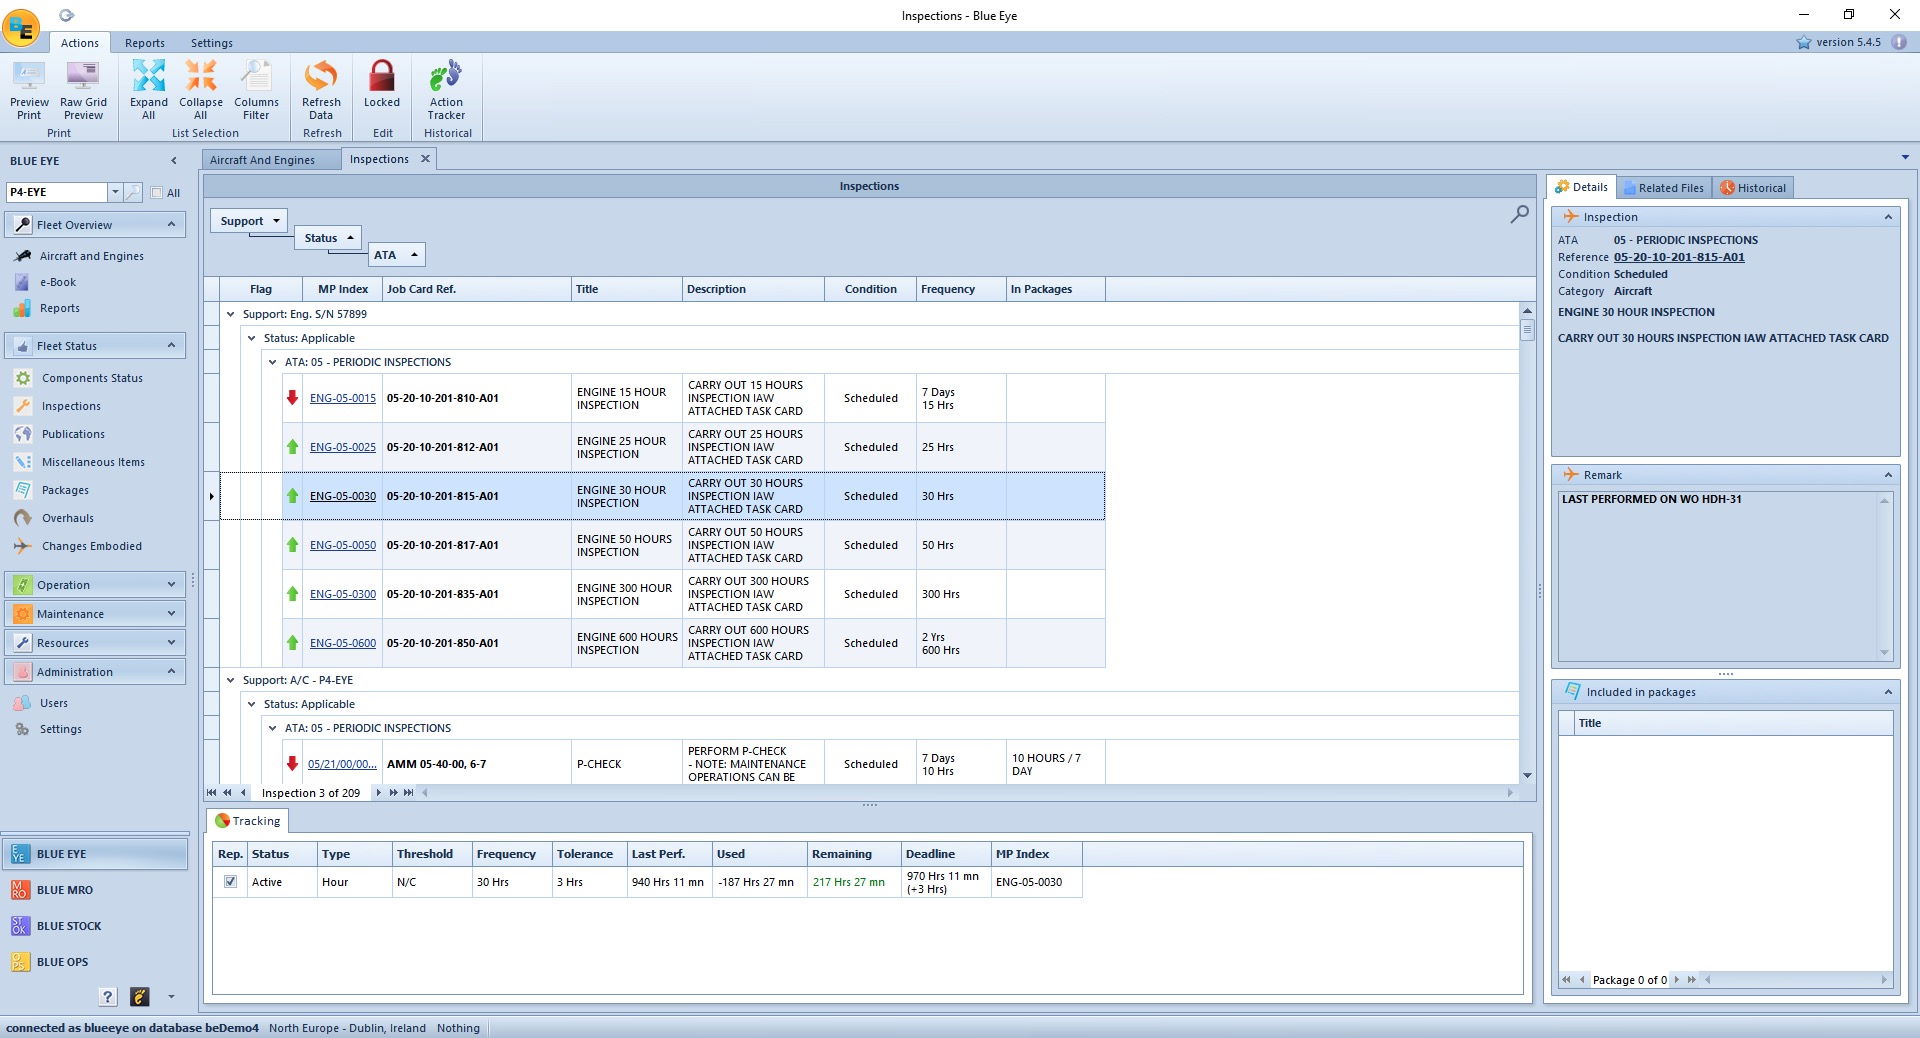
When you log into Blue EYE, select a module - here the ‘Inspections’ module - you will get your inspections list. You can either choose to see inspections related to all your fleet pressing on the checkbox “All†or select one specific aircraft thanks to the selector. As you can see, the lock icon is greyed out when you select all aircraft.
To be able to switch to edit mode, you need to select one aircraft.
By default, you are not able to make changes to the inspections list.
If
you want to make changes, you have to select one aircraft, and then click on
the lock icon .
When you are in edit mode, you cannot switch module.
In Edit mode, you are working on a local database, that means that until you save your changes, your live database is not touched.
If
you are happy with the changes you made, press ‘Save’  and the data will be
pushed to the servers.
and the data will be
pushed to the servers.
If
you are not, just press ‘Cancel changes’  and the database will remain as it
was.
and the database will remain as it
was.
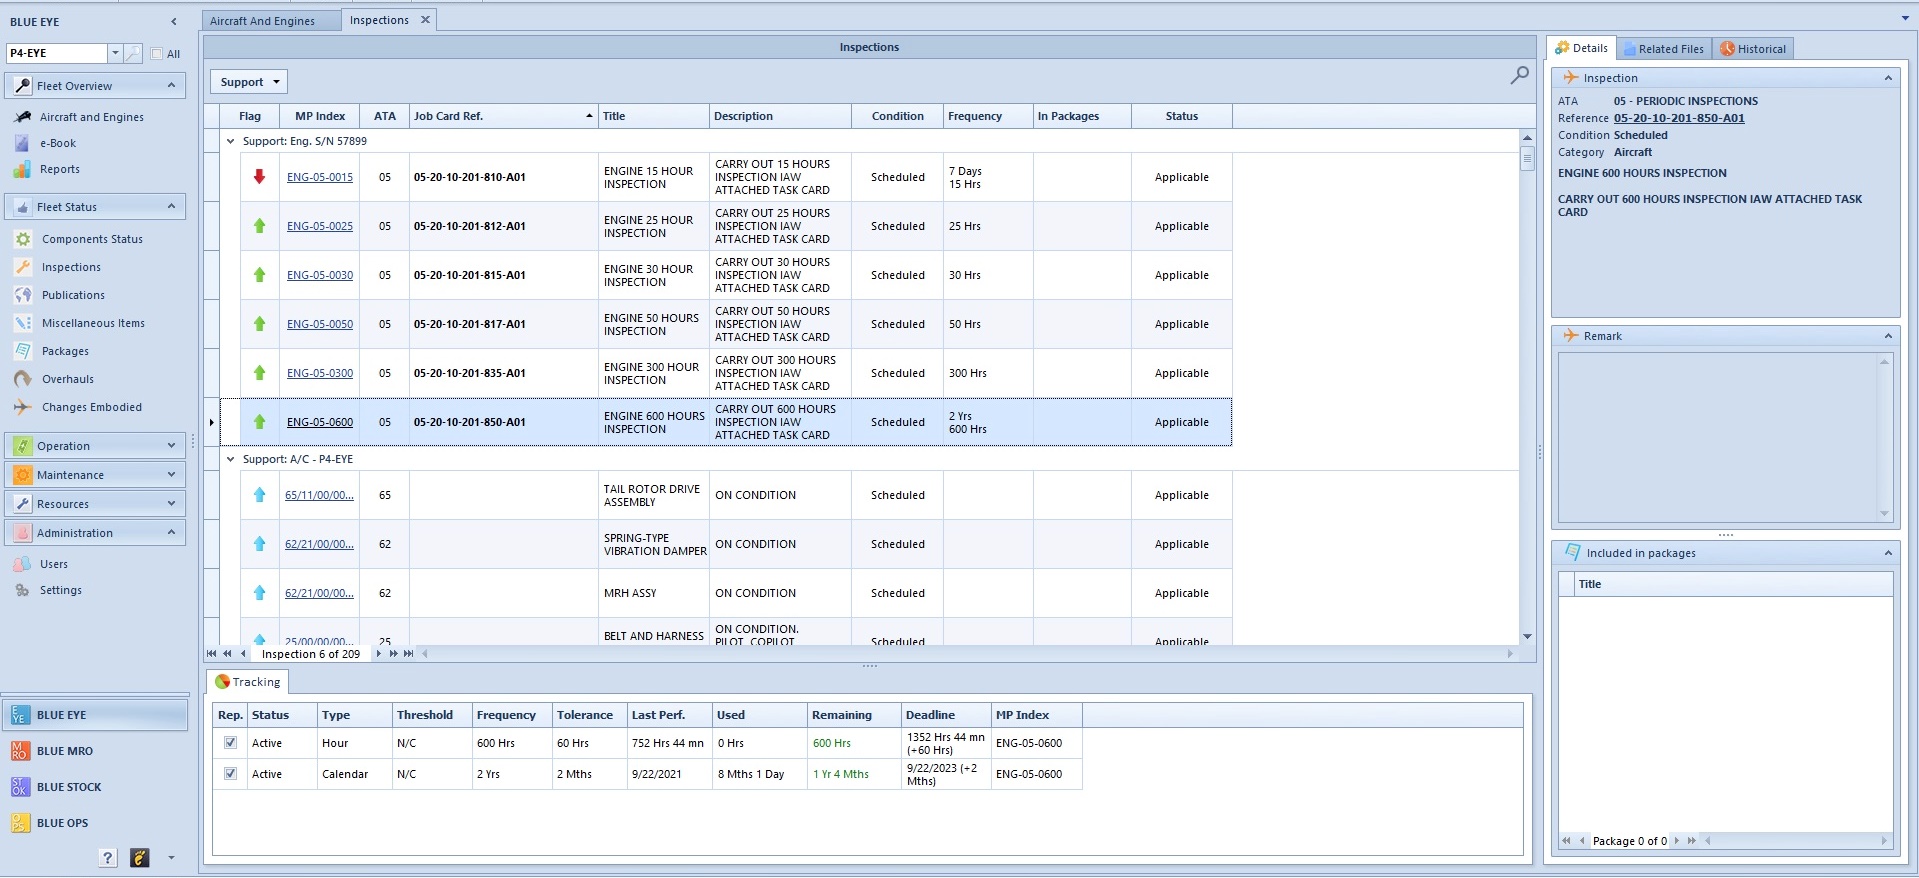
When you click on one inspection, the information linked to it will be displayed in the right panel.
For some inspections, you will also see a bottom panel appearing that will display additional information, here the tracking events.
Filter & Sort Options
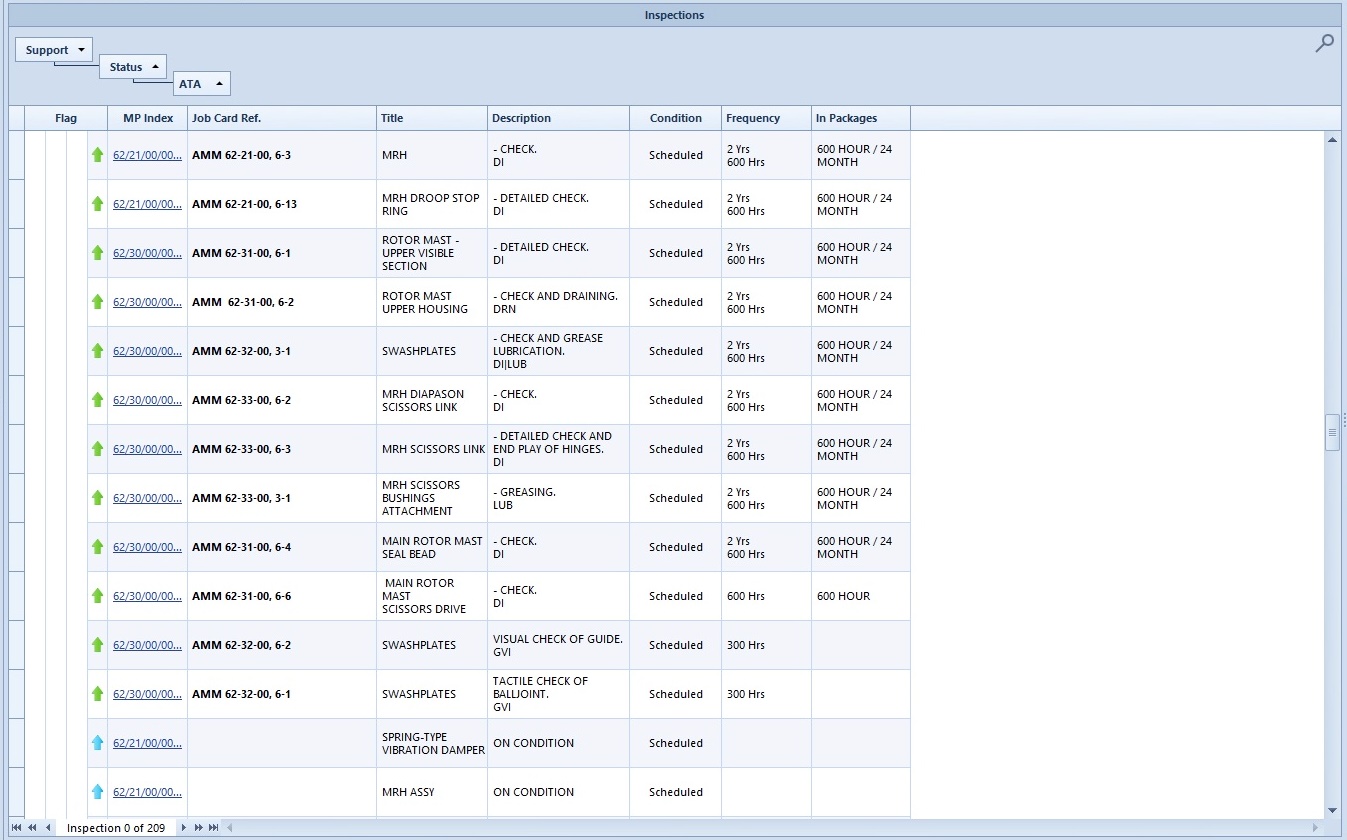
You can see that you already have several default columns in the inspections list.
If you want to organize this information the way you want it, you have a lot of options to chose from.
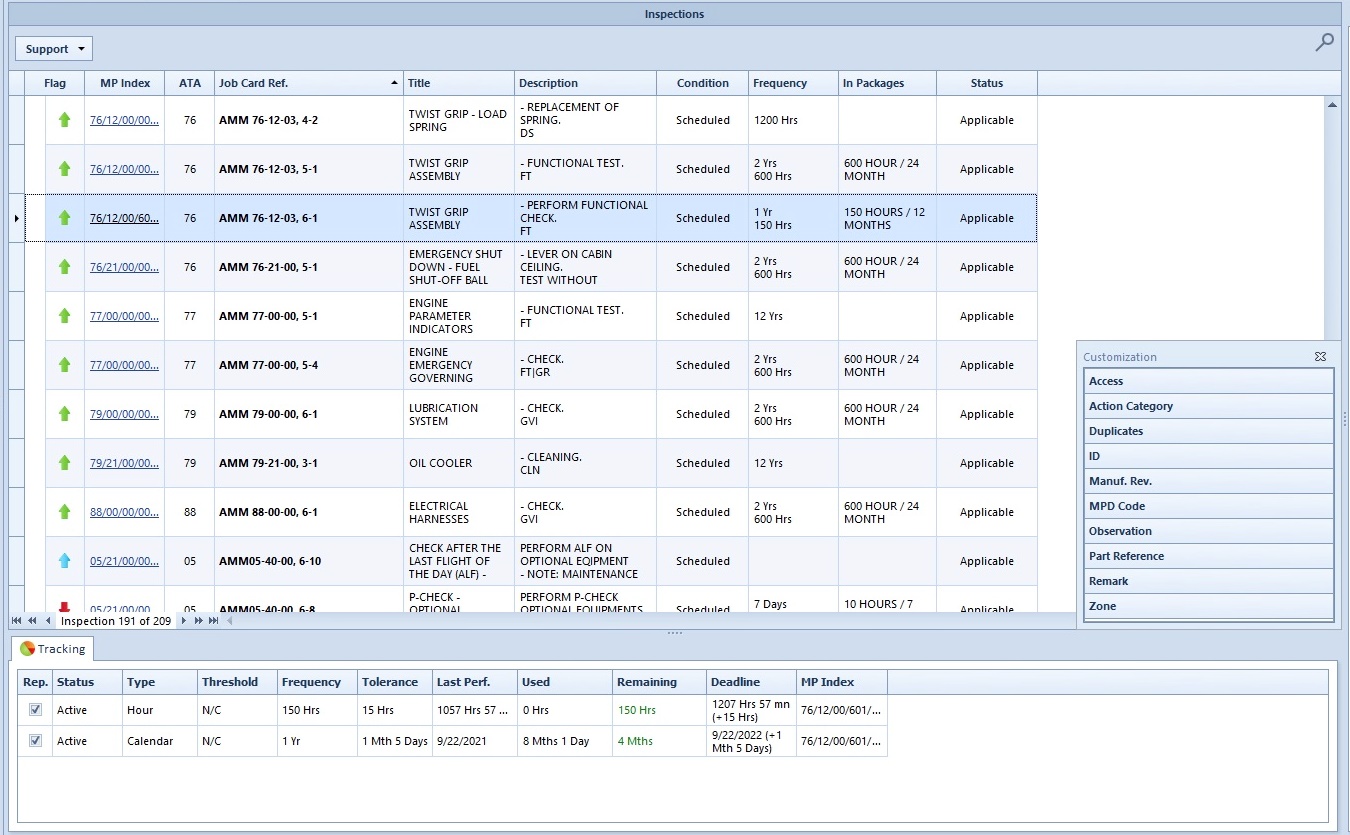
First of all, you can select or delete columns using the column chooser tool.
To open it, right-click on any columns, then select column chooser.

From here, you can customize your inspections list by adding or deleting the columns you want.
Just drag the column where you want it to appear or drag it away until you see a black cross to remove a column.
To filter, just hover your mouse over one column and click on the sort icon on the top right corner.
From there, you can choose what filter you want to activate.
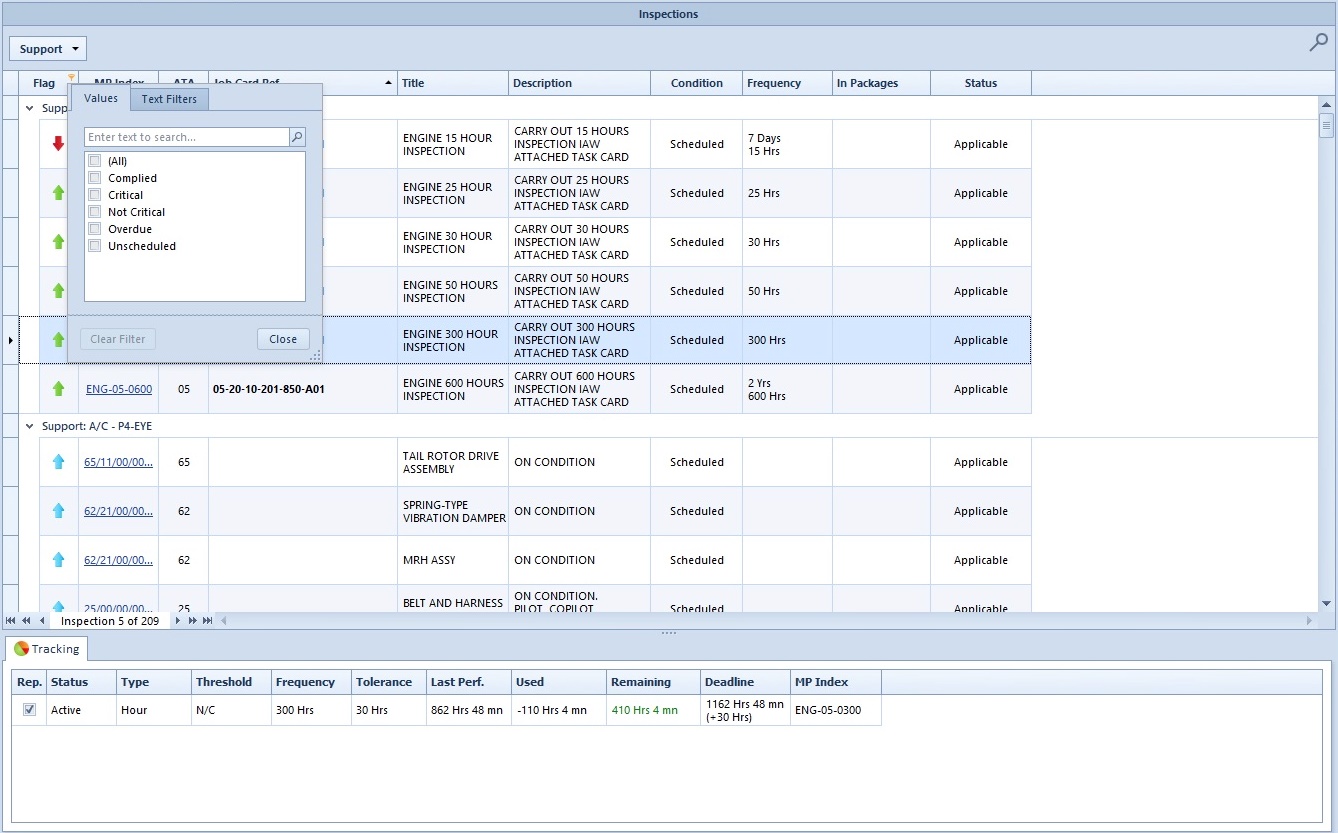
Now let’s say, you want to see all the unscheduled inspections, you will filter the flag column by ticking ‘Unscheduled’.
You can see at the bottom of your inspections list that the filter is active.
If you want to unable it temporarily, you can untick it or, if you want to delete it, you can press the cross button at the bottom of the panel.
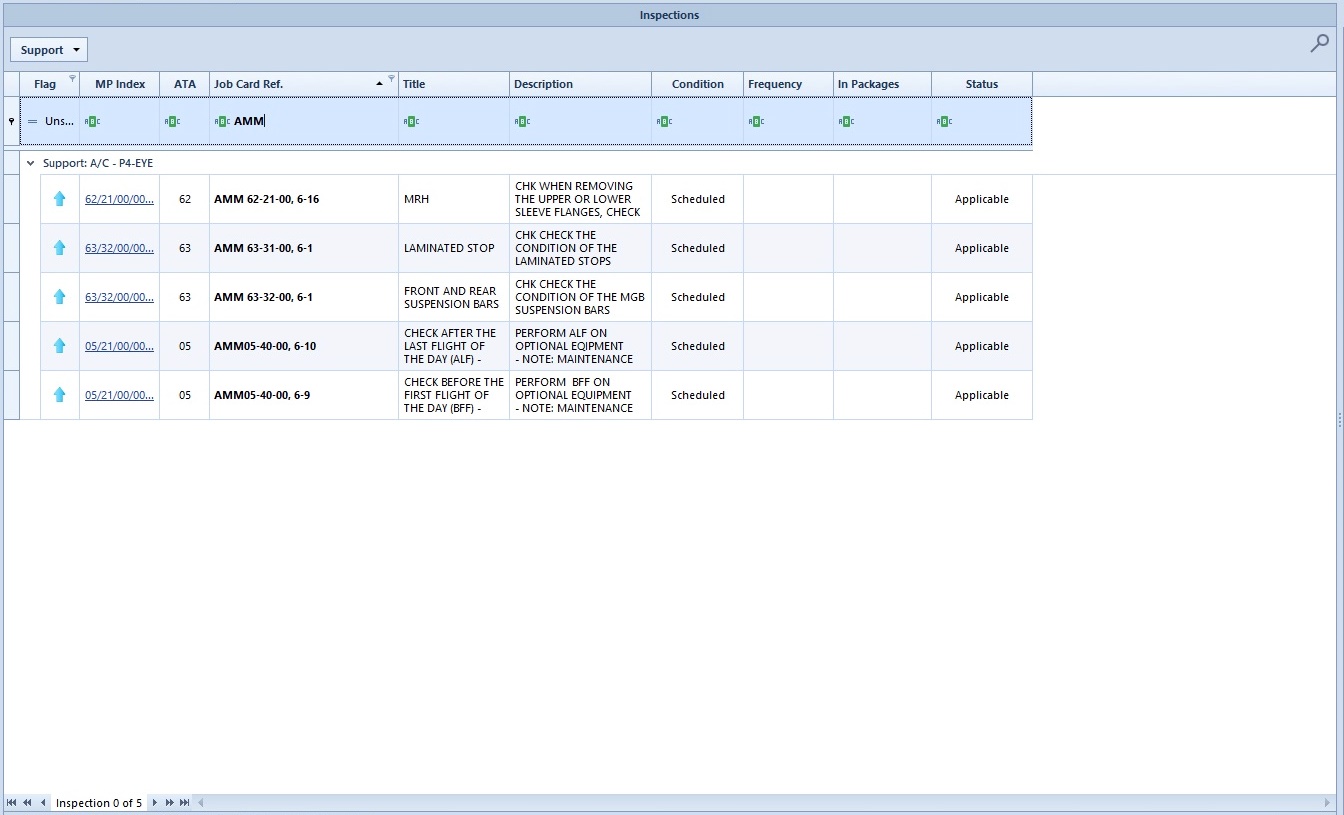
You can also click on Column filter (button).
This will display a blank row on top of your inspections list allowing you to type keywords to filter.
Grouping Options
To get organized, you can group your inspections list based on some fields, just as you would do with a Pivot table on Excel.
To do this, right click on the Status column for example, and select ‘Group By This Column’.
You can repeat the operation to add filters.
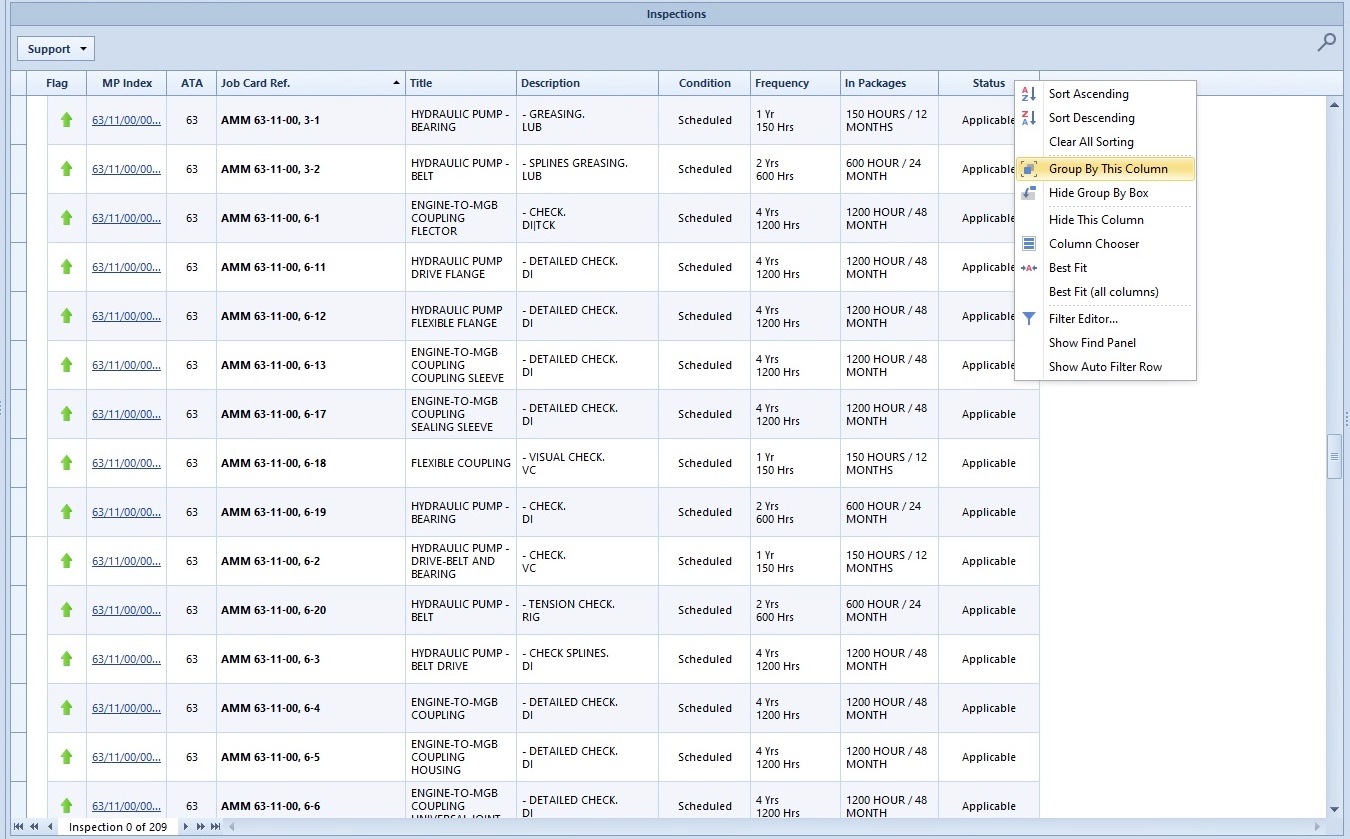
Here is an example.
Now you see that the Status and ATA columns have been moved to the Grouping hierarchy, and your data is grouped by Support.
Print & Export
Once
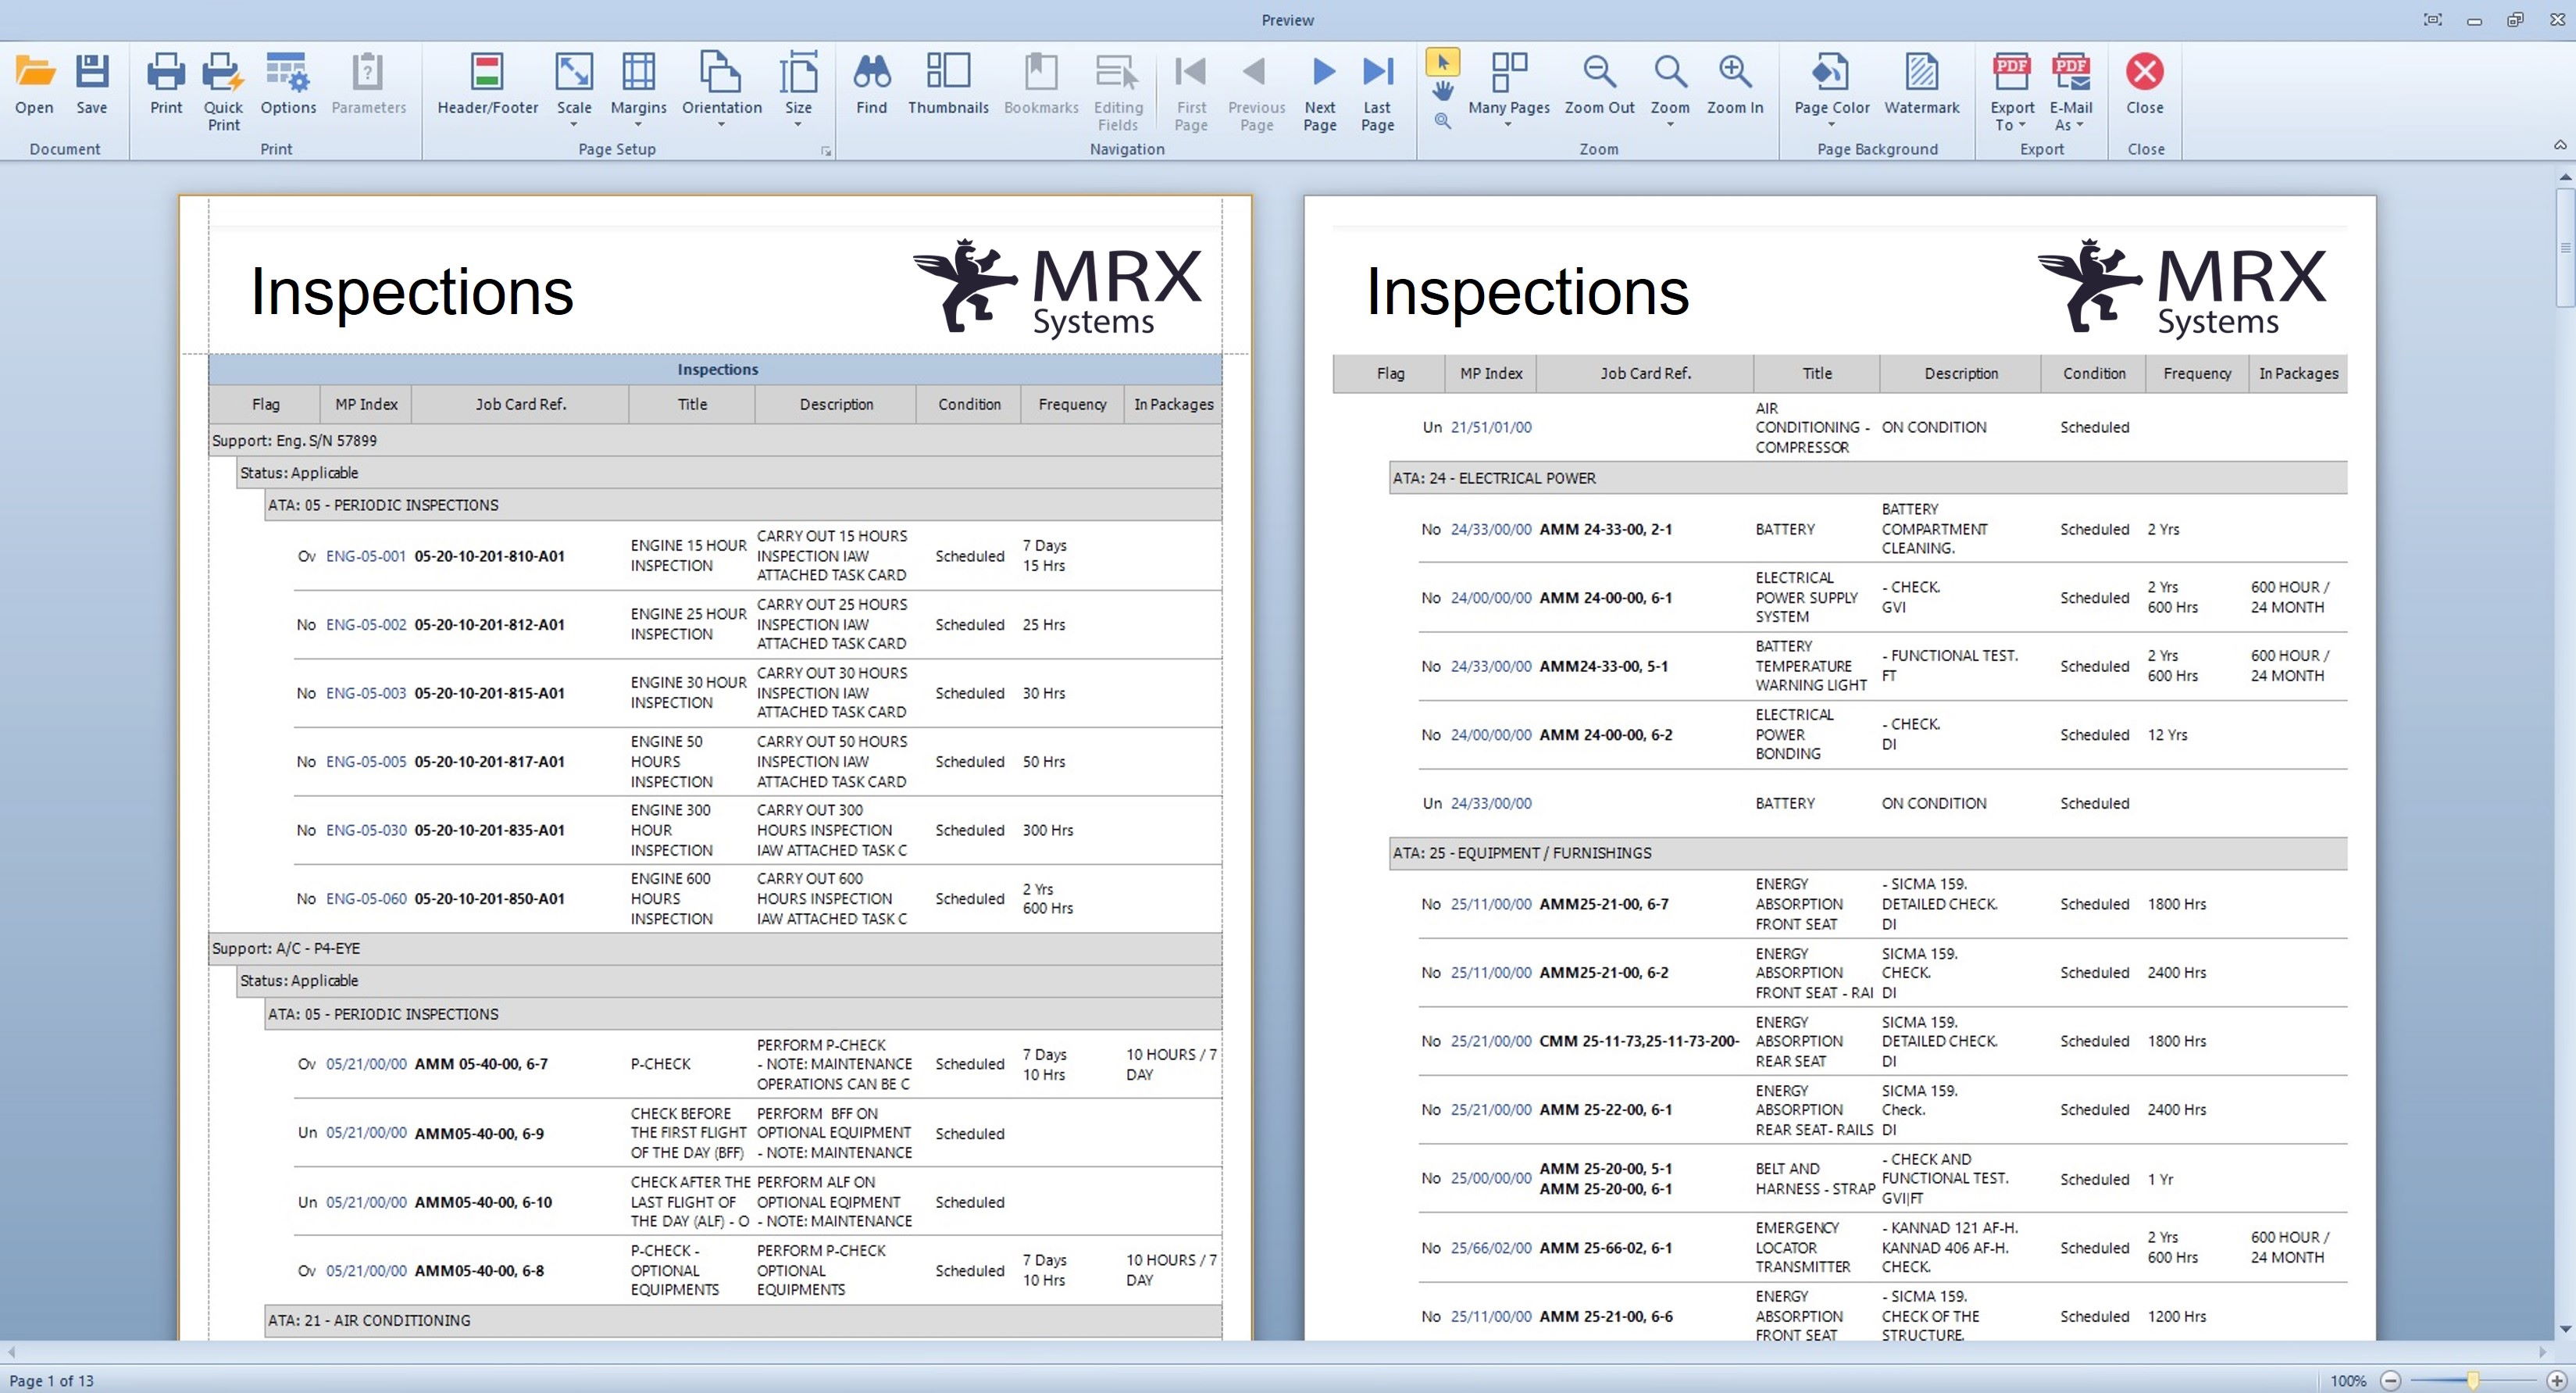
you have filtered the information the way you wanted, click on the Raw grid
preview button to get the printed version of my table.
As you can see, I get my table exactly how I did my set up.
Same groups, same filters, and so on.
From there, you can customize your export with a lot of options.
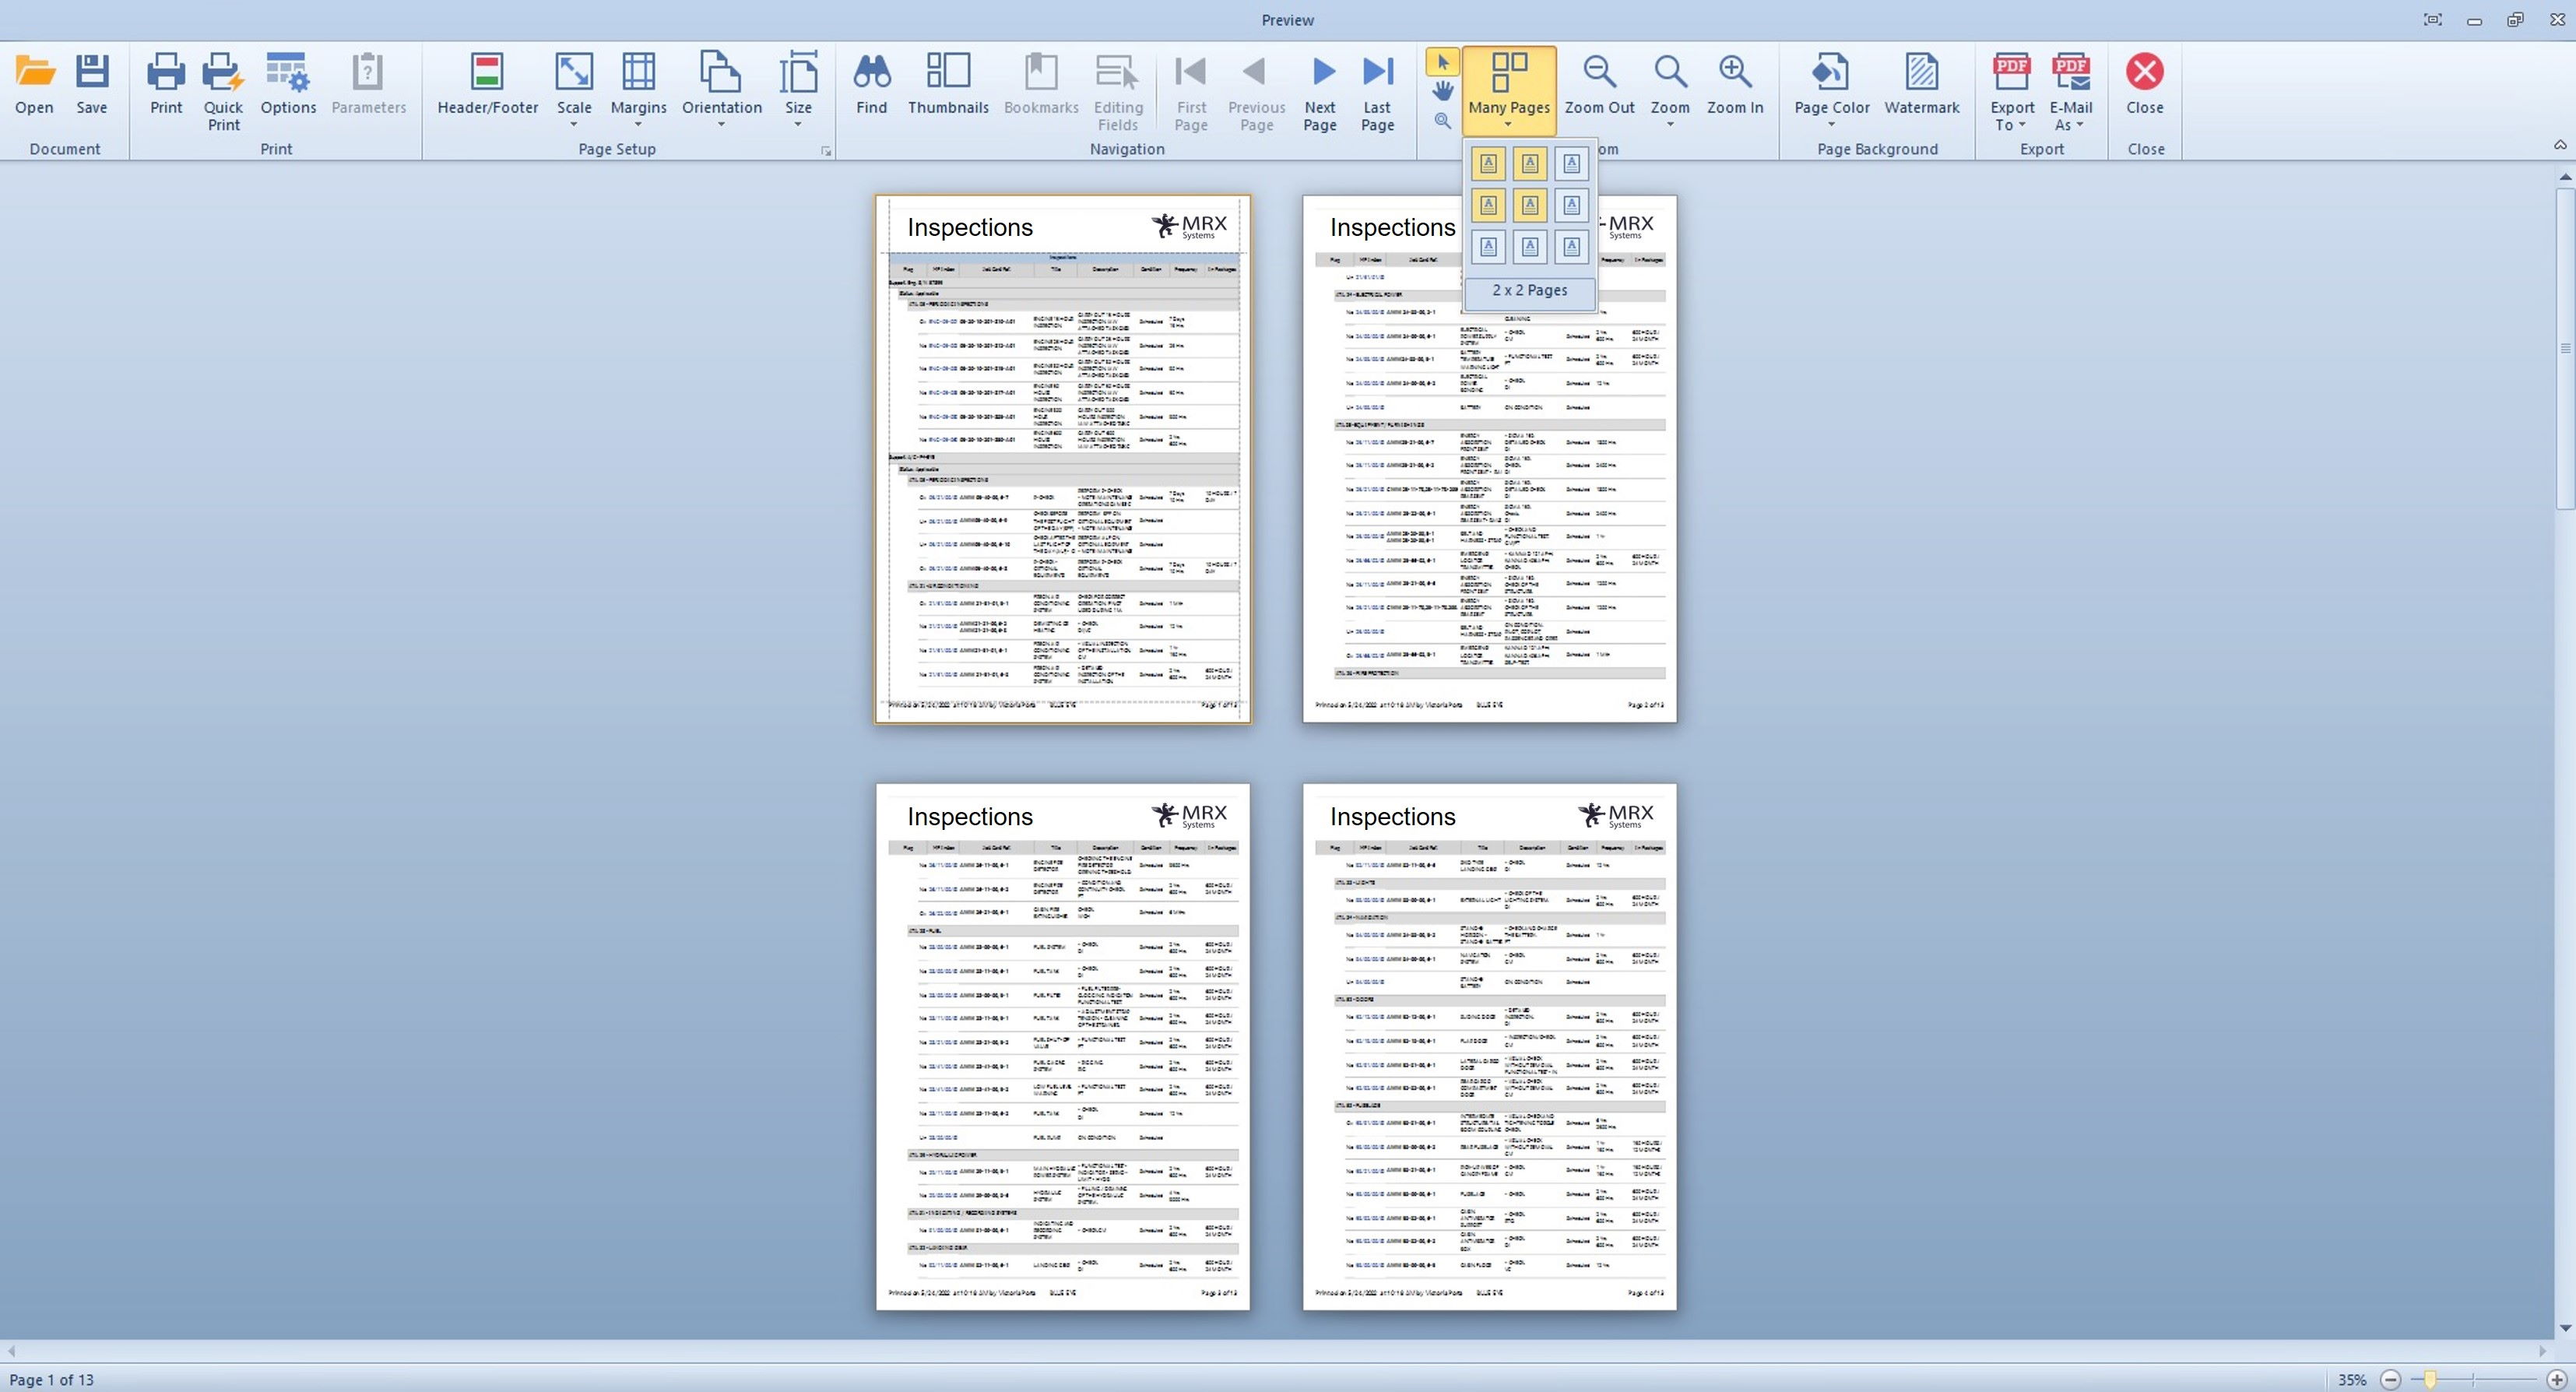
You
want to see many pages in your preview window, let’s say 4 pages: click on
‘Many Pages’ and select the number of pages you want.
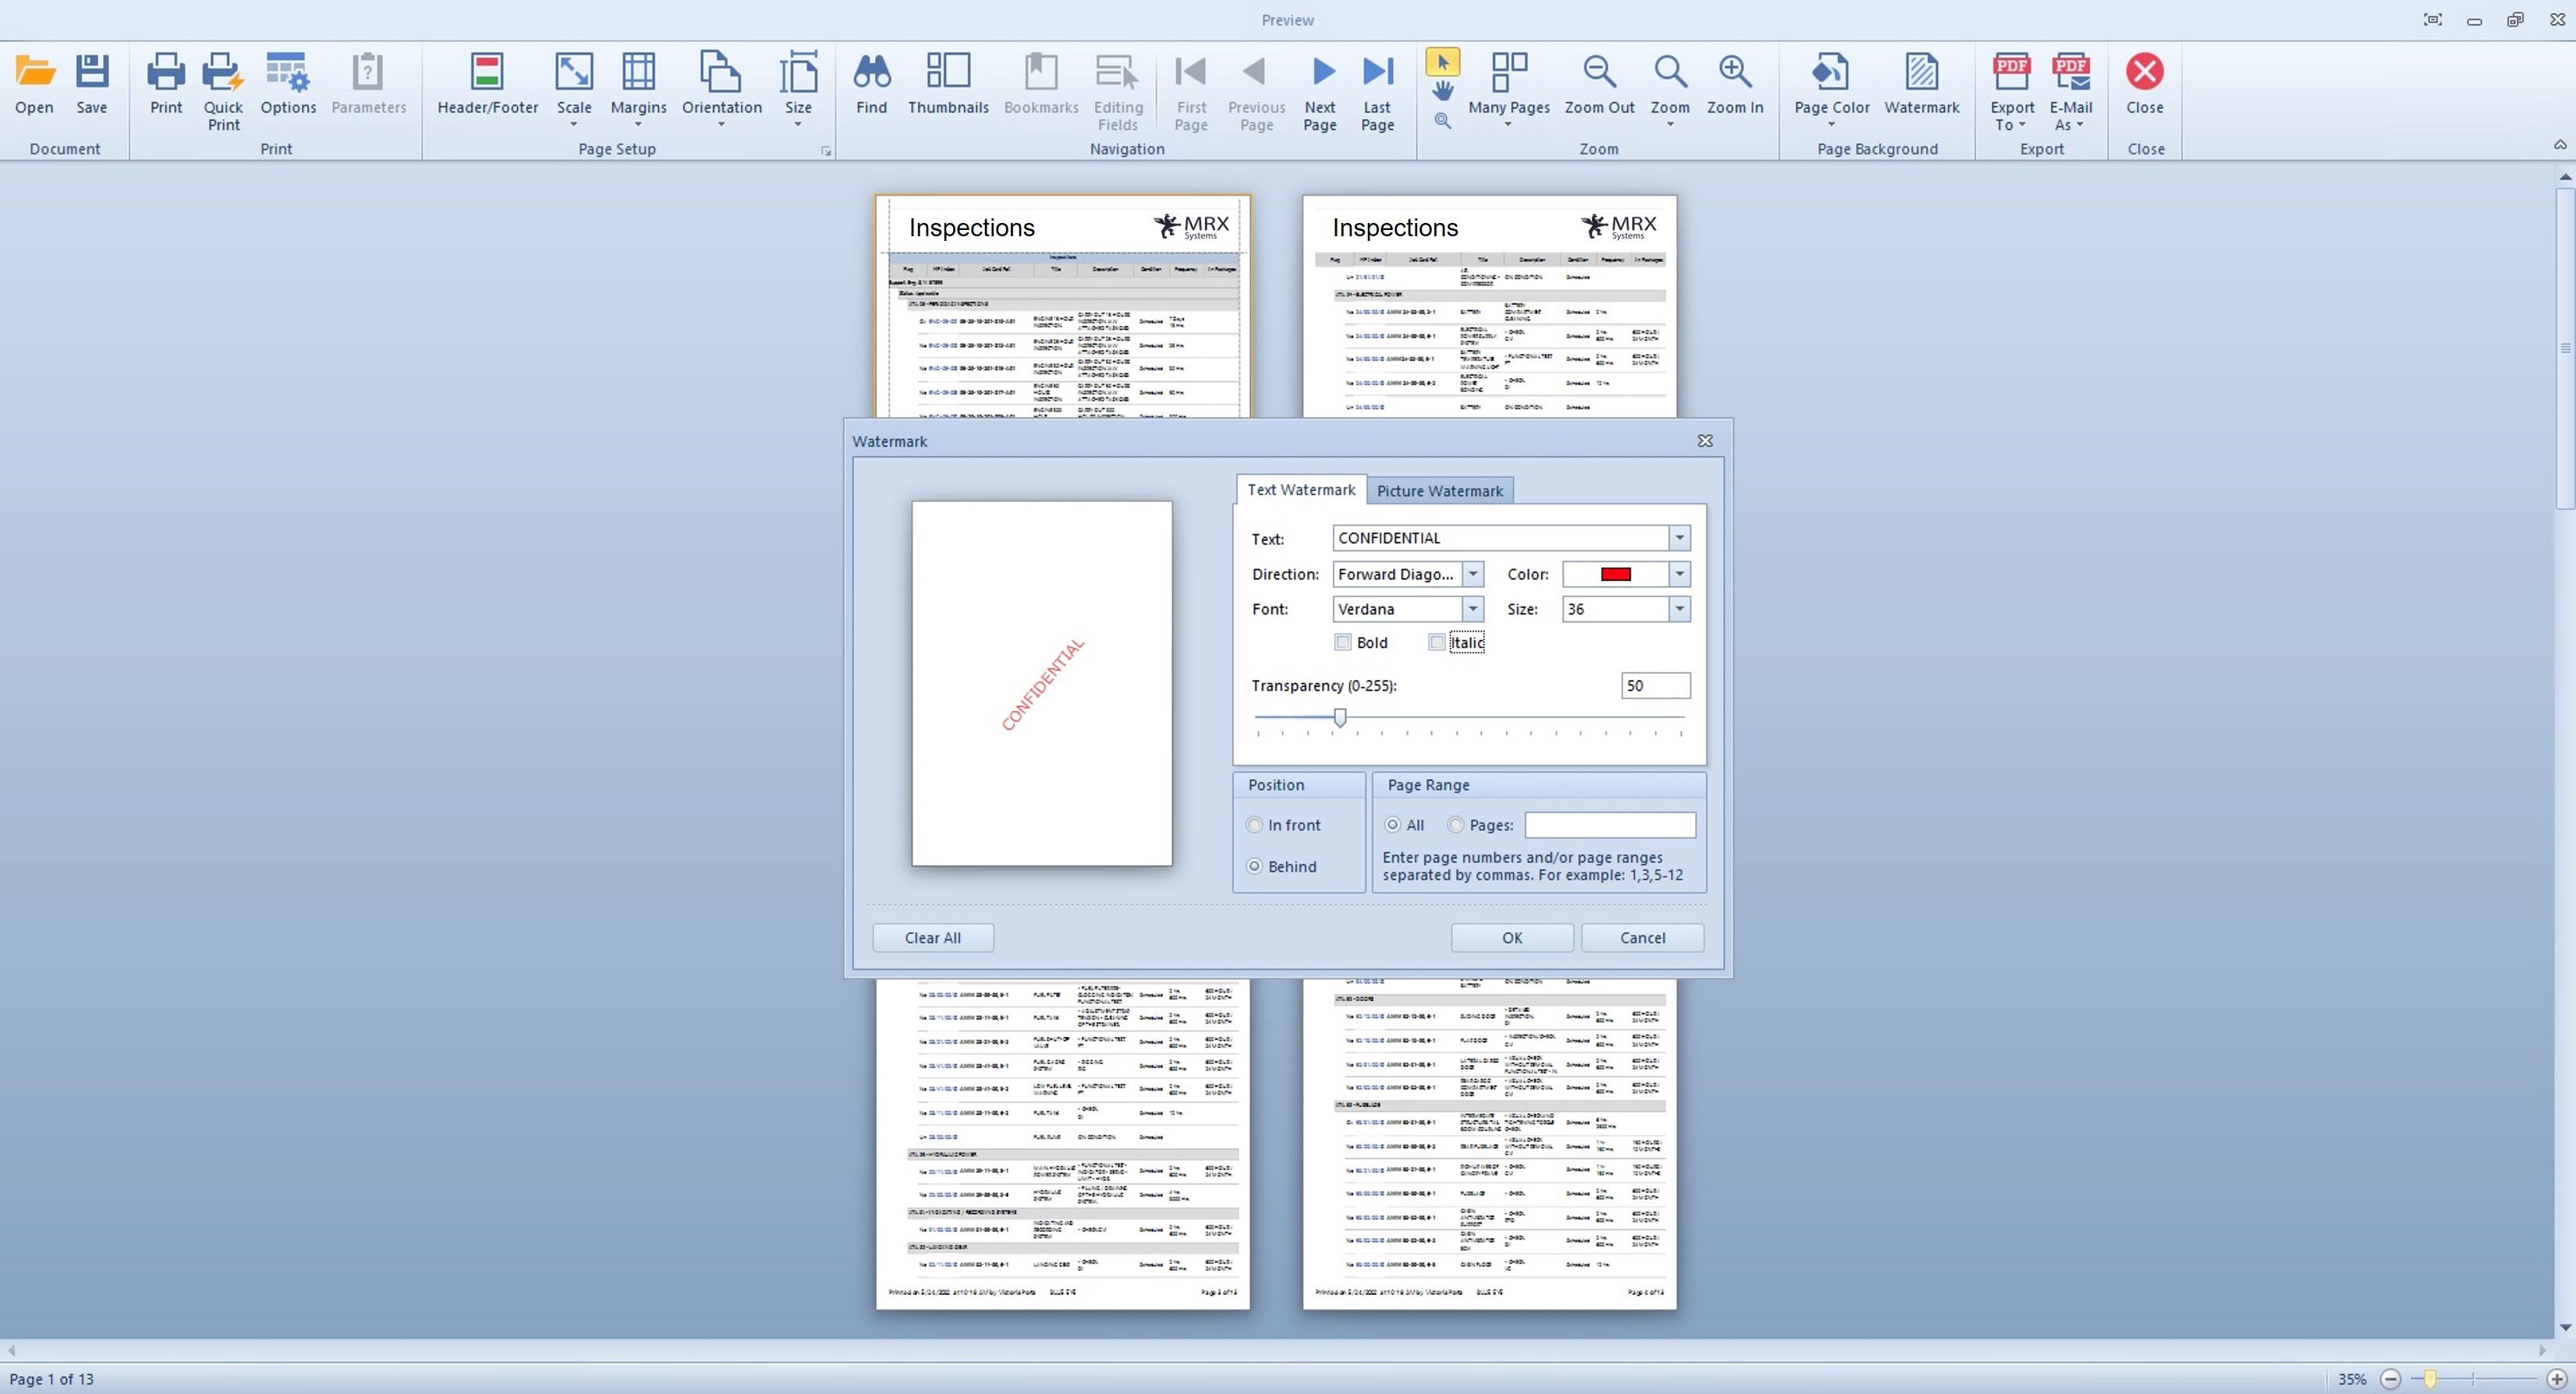
You can add a watermark.
A pop-up window opens to let you choose your settings.
You can either print the file pressing ‘Print’ (button) or do a quick print (button).
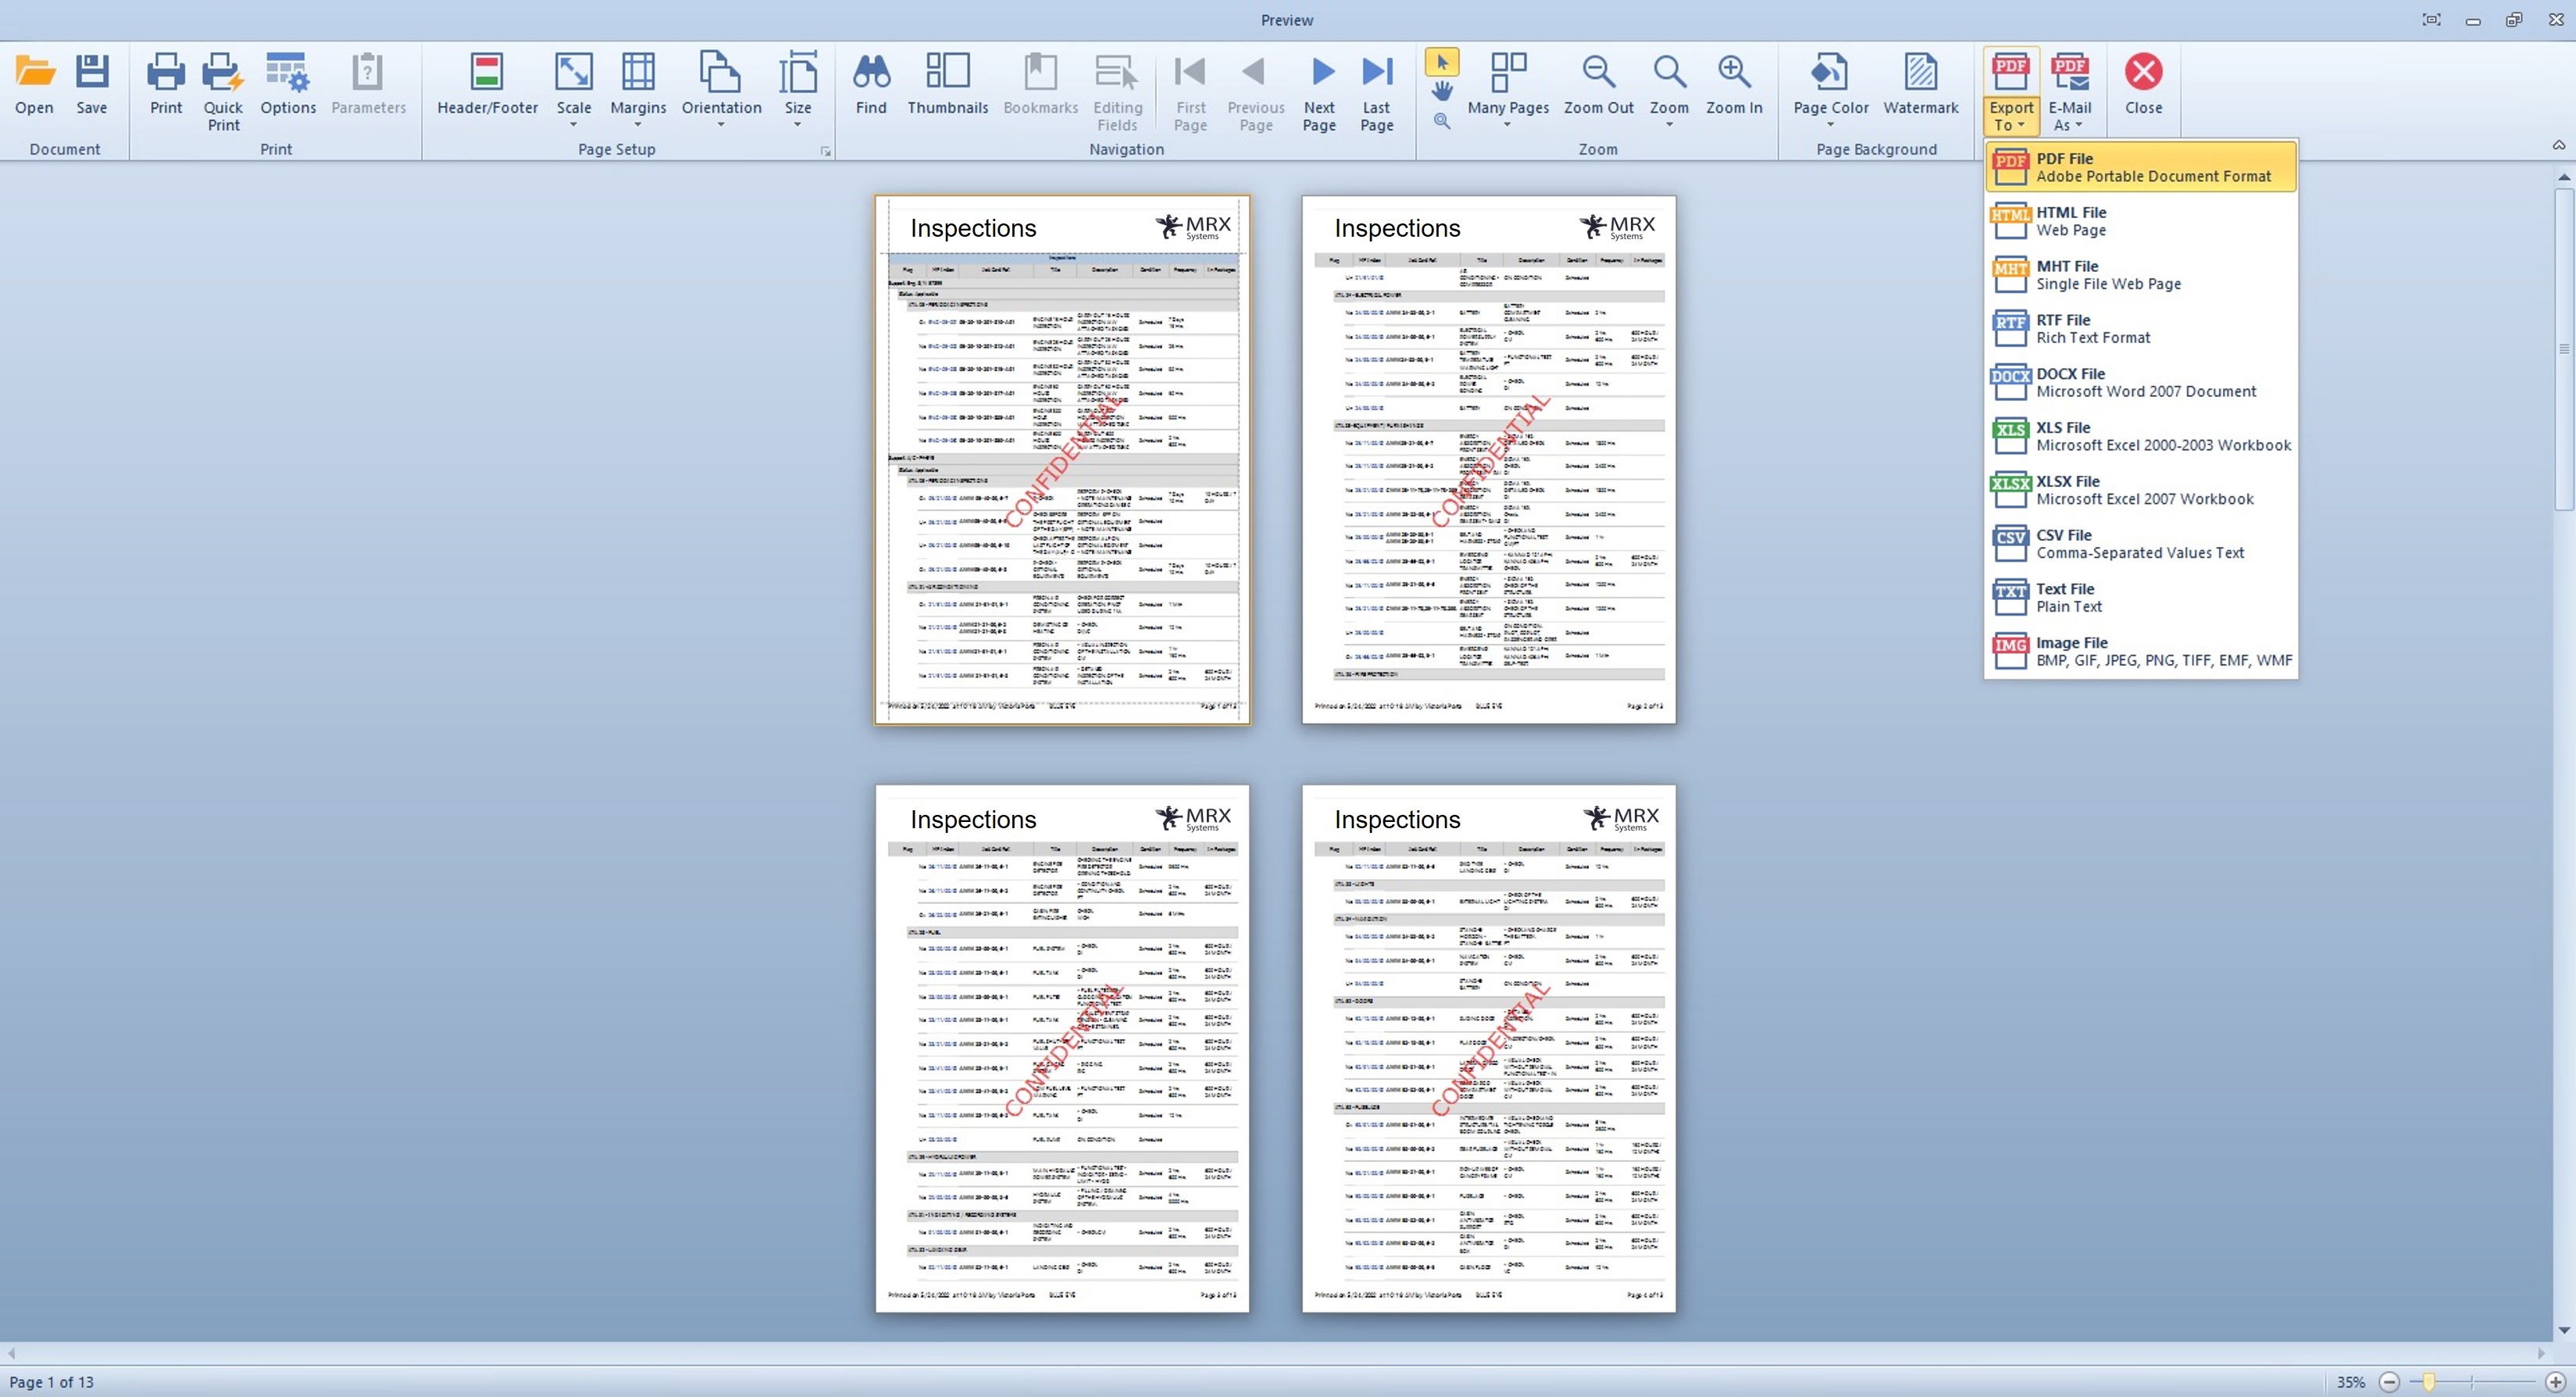
If you click on the ‘Export To’ button, you have many options.
You can choose PDF, word document, Excel, CSV and so on.
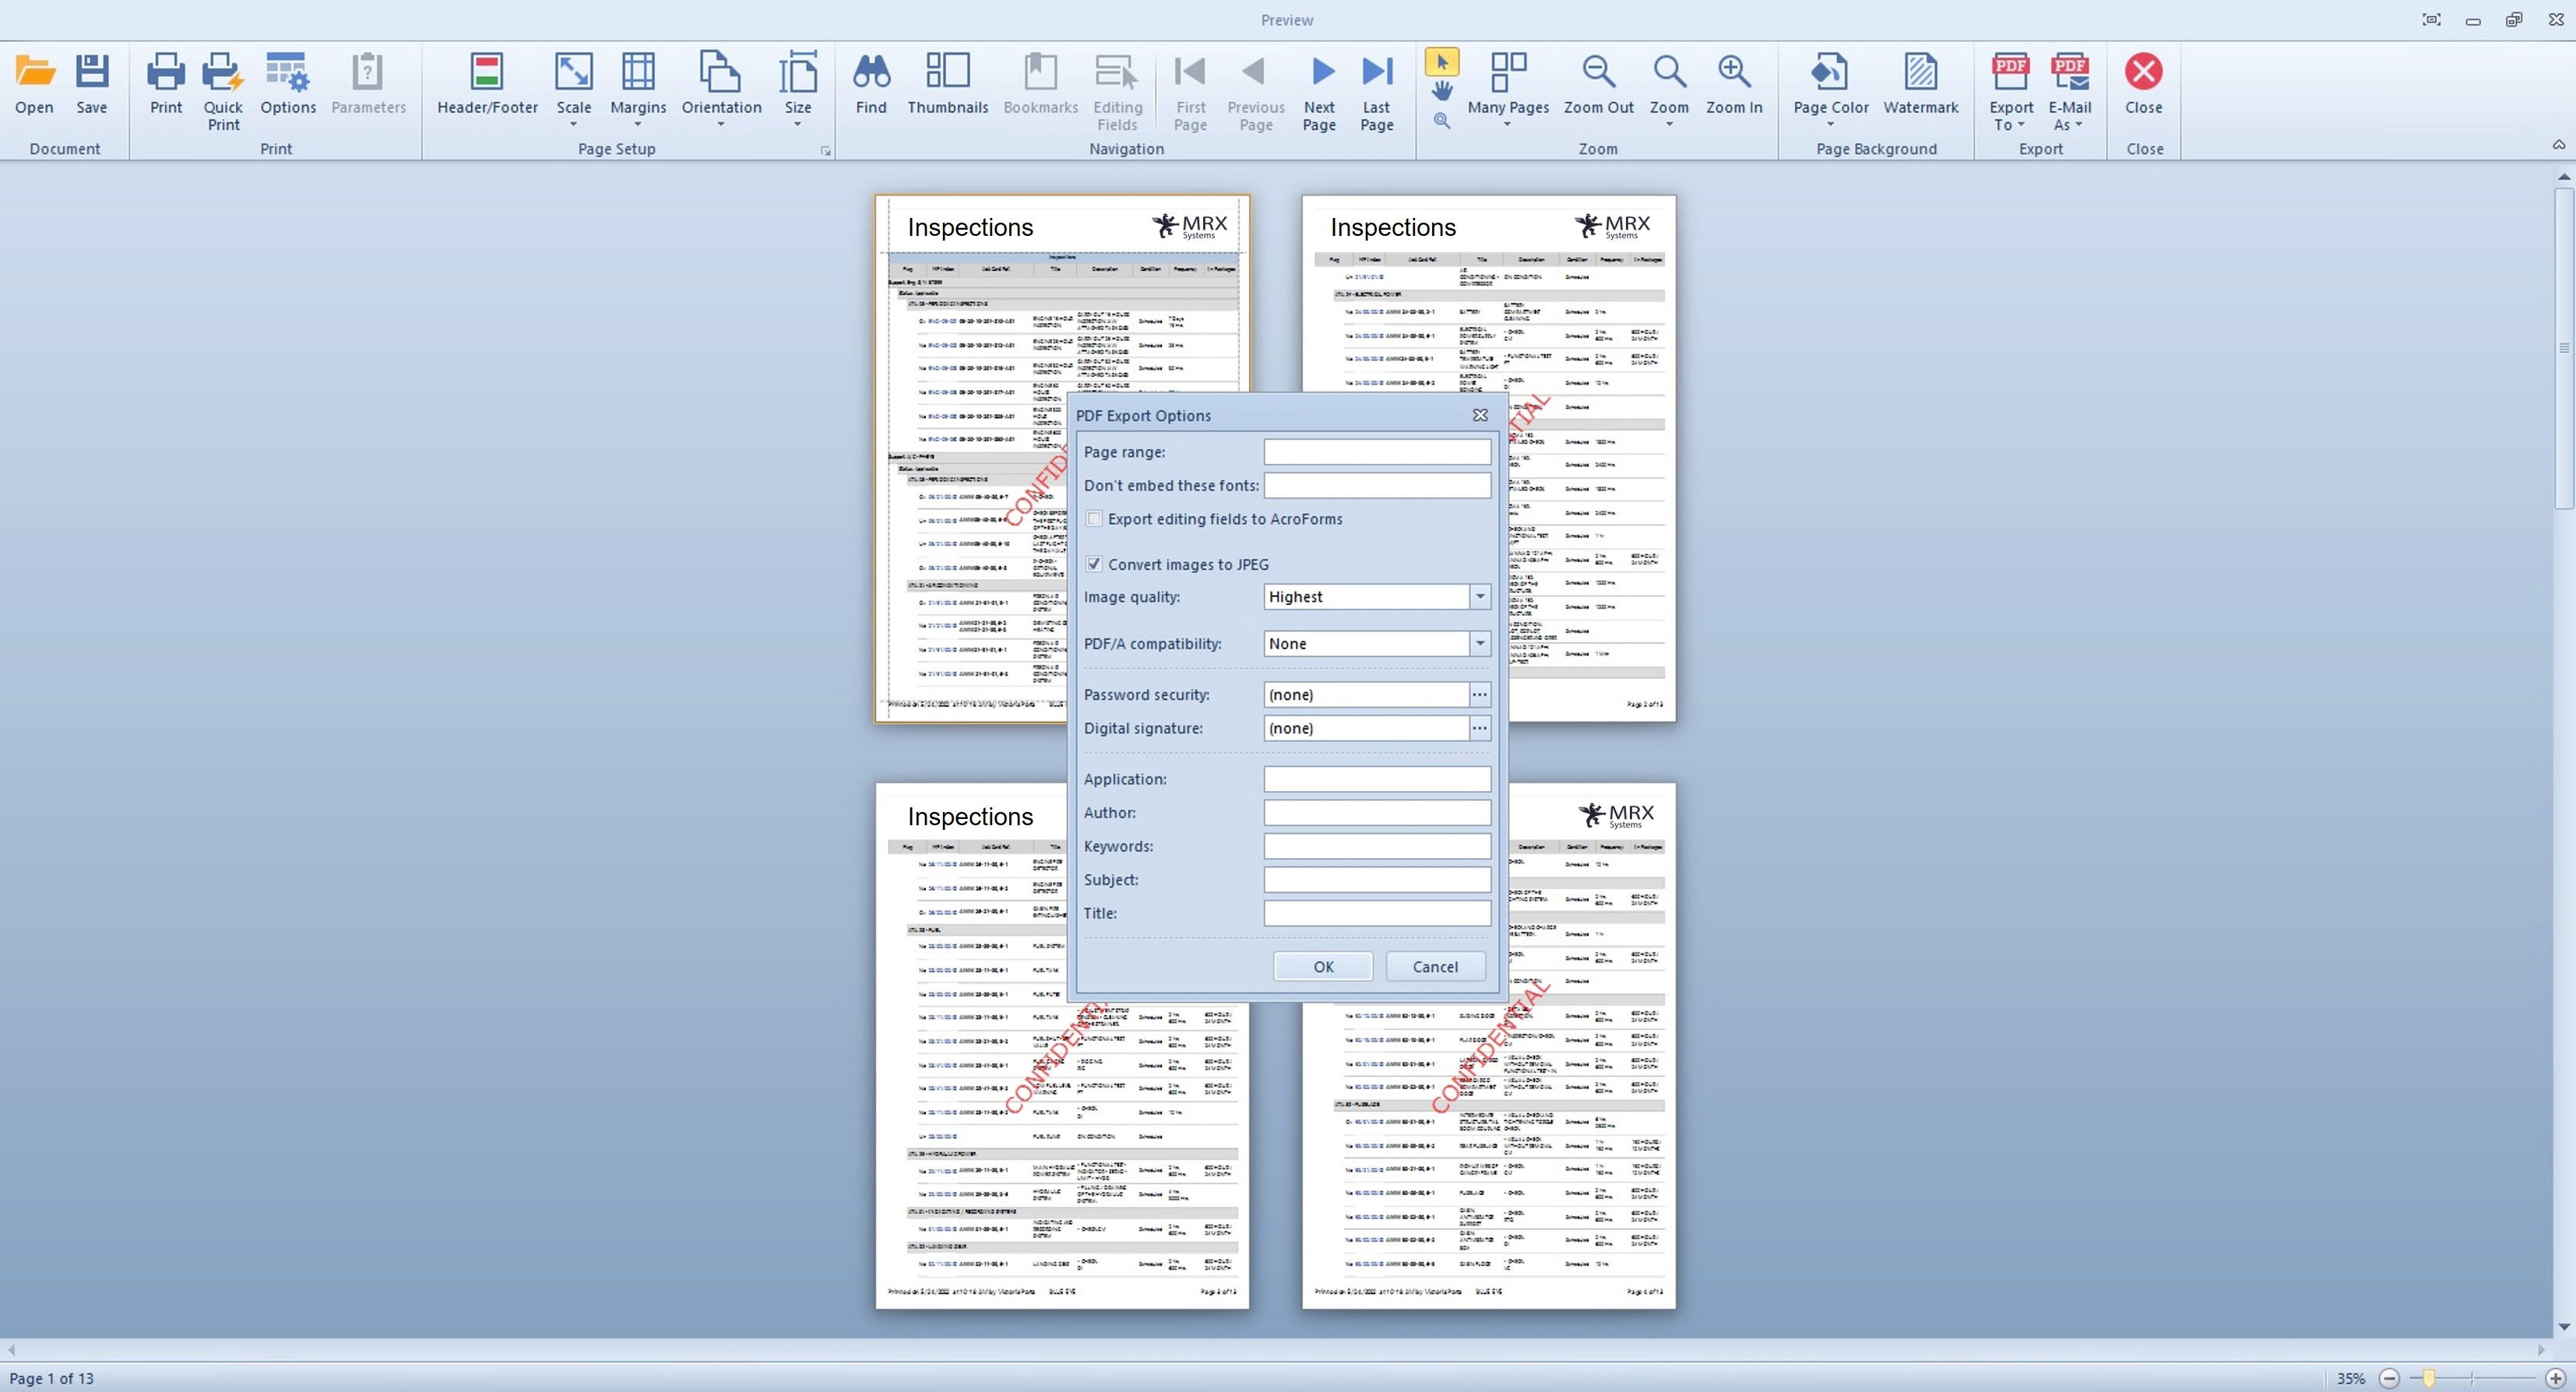
If you export as a PDF, you see that you have other options for your export, for instance you can add a password to open this document which is great when you are sharing sensitive data.
Related Files
The
‘Related
Files’ tab is
where
you
will
find
all the documents that
have been attached
to the item you
have selected,
in this
case it
is
an aircraft
but it
can also
be
a component, it
can be
an inspection, etc…
To
load
a new document, switch to edit
mode , then
add
a new document  and finish with
saving.
and finish with
saving.
When you save your related file, it will be pushed directly to the secured Microsoft Azure Cloud on your dedicated database, so you know that your document is safely stored and you can access it anywhere in the world.
In related files, you can also create folders and get organized.
As
always,
press
the lock icon
to go into
Edit mode, create
your
folders  , move files in and finish with
saving .
, move files in and finish with
saving .
You can upload an unlimited number of related files, so folders are a very good way to keep your documents tidy and easy to find.